ER CHEN LD0087-1
10-50W 12V Outdoor Security PIR Motion Sensor User Manual
Brand: ER CHEN | Model: LD0087-1
1. Introduction
This user manual provides detailed instructions for the installation, operation, and maintenance of the ER CHEN 10-50W 12V Outdoor Security PIR Human Body Motion Sensor Detector. This device is designed to automatically detect human motion and activate connected lighting or other compatible devices, enhancing security and convenience in outdoor environments.
2. Key Features
- Operating Voltage: DC 12V
- Adjustable Detection Distance: Up to 12 meters (at 25°C)
- Adjustable Delay Time: From 8 seconds to 10 minutes
- Adjustable Environmental Illumination: 2 ~ 2000 LUX
- Compact Dimensions: 60 x 47 x 156mm
3. Product Components
The motion sensor consists of the main body, a PIR lens for motion detection, and three adjustment knobs for fine-tuning its operation.
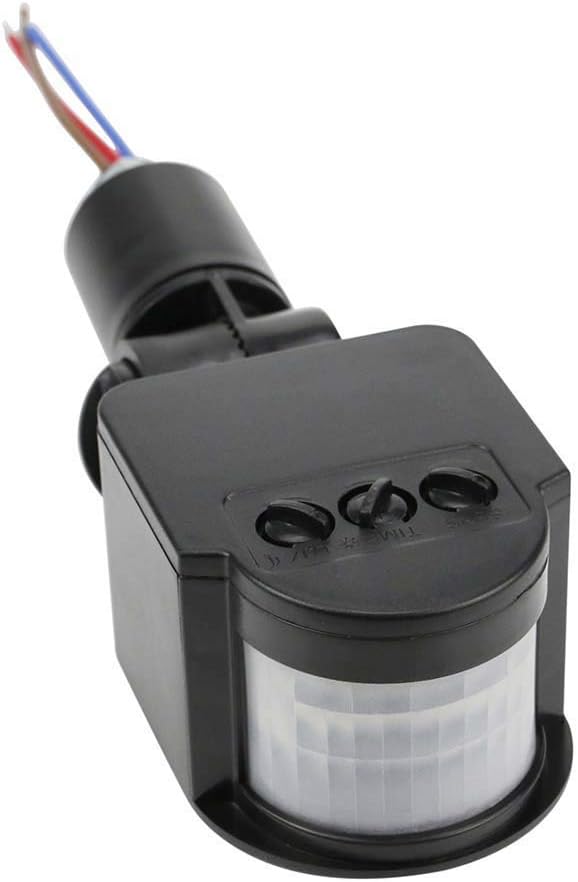
Figure 3.1: Overview of the ER CHEN 12V PIR Motion Sensor.

Figure 3.2: Close-up view of the SENS, TIME, and LUX adjustment knobs.
4. Setup and Installation
Proper installation is crucial for optimal performance. Follow these steps carefully:
4.1 Mounting
- The sensor is designed for open-type installation.
- A 16mm hole is required for mounting.
- Ensure the adjustment knobs are facing downwards after installation to protect them from weather elements.
- The sensor features an adjustable bracket allowing for a 180-degree rotation to optimize the detection area.
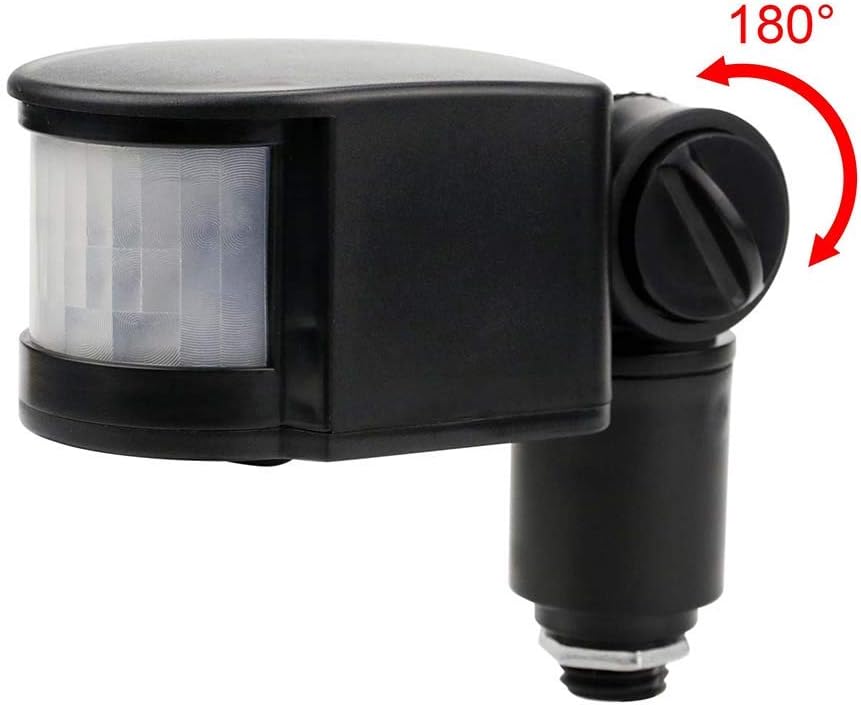
Figure 4.1: The sensor's adjustable mounting allows for 180-degree positioning.
4.2 Wiring Instructions
The sensor operates on DC 12V. Refer to the wiring diagram and instructions below:
- Blue Wire (N): Connect to the negative (zero) line of your DC 12V power supply.
- Brown Wire (L): Connect to the positive (FireWire) line of your DC 12V power supply.
- Red Wire (Output): This is the sensor's output line. Connect it to the positive terminal of your load (e.g., LED lamp).
Summary: Blue and Brown wires are for input power. Blue and Red wires are for connecting the load (lamps).

Figure 4.2: Wiring diagram and overview of adjustment functions.
5. Operating and Adjustments
The sensor features three adjustable knobs to customize its performance:

Figure 5.1: Detailed explanation of the sensor's adjustment knobs.
- LUX (Environmental Illumination):
This knob adjusts the ambient light level at which the sensor will operate.- When the knob points to the sun position, the sensor will work all day (24 hours), regardless of ambient light.
- When the knob points to the moon position, the sensor will only activate in low light conditions (at night).
- TIME (Delay Time):
This knob adjusts how long the connected device remains activated after motion is detected. The delay time ranges from approximately 8 seconds to 10 minutes. The timer resets if motion is detected again within the delay period. - SENS (Sensitivity/Detection Distance):
This knob adjusts the sensitivity of the sensor, which directly affects the detection range. The maximum detection distance is 12 meters. While generally not requiring frequent adjustment, it can be fine-tuned to suit specific environmental needs.

Figure 5.2: Illustration of the sensor's typical detection range (6-10 meters shown).
6. Maintenance
To ensure long-term performance and accuracy of your motion sensor, consider the following maintenance tips:
- Cleaning: Periodically wipe the sensor lens with a soft, dry cloth to remove dust, dirt, or debris that may obstruct detection. Avoid using abrasive cleaners or solvents.
- Clear Detection Area: Ensure that the detection area remains clear of obstructions such as tall plants, tree branches, or other objects that could cause false triggers or block detection.
- Environmental Protection: While designed for outdoor use, protecting the sensor from direct, prolonged exposure to extreme weather conditions (e.g., heavy rain, snow, direct sunlight) can extend its lifespan. Ensure the adjustment knobs are facing downwards as recommended during installation.
7. Troubleshooting
If you encounter issues with your motion sensor, refer to the following common problems and solutions:
| Problem | Possible Cause | Solution |
|---|---|---|
| Sensor does not turn on. | Incorrect wiring; No power supply; LUX setting too high for current light conditions; Sensor malfunction. | Verify wiring connections (Blue, Brown, Red); Check DC 12V power supply; Adjust LUX knob towards 'moon' position for night operation; Test with another power source or contact support if malfunction suspected. |
| Sensor does not turn off. | TIME setting too long; Continuous motion in detection area; Faulty unit. | Adjust TIME knob to a shorter duration; Ensure no continuous motion (e.g., swaying branches, pets) in the detection zone; If problem persists, unit may be faulty. |
| False triggers. | SENS setting too high; Heat sources (e.g., vents, direct sunlight); Moving objects (e.g., small animals, foliage) in detection area. | Reduce SENS setting; Reposition sensor away from heat sources or areas with frequent non-human motion; Clear detection area of obstructions. |
| Sensor not detecting motion. | SENS setting too low; Obstruction of sensor lens; Incorrect mounting angle; Motion outside detection range. | Increase SENS setting; Clean sensor lens; Adjust mounting angle to cover desired area; Ensure motion occurs within the specified detection range. |
8. Technical Specifications
- Operating Voltage: DC 12V
- Detection Range: Up to 12 meters (adjustable)
- Detection Angle: 140 degrees
- Delay Time: 8 seconds to 10 minutes (adjustable)
- Environmental Illumination: 2 ~ 2000 LUX (adjustable)
- Working Temperature: -10°C to +40°C
- Operating Humidity: Less than 93% RH
- Material: ABS
- Installation: Open type, 16mm hole
- Color: Black
- Power Source: Corded Electric
- Item Weight: Approximately 0.02 Pounds (0.32 ounces)
- Product Dimensions: 60mm (D) x 47mm (W) x 156mm (H) / 6.1"D x 2.28"W x 1.8"H
- Compatible Devices: Lights and other 12V DC loads up to 50W.

Figure 8.1: Product dimensions.
9. Warranty and Support
For information regarding product warranty, returns, or technical support, please refer to the purchase documentation or contact the seller directly. Keep your proof of purchase for any warranty claims.
Ask a question about this manual
Ask about setup, troubleshooting, compatibility, parts, safety, or missing instructions. Manuals+ will review the question and use this page’s manual context to help answer it.