Introduction
This manual provides detailed instructions for the safe and effective use of your Bosch SP508#8 Hex Shank Countersink Drill Bit. This tool is designed to drill precise pilot holes and countersinks in a single operation for wood, plastic, and composite materials. Please read this manual thoroughly before initial use and retain it for future reference.

Image: The Bosch SP508#8 Hex Shank Countersink Drill Bit, showing its integrated drill bit and countersink collar.
What's in the Box
Your Bosch SP508#8 Hex Shank Countersink Drill Bit package should contain the following items:
- One (1) #8 Hex Shank Countersink Drill Bit

Image: Front packaging of the Bosch SP508#8 Hex Shank Countersink Drill Bit, indicating its size and function.
Specifications
| Model Number | SP508 |
| Size | #8 |
| Material | High Speed Steel (HSS) |
| Shank Type | Hex |
| Cutting Diameter | 2 Inches |
| Cutting Angle | 120 Degrees |
| Finish Type | Uncoated |
| Product Dimensions | 0.3 x 1.8 x 5.8 inches |
| Item Weight | 0.48 ounces |
Safety Information
Always prioritize safety when operating power tools. Failure to follow these guidelines may result in injury or damage to the tool.
- Wear Eye Protection: Always wear safety glasses or goggles to protect your eyes from flying debris.
- Secure Workpiece: Ensure the material you are drilling into is securely clamped or held to prevent movement during operation.
- Proper RPM: Start drilling at a low RPM (revolutions per minute) and with the bit tip in direct contact with the workpiece.
- Apply Pressure Judiciously: Apply pressure only in direct line with the drilling axis. Do not apply excessive pressure, as this can cause bit breakage or loss of control.
- Avoid Hammer Drills: Do not use this countersink drill bit with hammer drills.
- Maximum No-Load Speed: Do not exceed 1500 RPM.
- Inspect Bit: Before each use, inspect the drill bit for any signs of damage or wear. Replace if necessary.
- Keep Hands Clear: Keep hands and fingers away from the rotating bit.

Image: Back of the product packaging displaying universal safety symbols and warnings in multiple languages.
Setup
Follow these steps to prepare your countersink drill bit for use:
- Select the Correct Drill: This hex shank bit is compatible with most corded and cordless drills. Ensure your drill has a 1/4-inch hex chuck or an adapter for hex shanks.
- Insert the Bit: Insert the hex shank of the countersink drill bit firmly into the drill chuck. Tighten the chuck securely to prevent slippage during operation.
- Adjust Countersink Depth: The countersink depth is adjustable. Use an Allen wrench (not included) to loosen the set screw on the side of the countersink collar. Slide the collar up or down to achieve the desired depth for your screw heads. Tighten the set screw firmly after adjustment.
- Check Pilot Bit Extension: Ensure the pilot drill bit extends sufficiently beyond the countersink collar for the material thickness. The pilot bit is replaceable if it becomes dull or damaged.

Image: An angled view of the countersink drill bit, highlighting the hex shank and adjustable collar.
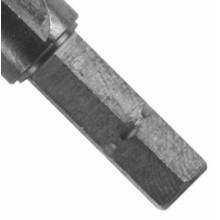
Image: A close-up view of the hex shank, designed for secure gripping in drill chucks.
Operating Instructions
Proper operation ensures clean results and prolongs tool life.
- Prepare Workpiece: Mark the drilling location on your material. Secure the workpiece to prevent movement.
- Position the Bit: Place the tip of the pilot drill bit directly on the marked spot.
- Start Drilling: Begin drilling at a low speed, applying light, steady pressure. Allow the pilot bit to penetrate the material.
- Engage Countersink: As the pilot bit drills, the countersink collar will engage the material, creating a clean countersink for the screw head. Continue drilling until the desired depth is reached, indicated by the adjusted collar stopping against the material surface.
- Withdraw the Bit: Once the pilot hole and countersink are complete, withdraw the bit from the material while the drill is still rotating.
- Material Compatibility: This bit is ideal for wood, plastic, and composite materials. Avoid using it on metal or masonry.
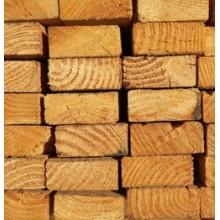
Image: A power drill equipped with a countersink bit being used to create a pilot hole and countersink in a wooden surface.
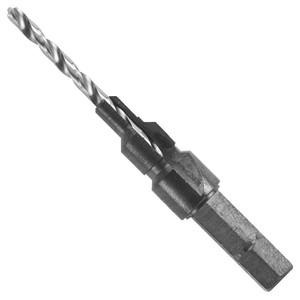
Image: A stack of wooden planks, illustrating typical materials suitable for this countersink drill bit.
Maintenance
Regular maintenance ensures optimal performance and extends the lifespan of your tool.
- Cleaning: After each use, clean the drill bit and countersink collar to remove any sawdust or debris. A brush or compressed air can be used.
- Pilot Bit Replacement: The pilot drill bit is replaceable. If it becomes dull or breaks, loosen the set screw on the collar, remove the old bit, insert a new one of the appropriate size, and tighten the set screw securely.
- Storage: Store the countersink drill bit in a dry place to prevent rust and corrosion. Keep it in its original packaging or a tool case to protect the cutting edges.
- Lubrication: While not typically required for wood, a light lubricant can be applied to the pilot bit when drilling harder materials to reduce friction and heat buildup.

Image: A close-up of the drill bit tip, showing the flutes and cutting edge, which should be kept clean and sharp.
Troubleshooting
If you encounter issues during operation, refer to the following common problems and solutions:
- Pilot Bit Comes Loose:
Problem: The pilot drill bit slides up or down during use.
Solution: Ensure the set screw holding the pilot bit in place is tightened firmly with an Allen wrench. Check if the pilot bit itself is worn or has a flat side that is not properly aligned with the set screw. - Bit Wobbles During Use:
Problem: The entire assembly or the pilot bit wobbles when drilling.
Solution: Verify that the hex shank is fully inserted and securely tightened in the drill chuck. Inspect the pilot bit for bends or damage. If the bit is bent, replace it. - Poor Countersink Quality:
Problem: The countersink is uneven, rough, or not deep enough.
Solution: Ensure the material is stable and not moving. Adjust the countersink collar to the desired depth and ensure the set screw is tight. Apply consistent, moderate pressure. A dull pilot bit can also affect countersink quality; consider replacing it. - Bit Breaks Easily:
Problem: The pilot bit or countersink breaks prematurely.
Solution: This can be caused by excessive pressure, using the bit on unsuitable materials (e.g., metal), or using a hammer drill function. Ensure you are operating within the recommended RPM and applying appropriate pressure. Replace broken bits immediately. - Difficulty Drilling:
Problem: The bit struggles to penetrate the material or overheats.
Solution: The pilot bit may be dull and require replacement. Ensure you are using the correct speed for the material. For harder woods, a slower speed and occasional withdrawal to clear chips can help.
Warranty and Support
Bosch products are manufactured to high standards and undergo rigorous quality control. For specific warranty information regarding your Bosch SP508#8 Hex Shank Countersink Drill Bit, please refer to the warranty card included with your purchase or visit the official Bosch website. For technical support, replacement parts, or service inquiries, please contact Bosch customer service through their official channels.
Bosch Customer Service:
Refer to your product packaging or the official Bosch website for the most current contact information.