METALLIC DETAILS PE4809
Instruction Manual
Photo-Etched Set Ejection SEAT K-36D/DM 1/48
Model: PE4809 | Brand: METALLIC DETAILS
1. Product Overview
This Photo-Etched Set provides highly detailed components for enhancing 1/48 scale K-36D/DM ejection seats in model aircraft. The set includes photo-etched parts and resin components designed to add intricate realism to your model.
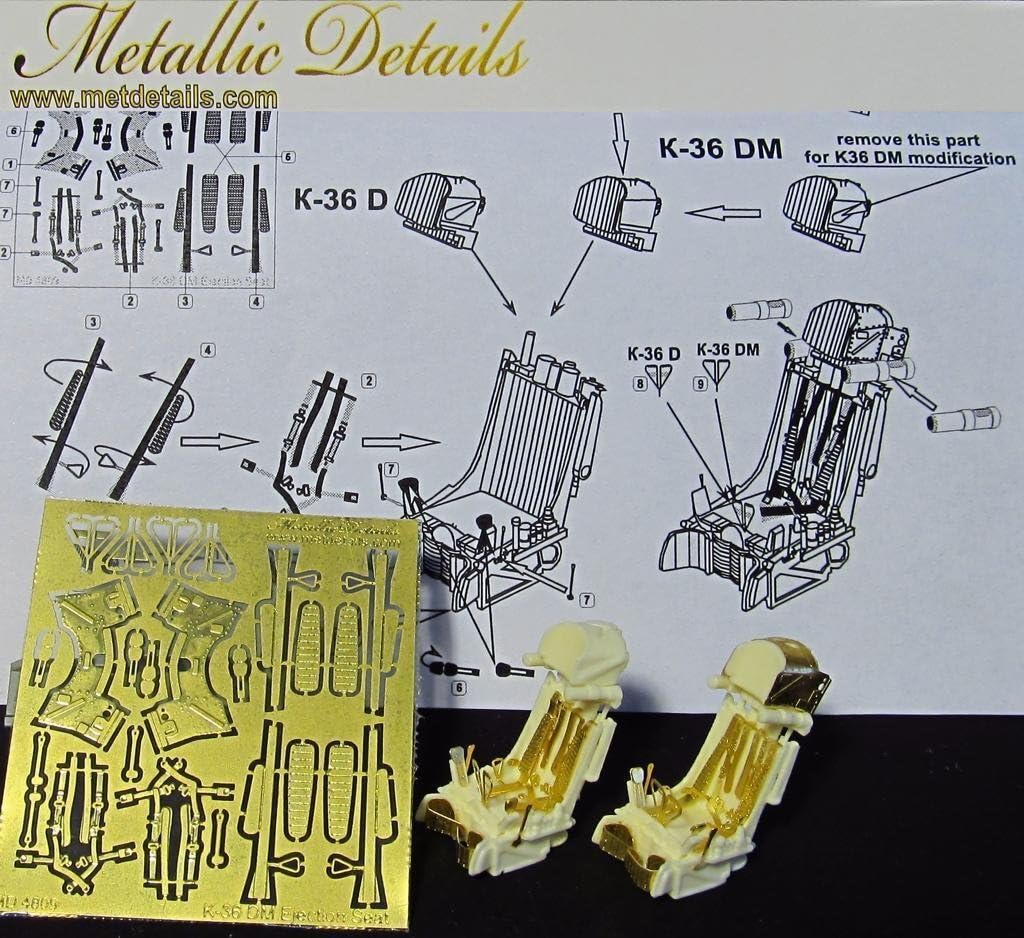
Image 1.1: Contents of the PE4809 set, showing the photo-etched brass sheet, resin ejection seat components, and the included assembly diagram.
2. Setup and Assembly
Careful handling and precision are required for assembling photo-etched parts. It is recommended to use appropriate tools such as a sharp hobby knife, fine-tip tweezers, and cyanoacrylate (CA) glue or epoxy for bonding.
2.1. Preparing Photo-Etched Parts
- Identify the required parts from the photo-etched sheet using the provided diagram.
- Carefully cut each part from the fret using a sharp hobby knife or specialized photo-etch shears. Ensure clean cuts to avoid bending or damaging the delicate parts.
- Gently file or sand any remaining attachment points (nubs) on the parts to ensure a smooth finish.
- For parts requiring bending, use a photo-etch bending tool or a straight edge to achieve precise angles. Bend slowly and carefully to prevent metal fatigue.
2.2. Assembling Components to Resin Seat
Follow the numerical sequence on the included assembly diagram (refer to Image 1.1) for proper placement of photo-etched parts onto the resin ejection seat. The diagram illustrates the specific locations and orientations for each component.
- Apply a small amount of CA glue or epoxy to the designated attachment points on the resin seat.
- Using tweezers, carefully position the photo-etched part onto the glue, ensuring correct alignment. Hold in place until the adhesive sets.
- Repeat this process for all photo-etched details, such as seatbelts, buckles, levers, and other intricate mechanisms, as indicated by the diagram.
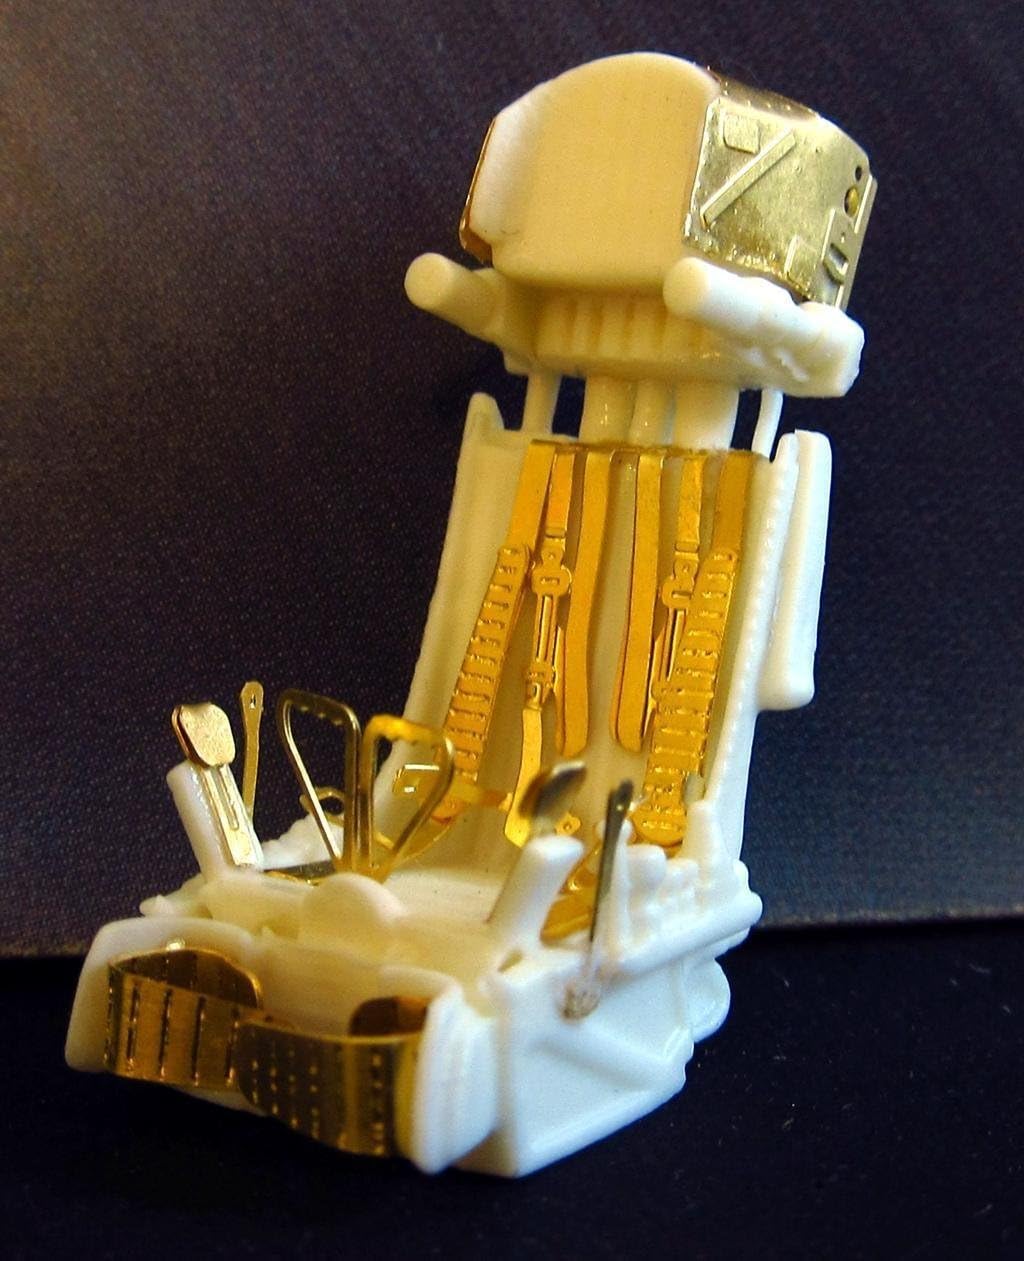
Image 2.1: Front view of a fully assembled K-36D/DM ejection seat, showcasing the integrated photo-etched harness and details.
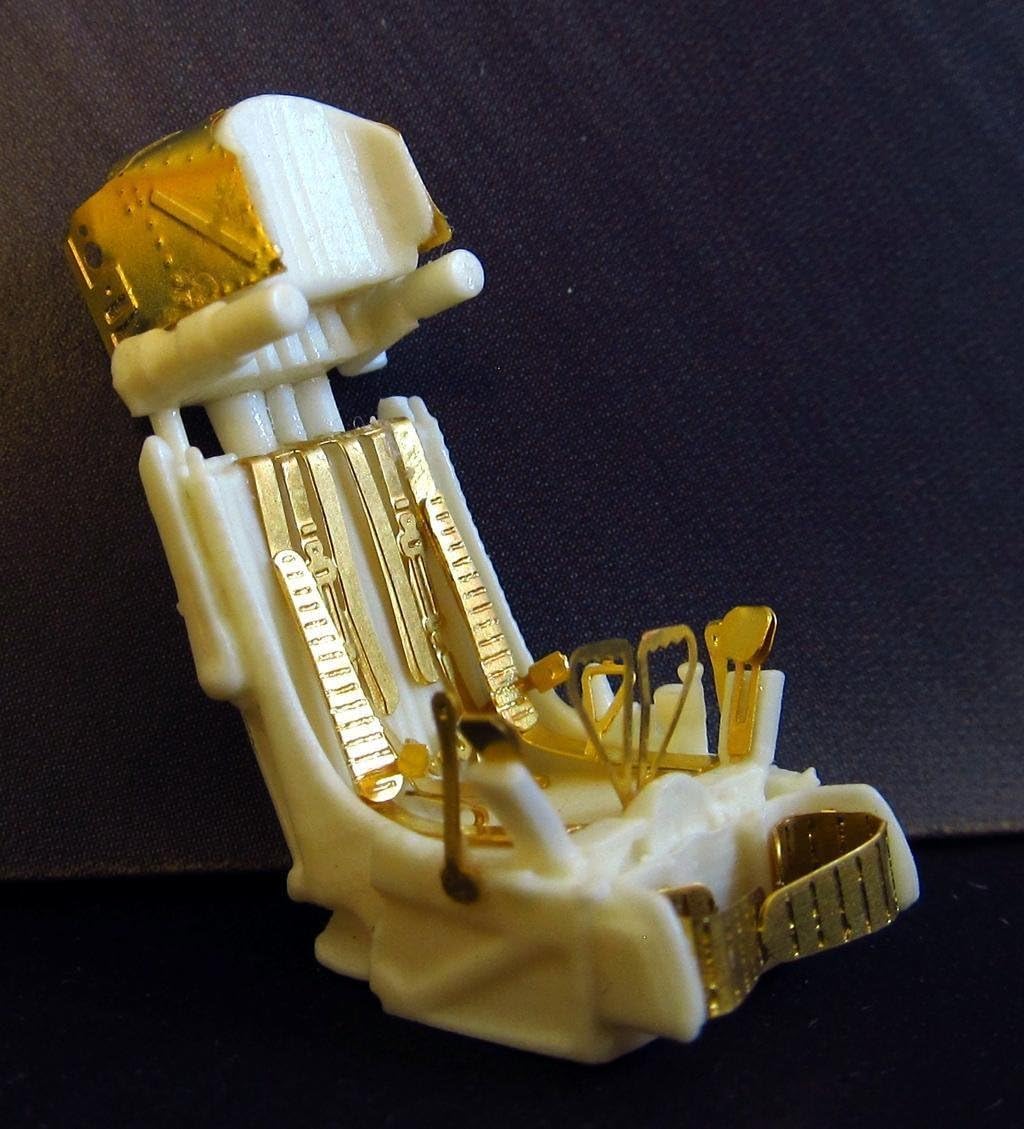
Image 2.2: Side view of the assembled ejection seat, highlighting the intricate photo-etched components from a different angle.
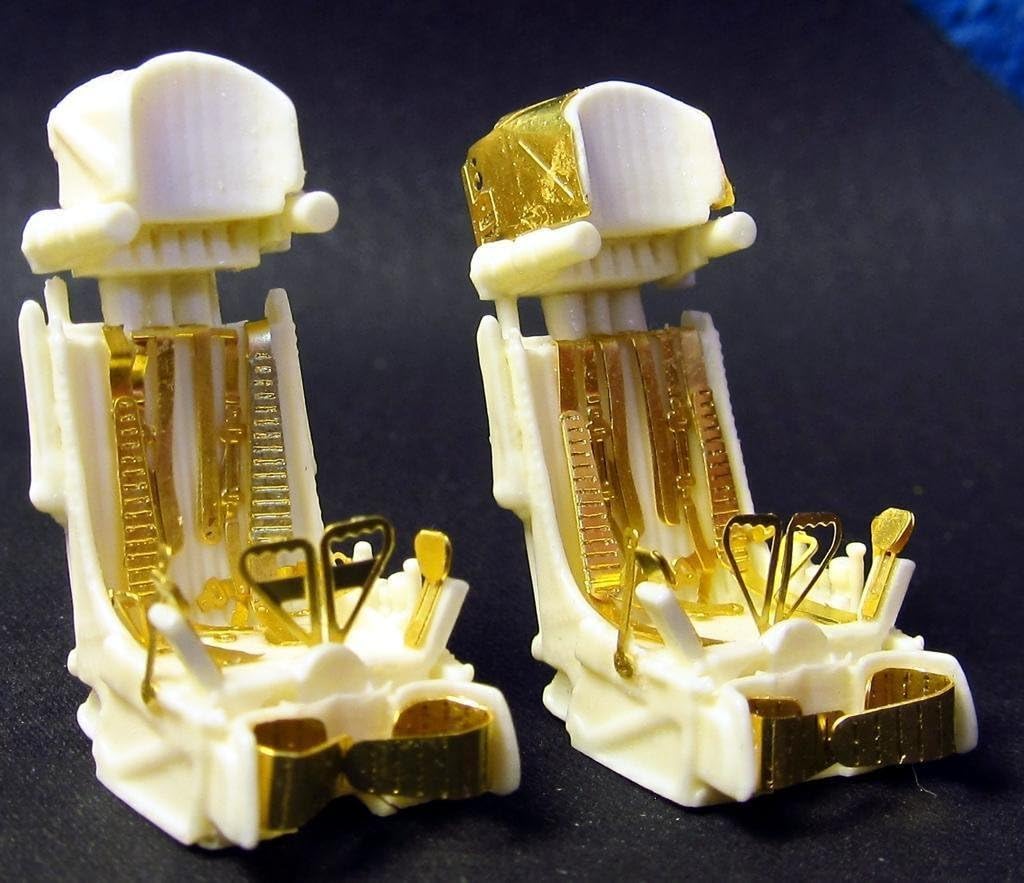
Image 2.3: Two completed K-36D/DM ejection seats, demonstrating the final appearance after assembly of the photo-etched parts.
3. Installation into Model
Once the ejection seat assembly is complete, it can be integrated into your 1/48 scale model aircraft cockpit. Ensure the cockpit tub is prepared according to your model kit's instructions.
- Test fit the assembled ejection seat into the model's cockpit tub to ensure proper clearance and fit. Minor adjustments to the cockpit or seat may be necessary depending on the specific model kit.
- Once satisfied with the fit, apply a small amount of adhesive (e.g., CA glue or plastic cement if compatible with resin) to secure the seat in place within the cockpit.
- Allow sufficient time for the adhesive to cure before proceeding with further model assembly.

Image 3.1: The assembled ejection seat positioned within a model aircraft cockpit tub, demonstrating fit and placement.
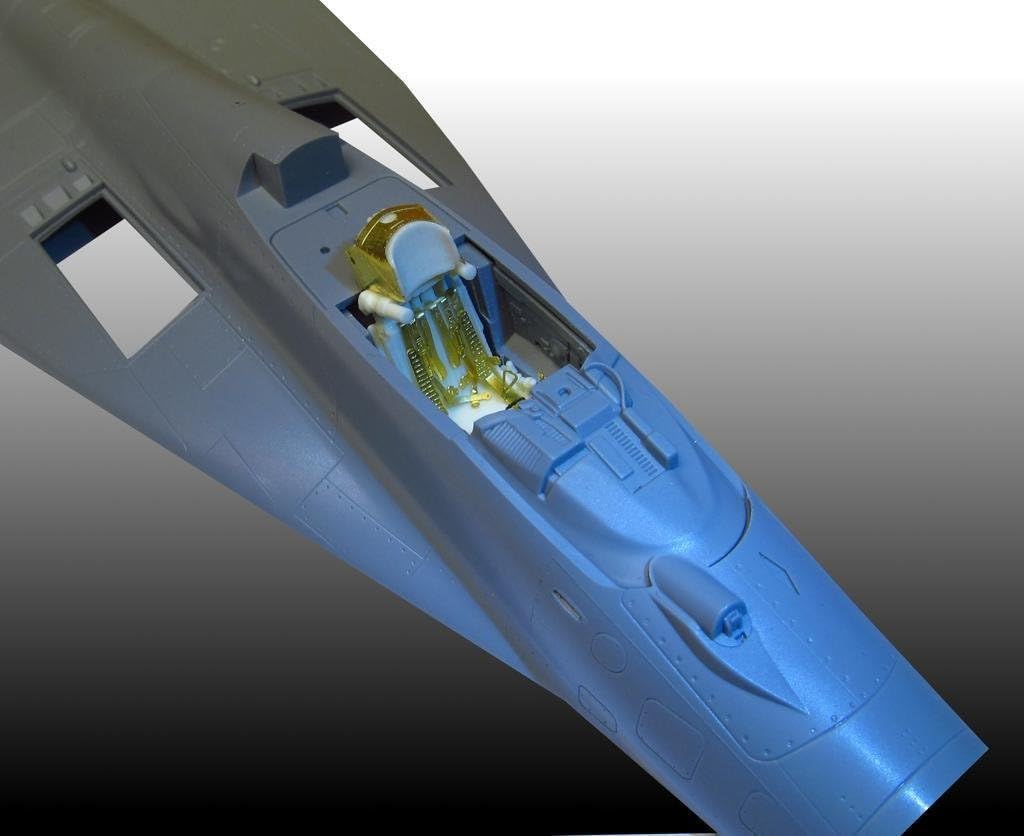
Image 3.2: The ejection seat installed within the fuselage of a model aircraft, viewed from above, showing its integration into the overall model.
4. Maintenance and Care
To preserve the detail and finish of your photo-etched parts, follow these guidelines:
- Handling: Always handle the assembled seat by its resin base or sturdy parts. Avoid touching the delicate photo-etched details directly, as they can bend or break.
- Cleaning: If necessary, gently dust the model with a soft brush. Avoid using harsh chemicals or abrasive materials, which can damage the paint or the photo-etched metal.
- Storage: Store your model in a dust-free environment, away from direct sunlight and extreme temperature fluctuations, to prevent material degradation.
5. Troubleshooting
Common issues encountered during assembly and their potential solutions:
- Part Bending: If a photo-etched part bends unintentionally, gently try to straighten it using flat-nose pliers or tweezers. Apply minimal force to avoid breaking the part.
- Adhesion Issues: Ensure surfaces are clean and free of oils before applying glue. Use fresh CA glue, as it can degrade over time. For stronger bonds, consider using a CA accelerator.
- Lost Parts: Due to their small size, photo-etched parts can be easily lost. Work over a clean, well-lit surface with a tray or mat to catch dropped parts.
6. Specifications
| Attribute | Detail |
|---|---|
| Product Name | Photo-Etched Set Ejection SEAT K-36D/DM |
| Model Number | PE4809 |
| Brand | METALLIC DETAILS |
| Scale | 1/48 |
| Material | Photo-etching, Resin |
| Country of Origin | Ukraine |
| Manufacturer Recommended Age | 12 years and up |
7. Warranty Information
This product is covered by the manufacturer's standard warranty against defects in materials and workmanship. Please retain your proof of purchase. For specific warranty terms and conditions, refer to the information provided by METALLIC DETAILS or contact their customer support.
8. Support
For technical assistance, missing parts, or any inquiries regarding the Photo-Etched Set Ejection SEAT K-36D/DM, please contact METALLIC DETAILS directly through their official website or designated customer service channels. Provide the model number (PE4809) and a detailed description of your issue for efficient support.
Ask a question about this manual
Ask about setup, troubleshooting, compatibility, parts, safety, or missing instructions. Manuals+ will review the question and use this page’s manual context to help answer it.