1. Introduction
This manual provides detailed instructions for the installation, operation, and maintenance of your Cobra CDR895D Drive HD Dual Channel Dash Camera. This device is designed to record video footage from both the front and rear of your vehicle, offering enhanced security and documentation of your journeys. Please read this manual thoroughly before using the product to ensure proper functionality and safety.
2. Package Contents
Verify that all items listed below are included in your package:
- CDR895D HD Dash Cam (Main Unit)
- Rear-Facing Camera
- 16GB MicroSD Card
- Mounting Bracket (Suction Cup Windshield Mount)
- 20 ft. (6m) Rear Cam Extender Cable
- Y-Cable
- 12V Power Adapter
- 10 ft. (3m) Micro USB Cable
3. Product Overview
The Cobra CDR895D features a main dash camera unit with a display and control buttons, accompanied by a smaller secondary camera for rear or in-cabin recording.

This image displays the primary Cobra CDR895D dash camera unit, featuring its screen and control buttons, positioned next to the compact secondary rear camera.
The main unit's 2-inch LCD screen allows for real-time viewing and playback of recorded footage, including a split-screen option to view both camera feeds simultaneously.
A close-up of the Cobra CDR895D dash camera's display, illustrating the split-screen functionality. One half shows the road ahead, while the other captures the vehicle's interior.
4. Setup and Installation
4.1. Main Camera Installation
- Attach Suction Mount: Secure the suction cup mount to the main dash camera unit.
- Position on Windshield: Choose a location on your front windshield that does not obstruct your view of the road. Ensure the camera lens has a clear line of sight.
- Secure Mount: Press the suction cup firmly against the windshield and engage the locking lever to secure it. Adjust the camera angle as needed.

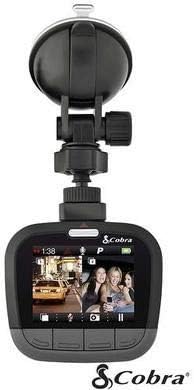
The Cobra CDR895D main dash camera unit shown connected to its adjustable suction cup mounting bracket, ready for attachment to a windshield.

The main Cobra CDR895D dash camera securely attached to a vehicle's front windshield via its suction cup mount, providing a clear view of the road.
4.2. Rear Camera Installation
The secondary camera can be configured in two ways:
- In-Cabin Recording: Mount the rear camera on the front windshield facing inwards to record vehicle interior activity.
- Rear-Facing Recording: Use the 20 ft. extender cable to mount the rear camera on the rear windshield, facing outwards to record behind your vehicle.

The compact secondary camera of the Cobra CDR895D system, installed on the interior of the vehicle's rear windshield, positioned to record activity behind the car.
4.3. Power Connection
- Insert MicroSD Card: Ensure the 16GB MicroSD card is inserted into the main camera unit.
- Connect Cameras: Connect the rear camera to the main unit using the Y-cable and, if necessary, the 20 ft. extender cable.
- Connect Power: Plug the 12V Power Adapter into your vehicle's cigarette lighter socket. Connect the Micro USB cable from the adapter to the main dash camera unit. The unit will automatically power on and begin recording when your vehicle starts.
5. Basic Operation
5.1. Powering On/Off
- Automatic: The camera powers on and off automatically with your vehicle's ignition when connected to the 12V power adapter.
- Manual: Press and hold the power button on the main unit to manually power on or off.
5.2. Recording Modes
- Loop Recording: The camera continuously records video in segments (e.g., 3, 5, or 10 minutes). When the MicroSD card is full, the oldest unprotected files are overwritten.
- Emergency Recording (G-Sensor): The built-in G-sensor detects sudden impacts or rapid acceleration/deceleration. When triggered, the current recording segment is automatically locked and protected from being overwritten. You can also manually trigger emergency recording by pressing the dedicated button.
5.3. Parking Mode
When enabled in settings, Parking Mode allows the camera to monitor for movement outside the vehicle after it has been turned off. If motion is detected, the camera will automatically begin recording for a set duration (up to 10 minutes). By default, this mode is off.
5.4. Viewing Recordings
Recordings can be viewed directly on the camera's 2-inch LCD screen using the Video Viewer option in the menu. Alternatively, you can remove the MicroSD card and view files on a computer.
6. Settings Menu
Access the settings menu using the control buttons on the main unit. Key settings include:
- Video Settings: Adjust camera resolutions (1080P front, 720P rear), loop clip time, G-Sensor sensitivity, Parking Mode, Cobra Watermark, Date/Time Stamp, Flip Cam, Mirror Cam.
- General Settings: Control volume, set date/time, configure screen saver, adjust beep sound, format SD card, restore defaults, and view firmware version.
7. Maintenance
7.1. SD Card Management
It is recommended to format the MicroSD card periodically (e.g., once a month) to ensure optimal performance and prevent data corruption. This can be done through the camera's settings menu.
7.2. Cleaning
Use a soft, dry cloth to clean the camera lenses and display screen. Avoid abrasive cleaners or solvents that could damage the device.
8. Troubleshooting
- Camera Freezes: If the camera freezes, especially with the screen saver enabled, try disconnecting power and allowing the battery to fully discharge before reconnecting. If issues persist, perform a factory reset via the settings menu.
- SD Card Issues: If you receive 're-insert SD card' messages or experience recording failures, try formatting the SD card. If the problem continues, replace the MicroSD card with a high-quality Class 10 or higher card.
- G-Sensor Too Sensitive: If the G-sensor is frequently triggering emergency recordings on normal roads, reduce its sensitivity setting in the video settings menu.
- Rear Camera Not Working: Check all cable connections between the main unit and the rear camera, including the Y-cable and extender cable. Ensure they are securely seated.
- No Power: Verify the 12V power adapter is securely plugged into the vehicle's socket and the Micro USB cable is firmly connected to the camera. Check your vehicle's fuse for the power outlet.
9. Specifications
| Feature | Detail |
|---|---|
| Model Name | CDR895D |
| Front Camera Resolution | 1080p Full HD |
| Rear Camera Resolution | 720p HD |
| Front Viewing Angle | 160 degrees |
| Rear Viewing Angle | 130 degrees |
| Display | 2-inch LCD |
| Special Features | G-Sensor, Parking Mode |
| Connectivity | USB |
| Included Storage | 16GB MicroSD Card |
| Mounting Type | Windshield Suction Mount |
| Power Source | 12V Vehicle Power Adapter |
| Dimensions (Main Unit) | 3.15 x 6.5 x 5.79 cm |
| Weight | 490 g |
10. Warranty and Support
Cobra products typically come with a one-year limited warranty from the date of purchase. This warranty covers defects in materials and workmanship under normal use. For specific warranty terms, conditions, and to register your product, please visit the official Cobra website or refer to the warranty card included with your product.
For technical support, troubleshooting assistance, or to inquire about service, please contact Cobra customer support through their official channels. Keep your purchase receipt as proof of purchase for warranty claims.


