1. Product Overview
The INSIZE 2871-101 Electronic Thickness Gage is a precision measuring instrument designed for accurately determining the thickness of various materials. It features a digital display for clear readings and user-friendly controls for efficient operation.
Key Features:
- Ceramic spindle tip and anvil for durability and precision.
- Intuitive buttons for On/Off, Zero, and Inch/Millimeter unit conversion.
- Powered by a CR2032 battery with automatic power-off function to conserve energy.
- Data output capability for advanced applications.
2. Setup
Before using your INSIZE Electronic Thickness Gage, please follow these setup instructions:
2.1. Battery Installation
The gage requires one CR2032 button cell battery. Ensure proper polarity when inserting.
- Locate the battery compartment cover, typically on the back or side of the display unit.
- Use a small coin or screwdriver to gently open the battery compartment.
- Insert the CR2032 battery with the positive (+) side facing up.
- Close the battery compartment cover securely.
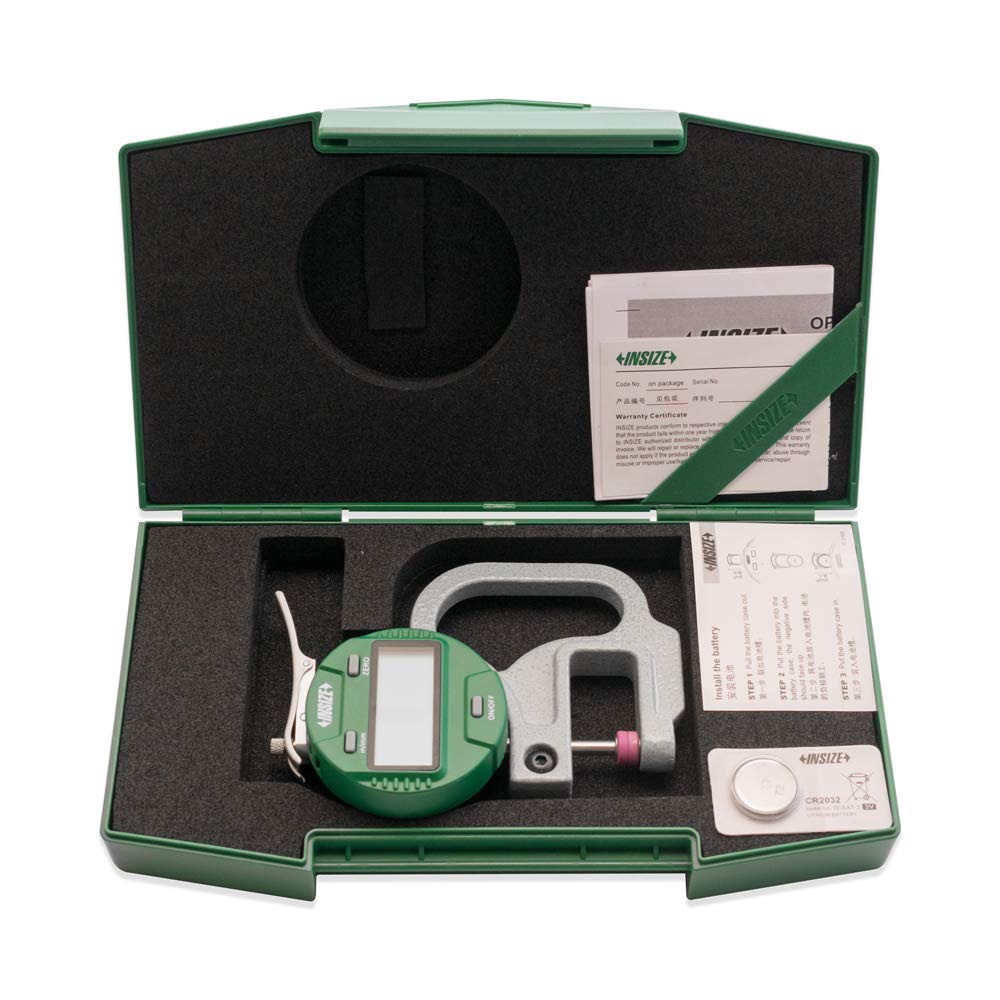
Figure 1: The INSIZE 2871-101 Electronic Thickness Gage shown in its protective case, with the CR2032 battery ready for installation. This image illustrates the product's packaging and initial setup components.
2.2. Initial Power On and Zeroing
After battery installation, power on the device and perform an initial zeroing.
- Press the ON/OFF button to turn on the gage. The display should light up.
- Ensure the spindle tip and anvil are clean and free of debris.
- Gently close the spindle tip onto the anvil until they make contact.
- Press the ZERO button. The display should now read 0.0000 or 0.000. If it does not, repeat the process.
3. Operating Instructions
Follow these steps to take accurate measurements with your thickness gage:
3.1. Taking a Measurement
- Ensure the gage is powered on and zeroed as described in Section 2.2.
- Gently lift the spindle lever to open the measuring jaws.
- Carefully insert the material to be measured between the ceramic spindle tip and the anvil.
- Release the spindle lever slowly, allowing the tip to rest firmly on the material without applying excessive force.
- Read the thickness value displayed on the digital screen.

Figure 2: The INSIZE 2871-101 Electronic Thickness Gage in operation, highlighting its digital display and ergonomic design for precise measurements.
3.2. Changing Measurement Units
The gage can display measurements in both inches and millimeters.
- Press the IN/MM button to toggle between inch (in) and millimeter (mm) units. The current unit will be indicated on the display.
3.3. Power Off
To turn off the gage, press and hold the ON/OFF button until the display turns off. The gage also features an automatic power-off function after a period of inactivity to save battery life.
4. Maintenance
Proper maintenance ensures the longevity and accuracy of your thickness gage.
4.1. Cleaning
- Wipe the gage body with a soft, dry cloth.
- For the ceramic spindle tip and anvil, use a clean, lint-free cloth. Avoid using abrasive cleaners or solvents, as they may damage the surfaces.
- Ensure no dust or debris accumulates on the measuring surfaces.
4.2. Battery Replacement
When the display becomes dim or the gage does not power on, it's time to replace the battery. Refer to Section 2.1 for battery installation instructions.
4.3. Storage
- Store the gage in its original protective case when not in use.
- Keep the gage in a dry environment, away from direct sunlight, extreme temperatures, and high humidity.
- Avoid storing in areas with excessive dust or corrosive chemicals.

Figure 3: The INSIZE 2871-101 Electronic Thickness Gage safely enclosed in its protective case, demonstrating proper storage for long-term preservation and protection.
5. Troubleshooting
If you encounter issues with your INSIZE Electronic Thickness Gage, refer to the following common problems and solutions:
| Problem | Possible Cause | Solution |
|---|---|---|
| Display does not turn on. | Dead or incorrectly installed battery. | Replace the CR2032 battery, ensuring correct polarity. |
| Inaccurate readings. | Gage not zeroed; debris on measuring surfaces; damaged spindle/anvil. | Re-zero the gage; clean spindle tip and anvil; inspect for damage. If damaged, contact support. |
| Display shows 'E' or error code. | Internal error; low battery. | Replace battery; turn off and restart the gage. If error persists, contact manufacturer support. |
| Buttons are unresponsive. | Low battery; internal malfunction. | Replace battery. If issue continues, contact manufacturer support. |
6. Specifications
Detailed technical specifications for the INSIZE 2871-101 Electronic Thickness Gage:
| Specification | Value |
|---|---|
| Model Number | 2871-101 |
| Measurement Range | 0 - 0.4 inches (0 - 10 mm) |
| Resolution | 0.00005 inches (0.001 mm) |
| Measurement Accuracy | +/-0.00005 inches |
| Material (Spindle Tip & Anvil) | Ceramic |
| Battery Type | CR2032 |
| Data Output | Yes |
7. Warranty and Support
For warranty information and technical support, please refer to the official INSIZE website or contact your authorized dealer. Keep your purchase receipt as proof of purchase.
Manufacturer: INSIZE
For further assistance, visit the official INSIZE website or contact their customer service department.


