1. Introduction
This manual provides detailed instructions for the proper installation, operation, and maintenance of your Ventline V2094 RV Roof Vent. This unit is designed to provide ventilation for recreational vehicles, featuring a 12-volt DC fan and a smoke-colored, wedge-shaped lid. Please read all instructions carefully before beginning installation or operation to ensure safe and efficient use.
2. Safety Information
- Always disconnect the RV's 12-volt power supply before performing any electrical work or installation.
- Wear appropriate personal protective equipment, including gloves and eye protection, during installation. The galvanized mounting flange may have sharp edges.
- Ensure proper sealing of the vent to prevent water leaks. Use recommended sealants and follow best practices for RV roof penetration.
- Verify all electrical connections are secure and correctly polarized (positive to positive, negative to negative) to prevent damage to the fan or electrical system.
- Do not operate the fan if the blades are obstructed or damaged.
3. Package Contents
Verify that all components are present before beginning installation:
- Ventline RV Roof Vent Assembly (with 12V DC fan and smoke lid)
- Garnish Ring (1.75" depth)
- Putty Tape
- Mounting Screws

Figure 3.1: Complete Ventline RV Roof Vent package contents.
4. Specifications
| Feature | Specification |
|---|---|
| Model | V2094 |
| Rough Opening Size | 14.25" x 14.25" |
| Fan Type | 12 Volt DC Exhaust Fan |
| Lid Type | Smoke Plastic Wedge Shape Aerodynamic Lid |
| Garnish Ring Depth | 1.75 inches |
| Mounting Flange | Galvanized Steel |
| Power Source | DC power supply |
| Wattage | 12 watts |
| Voltage | 12 Volts |
| Item Weight | 6 pounds |
5. Installation
Tools and Materials Required (Not Included): Appropriate roof sealant (e.g., Dicor self-leveling sealant), screwdriver, drill, wire strippers, crimpers, electrical connectors, measuring tape, cleaning supplies.
- Prepare the Opening: Ensure your RV roof has a rough opening of 14.25" x 14.25". If replacing an existing vent, carefully remove the old unit and clean the area thoroughly, removing all old sealant.
- Apply Putty Tape: Apply the included putty tape around the perimeter of the roof opening where the vent's galvanized mounting flange will sit. Ensure a continuous, watertight seal.
- Position the Vent: Carefully place the Ventline roof vent assembly into the prepared opening from the exterior of the RV. Ensure the vent is oriented correctly.

Figure 5.1: Exterior view of the Ventline RV Roof Vent.
- Secure the Vent: From the interior, align the galvanized mounting flange with the roof opening. Use the provided screws to secure the vent to the roof structure. Do not overtighten.

Figure 5.2: Putty tape and mounting screws.
- Electrical Connection: Locate the 12-volt DC wiring from your RV. Connect the vent's fan wires to the RV's 12-volt power supply, ensuring correct polarity (positive to positive, negative to negative). Secure connections with appropriate electrical connectors.
- Install Garnish Ring: From the interior, slide the garnish ring into place, covering the rough edges of the opening and the mounting flange. Secure the garnish ring with screws (if applicable, or it may snap into place).
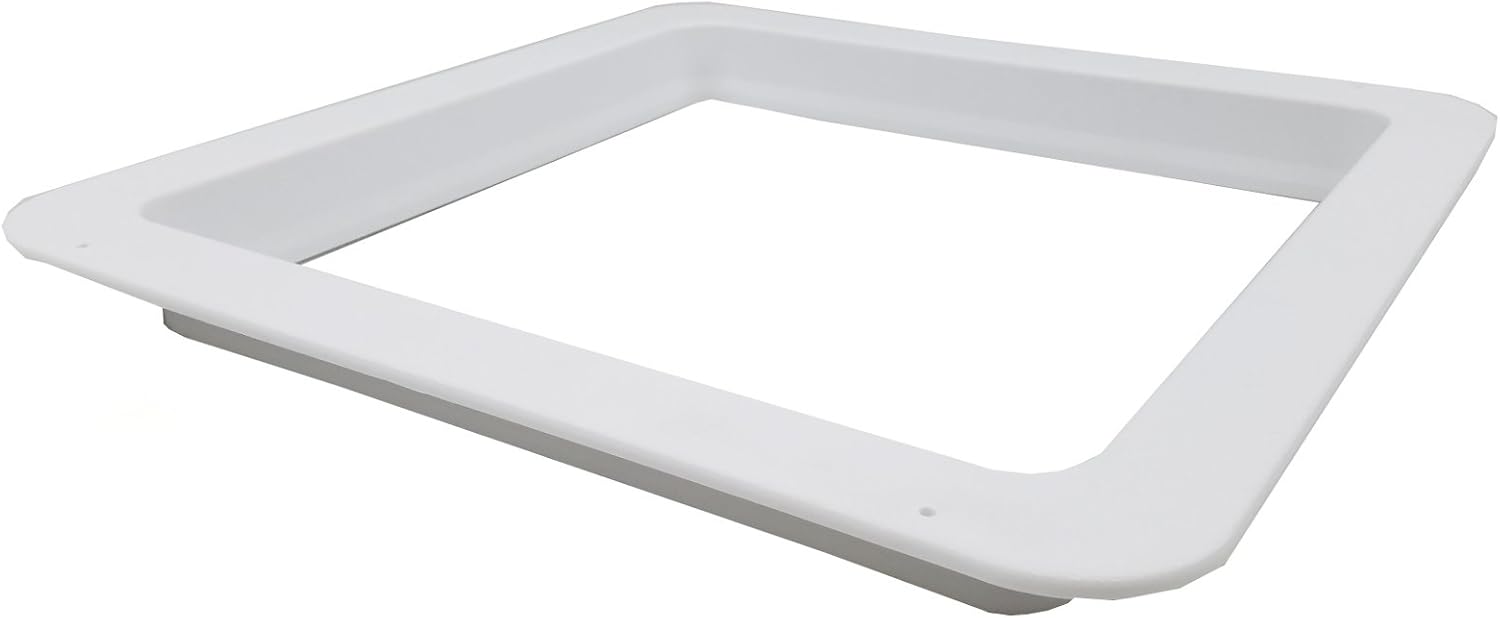
Figure 5.3: The 1.75-inch deep garnish ring.
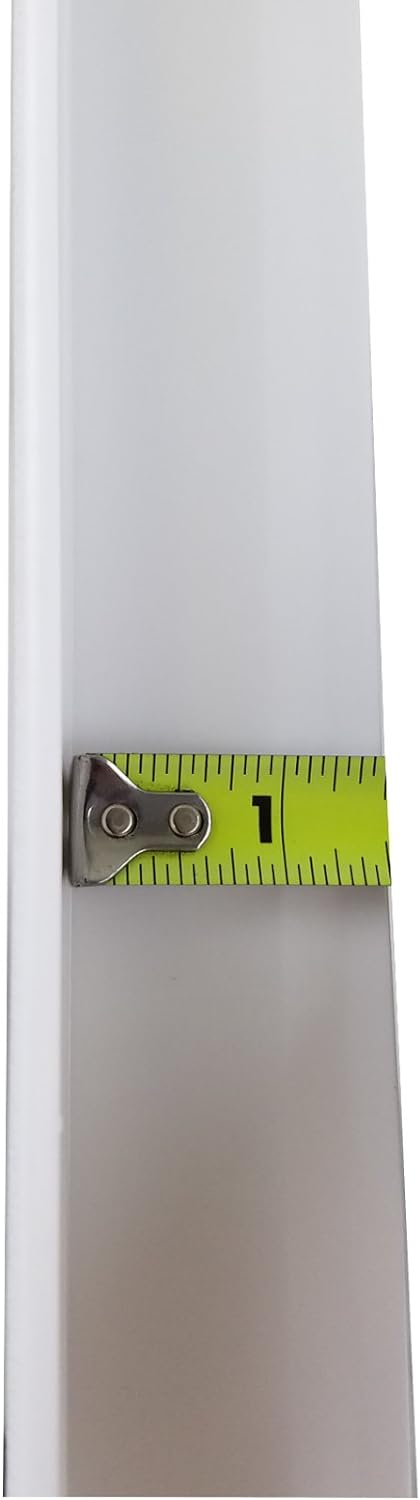
Figure 5.4: Garnish ring depth measurement.
- Seal the Exterior: Apply a generous bead of appropriate RV roof sealant (e.g., self-leveling sealant) around the entire perimeter of the vent's exterior flange to create a waterproof seal. Also, seal all screw heads.
6. Operation
The Ventline V2094 RV Roof Vent is designed for straightforward operation.
- Opening the Lid: To open the vent lid, rotate the black knob located on the interior frame counter-clockwise. Continue rotating until the lid is fully open.
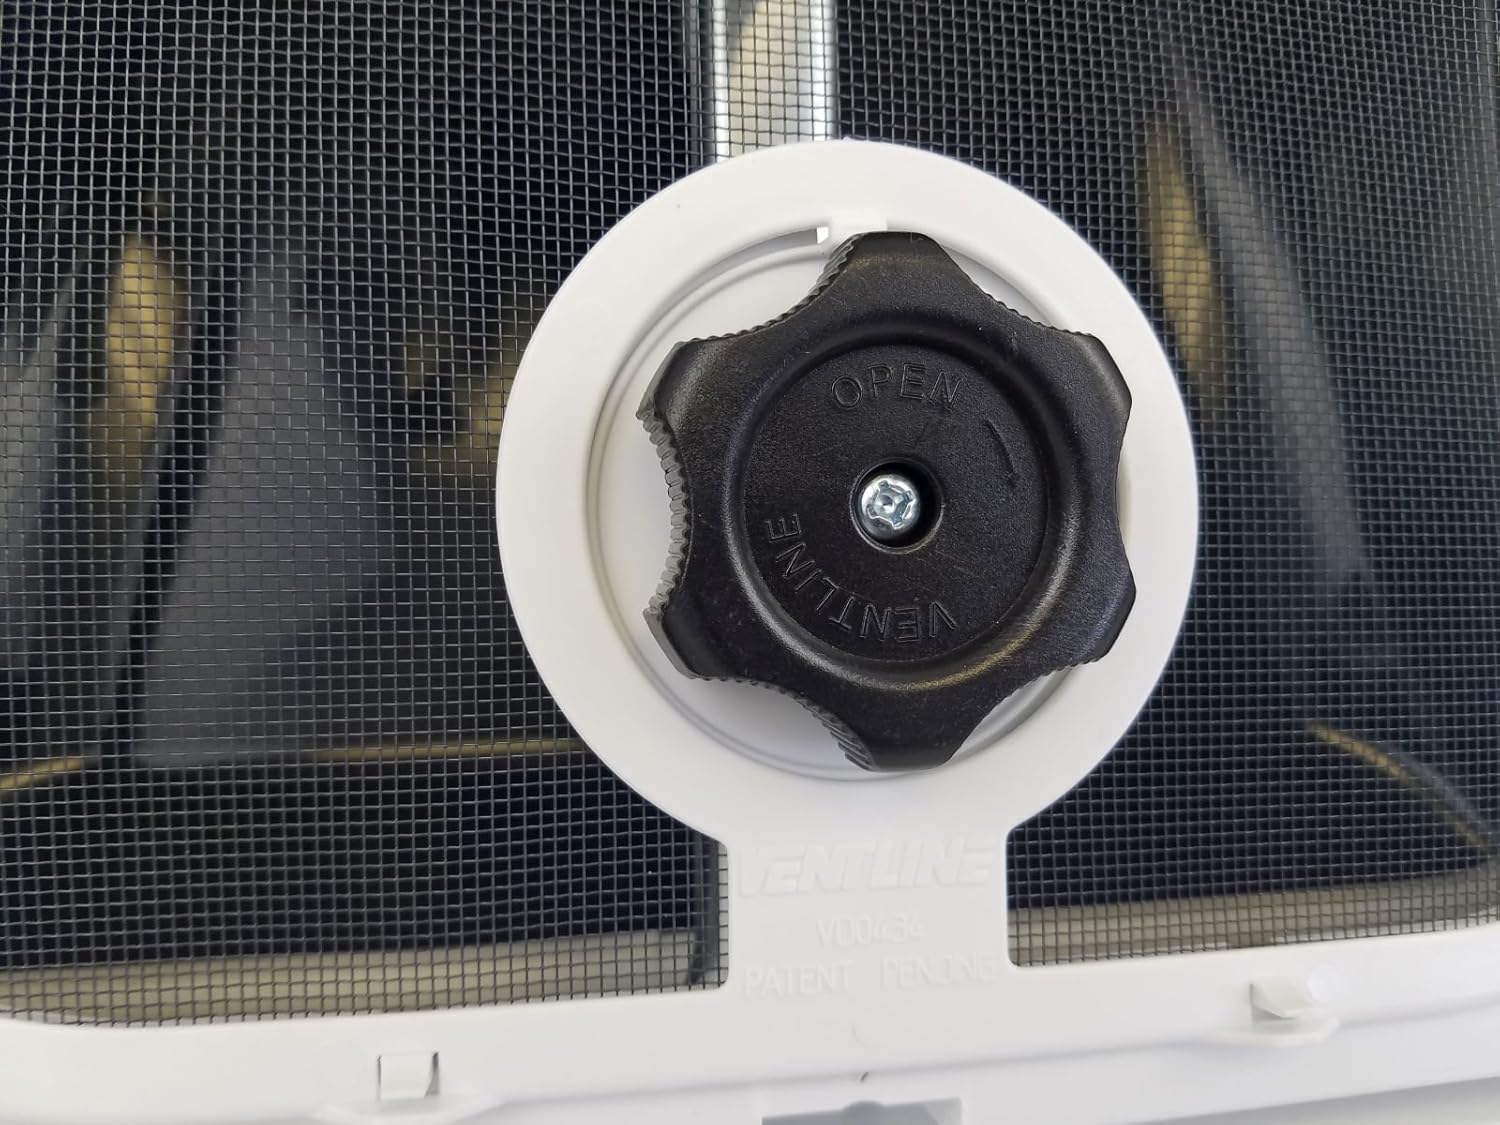
Figure 6.1: Lid opening knob.
- Closing the Lid: To close the vent lid, rotate the black knob clockwise until the lid is fully seated and sealed against the vent frame.
- Operating the Fan: The 12-volt DC fan is controlled by a small black switch located on the interior frame. Flip the switch to the 'ON' position to activate the fan and to the 'OFF' position to deactivate it.
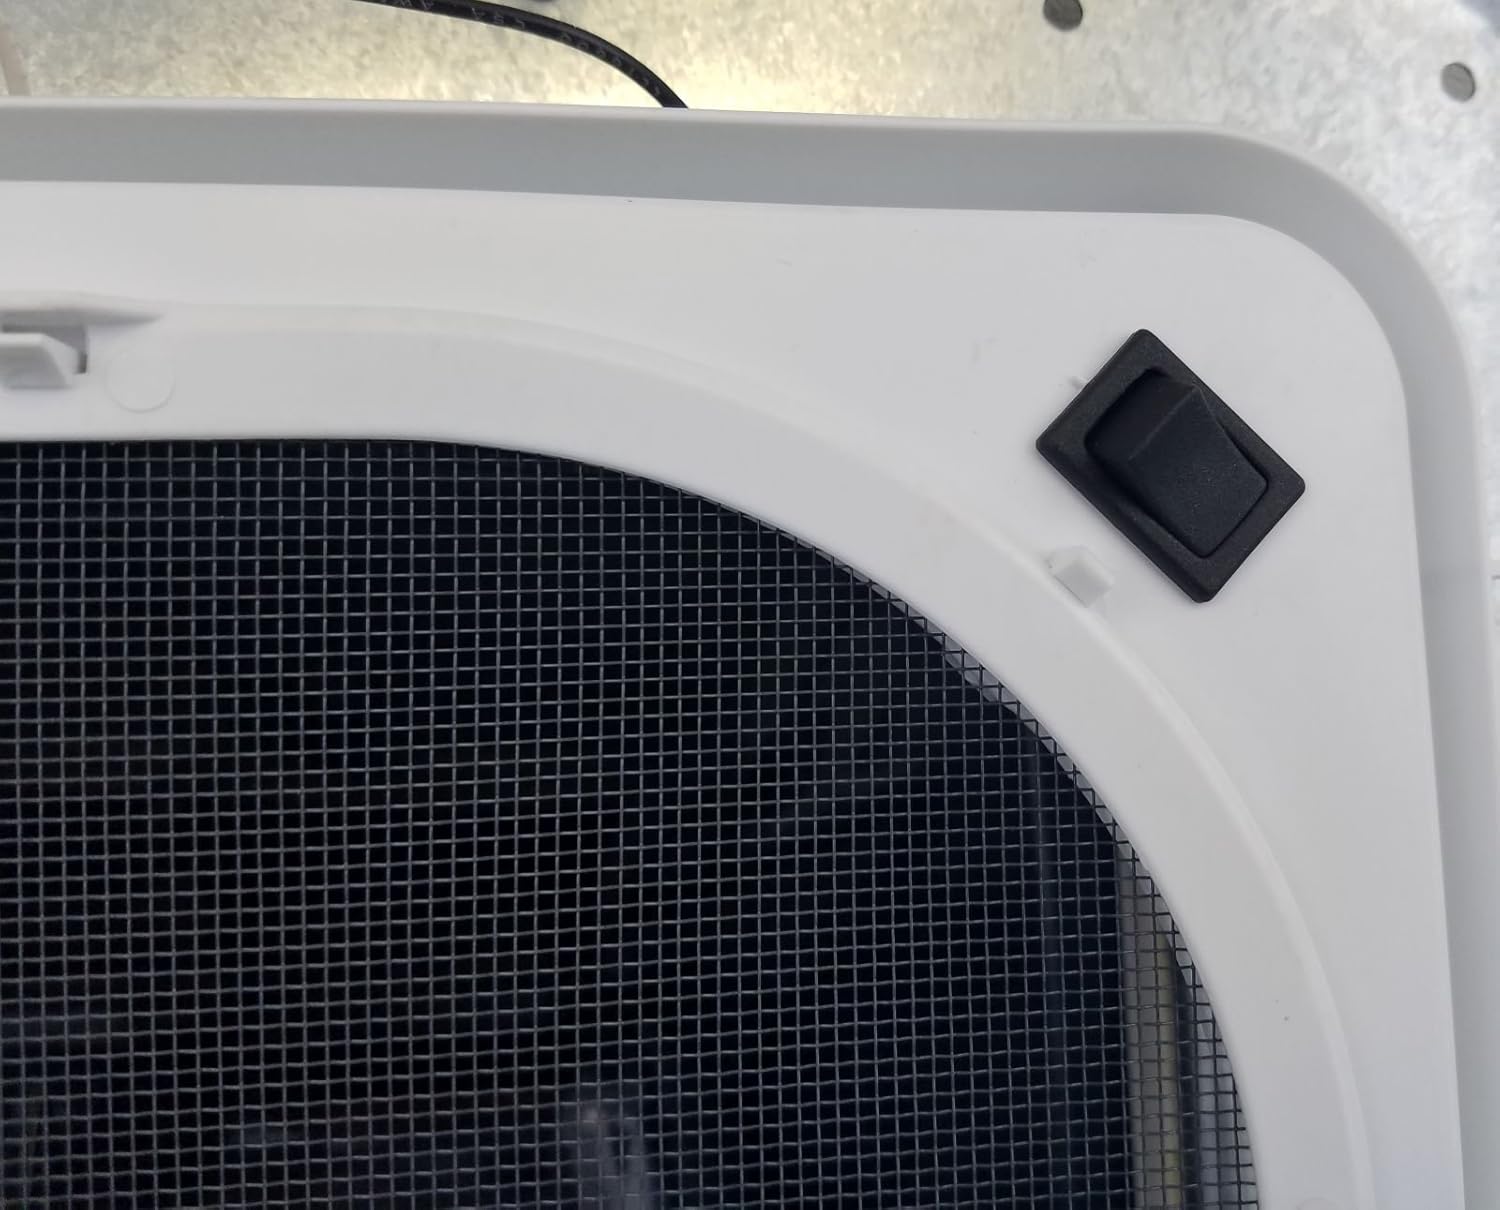
Figure 6.2: Fan control switch.

Figure 6.3: Interior view with fan and screen.
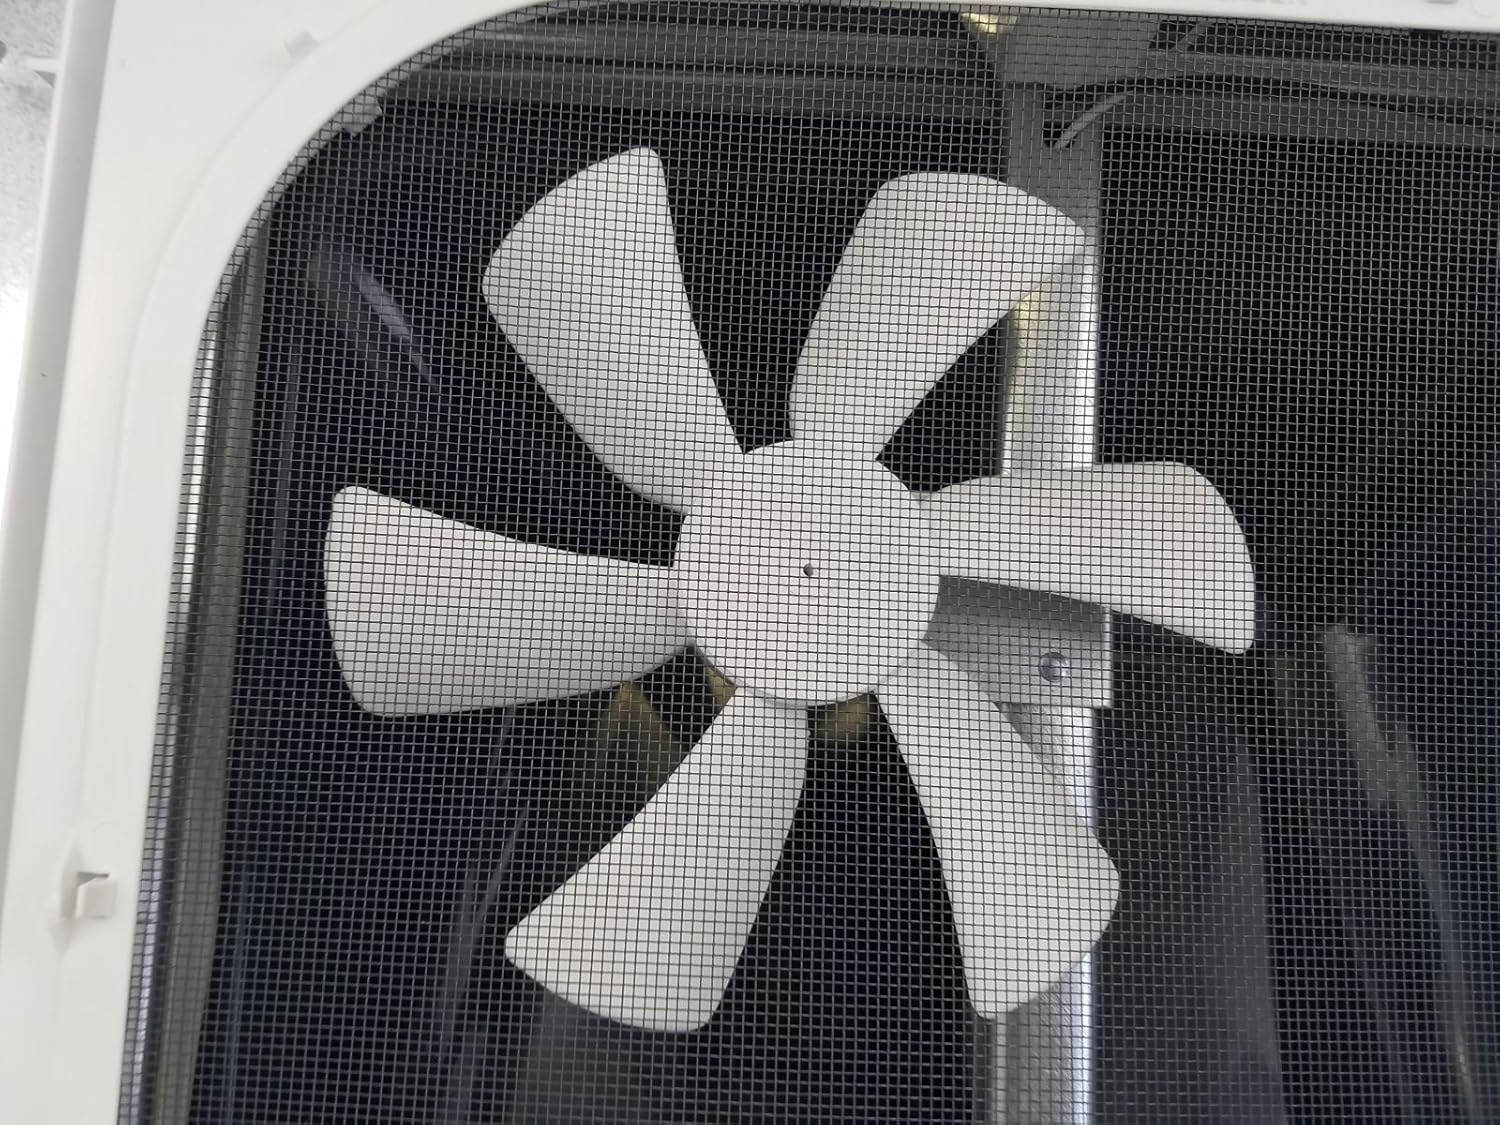
Figure 6.4: Close-up of the fan blades.
7. Maintenance
Regular maintenance will ensure the longevity and efficient operation of your RV roof vent.
- Cleaning the Screen: Periodically remove the interior screen (if removable) and clean it with mild soap and water to remove dust and debris. Ensure it is dry before reinstallation.
- Cleaning Fan Blades: With the power disconnected, gently wipe the fan blades with a damp cloth to remove any accumulated dust.
- Lid and Seal Inspection: Inspect the exterior lid and its seals regularly for cracks, deterioration, or damage. Replace components as necessary to maintain a watertight seal.
- Exterior Sealant Check: Annually inspect the roof sealant around the vent's perimeter. Reapply or repair sealant as needed to prevent leaks.
8. Troubleshooting
| Problem | Possible Cause | Solution |
|---|---|---|
| Fan does not operate. | No 12V power, loose wiring connection, faulty switch, motor failure. | Check RV's 12V power supply. Verify all electrical connections are secure. Test the fan switch. If issues persist, consult a qualified technician. |
| Lid does not open or close smoothly. | Debris in mechanism, worn gears, bent lid. | Inspect for obstructions and remove. Lubricate moving parts with a silicone-based lubricant. Inspect lid for damage. |
| Water leak around the vent. | Improperly sealed exterior, damaged lid seal, cracked vent housing. | Inspect exterior sealant and reapply as necessary. Check the lid seal for damage and replace if needed. Inspect the vent housing for cracks. |
| Excessive noise during fan operation. | Fan blades obstructed, loose mounting, worn motor bearings. | Ensure no debris is hitting the fan blades. Check that the vent is securely mounted. If noise persists, the motor may require replacement. |
9. Warranty and Support
For specific warranty information regarding your Ventline V2094 RV Roof Vent, please refer to the documentation provided at the time of purchase or contact Ventline customer support directly. Keep your proof of purchase for warranty claims.
For technical assistance or replacement parts, please contact Ventline customer service or your authorized dealer.