Introduction
This manual provides essential information for the proper installation, operation, and maintenance of your Technical Precision H1 Halogen Headlight Bulb. This product is designed as a direct replacement for GE General Electric G.E H1-55w 12v (50310-1) light bulbs, commonly used as high beam halogen headlight bulbs with a P14.5S base.
Please read this manual thoroughly before installation to ensure safe and effective use.
Safety Information
- Always disconnect the vehicle's battery before attempting any electrical work.
- Halogen bulbs operate at high temperatures. Allow the old bulb to cool completely before handling.
- Avoid touching the glass part of the new bulb with bare hands. Oils from your skin can create hot spots, leading to premature failure. Use gloves or a clean cloth.
- Ensure the replacement bulb matches the specifications of the original bulb to prevent damage to the vehicle's electrical system.
- Dispose of old bulbs responsibly according to local regulations.
Product Overview

Front view of the Technical Precision H1 Halogen Headlight Bulb, showing the glass bulb and metal base with electrical contacts.

Angled view of the H1 bulb, highlighting the P14.5S base and filament structure.

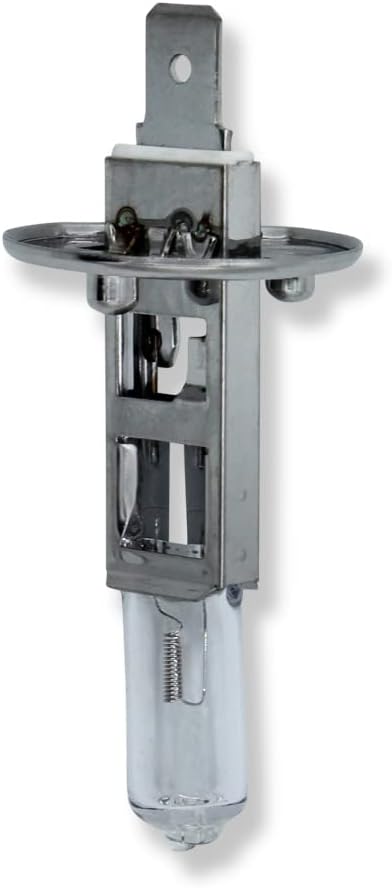
Side view of the H1 bulb, showing the compact design and metal housing.

The H1 bulb held in a hand, illustrating its compact size.
Top-down view of the H1 bulb, showing the base and connection points.
Setup and Installation
Replacing a headlight bulb typically involves accessing the bulb housing from behind the headlight assembly. The exact procedure may vary depending on your vehicle's make and model. Refer to your vehicle's owner's manual for specific instructions.
General Installation Steps:
- Park Safely: Park your vehicle on a level surface, turn off the engine, and engage the parking brake.
- Access Headlight Assembly: Open the hood and locate the back of the headlight assembly. You may need to remove a cover, air intake, or other components to gain access.
- Disconnect Power: Disconnect the electrical connector from the old bulb.
- Remove Old Bulb: Unclip or twist the retaining mechanism that holds the bulb in place. Carefully pull out the old bulb. Avoid touching the glass of the new bulb.
- Insert New Bulb: Align the tabs on the base of the new Technical Precision H1 bulb with the slots in the headlight housing. Gently push the bulb into place until it seats securely.
- Secure Bulb: Re-engage the retaining clip or twist the bulb to lock it into position.
- Reconnect Power: Reconnect the electrical connector to the new bulb.
- Test Functionality: Turn on your vehicle's headlights to ensure the new bulb is functioning correctly.
- Reassemble: Reinstall any components that were removed to access the headlight assembly.
If you are unsure about the installation process, it is recommended to consult a qualified automotive technician.
Operating Instructions
The Technical Precision H1 Halogen Headlight Bulb operates as part of your vehicle's electrical system. Once properly installed, its operation is controlled by your vehicle's headlight switch and associated electrical circuits.
- Ensure your vehicle's electrical system is functioning correctly.
- Turn on your vehicle's headlights as you normally would. The bulb should illuminate immediately.
- This H1 bulb is typically used for high beam applications. Activate your high beams to confirm proper function.
Maintenance
Halogen headlight bulbs generally require minimal maintenance beyond replacement when they reach the end of their service life. The rated operating life for this bulb is 225 hours.
- Regular Inspection: Periodically check your vehicle's headlights to ensure both bulbs are functioning.
- Clean Headlight Lenses: Keep your vehicle's headlight lenses clean to maximize light output. Use a soft cloth and appropriate cleaning solution.
- Avoid Contamination: When handling new bulbs, always use gloves or a clean cloth to prevent skin oils from transferring to the glass, which can shorten bulb life.
- Replace in Pairs (Recommended): While not strictly necessary, it is often recommended to replace headlight bulbs in pairs. This ensures consistent light output and color temperature, as bulbs tend to dim and change color slightly over their lifespan.
Troubleshooting
If your new Technical Precision H1 Halogen Headlight Bulb does not illuminate after installation, consider the following troubleshooting steps:
- Check Connections: Ensure the electrical connector is fully seated on the bulb's terminals.
- Verify Bulb Seating: Confirm the bulb is properly seated and locked into the headlight housing.
- Inspect Fuse: Check the vehicle's fuse box for a blown headlight fuse. Refer to your vehicle's owner's manual for the fuse box location and diagram. Replace any blown fuses with one of the correct amperage.
- Test Voltage: If you have a multimeter, check for 12V power at the bulb's connector when the headlights are switched on. If no power, the issue may be with the vehicle's wiring, switch, or relay.
- Bulb Integrity: Although rare for new bulbs, visually inspect the filament of the bulb for any breaks.
- Professional Assistance: If the problem persists after these steps, it is advisable to seek assistance from a qualified automotive electrician or mechanic.
Specifications
| Feature | Specification |
|---|---|
| Model Number | H1-55W 12V (50310-1)-AZ-FLF2-4 |
| Voltage | 12 Volts |
| Wattage | 55W |
| Bulb Type | Halogen |
| Base Type | P14.5S |
| Operating Life | 225 Hours |
| Auto Part Position | Front (Headlight) |
| Item Package Quantity | 1 |
Warranty and Support
For information regarding product warranty or technical support, please refer to the official Technical Precision website or contact their customer service directly. Contact details are typically available on the product packaging or the manufacturer's official online presence.
You can visit the Technical Precision Store on Amazon for more information: Technical Precision Store