
Cremona SV-180BKE
Cremona SV-180BKE Premier Student Electric Violin Instruction Manual
Model: SV-180BKE
1. Product Overview
The Cremona SV-180BKE is a 4/4 size solid-body electric violin designed for students and musicians. It features a powerful piezo pickup and a rosewood bridge for amplified sound. The solid hardwood body minimizes feedback, and the fingerboard and fittings are made from genuine ebony. The lower bout accommodates standard chinrests and shoulder pads. A lightweight composite tailpiece with four built-in fine tuners is standard.

Figure 1: Front view of the Cremona SV-180BKE Electric Violin.
Key Features:
- Solid hardwood body with modern design.
- Lower bout designed to accept standard chinrests and shoulder rests.
- Integrated volume and tone controls.
- Standard headphone jack for private practice.
- 1/8" mini line-out jack for connecting to amplifiers.
- 1/8" mini line-in jack for playing along with external media.
- Ebony Hill-style fittings and ebony fingerboard.
- Lightweight composite tailpiece with 4 fine tuners.
2. What's Included
The Cremona SV-180BKE electric violin package typically includes the following components:
- Cremona SV-180BKE Electric Violin
- Brazil wood bow
- Lightweight rigid foam case
- D'Addario Prelude strings (pre-installed or included separately)
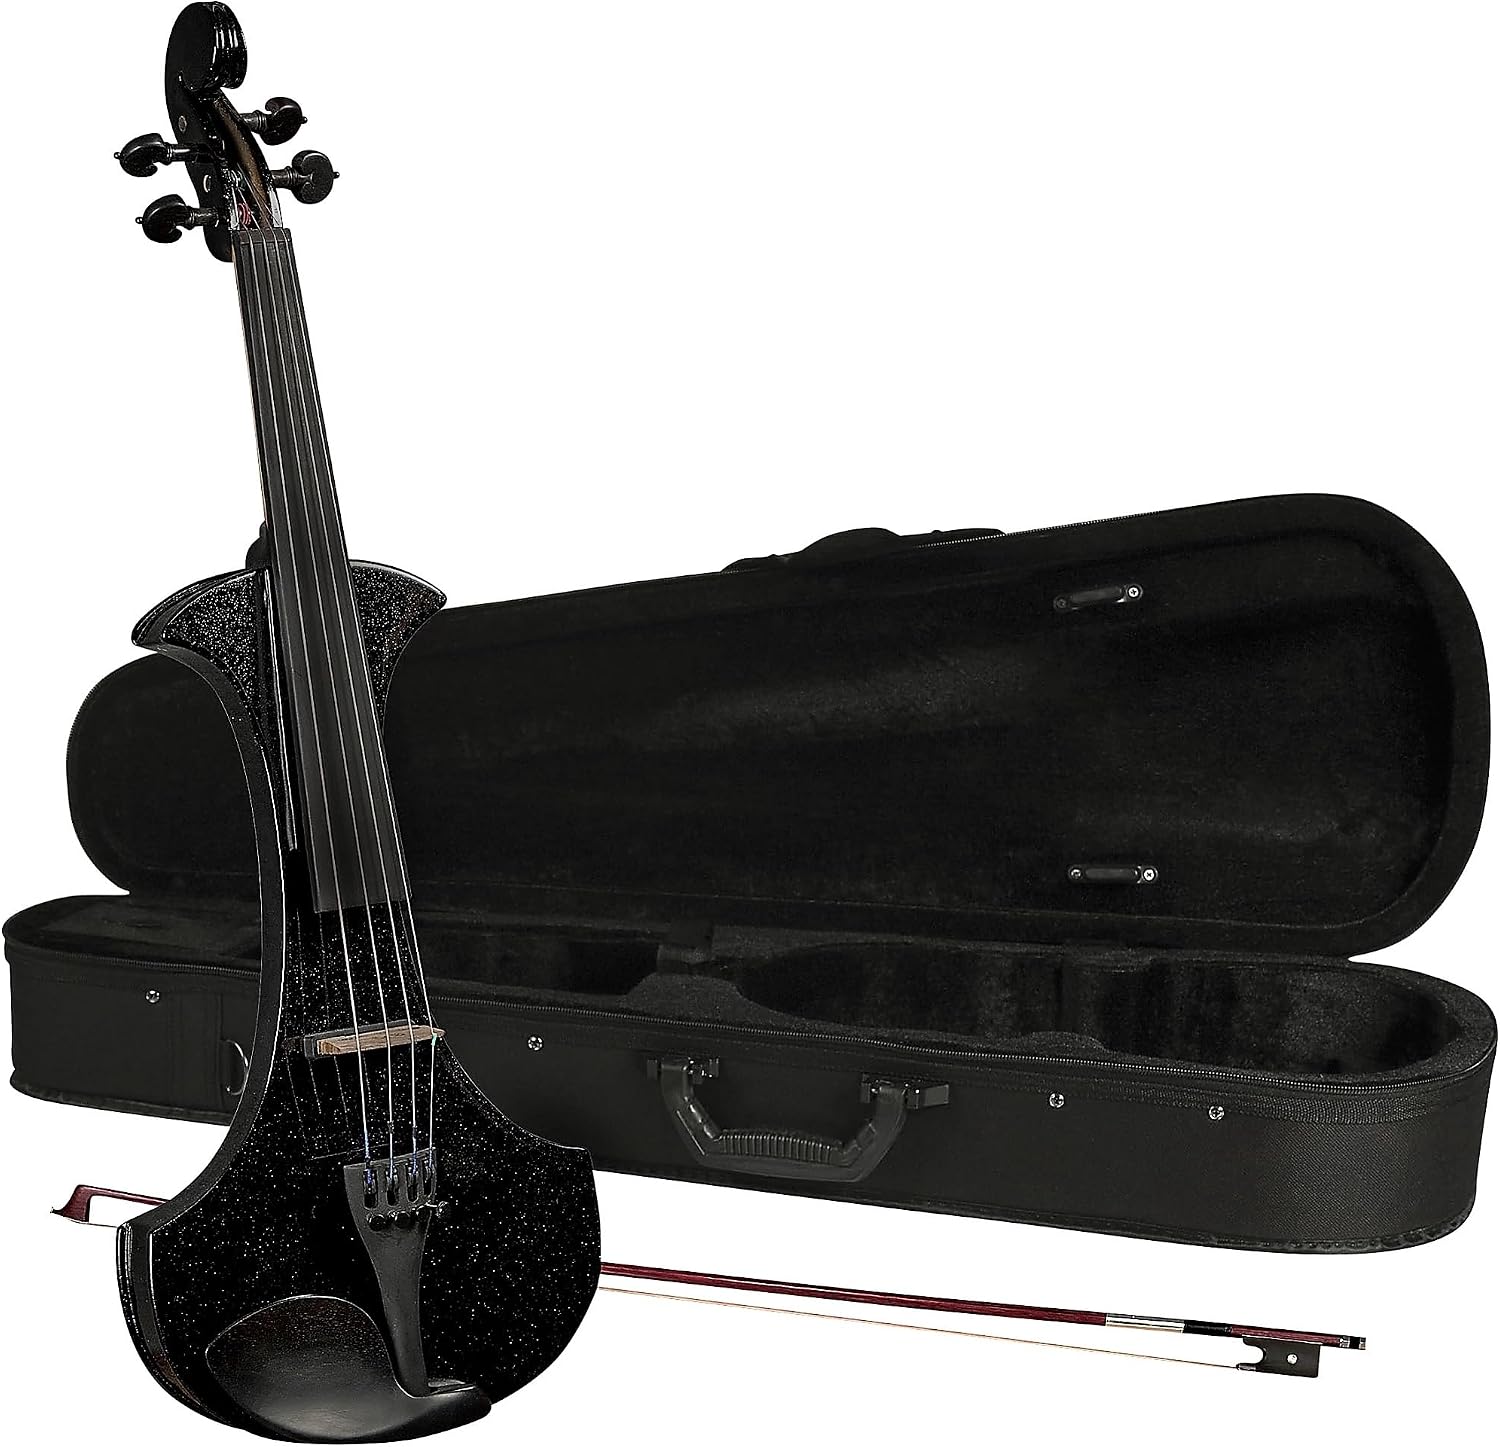
Figure 2: Cremona SV-180BKE Electric Violin with case and bow.
3. Setup
- Unpacking: Carefully remove the violin and all accessories from the rigid foam case. Inspect for any visible damage.
- Bridge Placement: The bridge may be lowered for shipping. Gently stand the bridge upright, ensuring its feet align with the f-holes on the violin body. The side of the bridge with the 'Cremona' logo should face the tailpiece. The bridge should be perpendicular to the violin's top plate.
- String Installation and Tuning: If strings are not pre-installed, carefully attach the D'Addario Prelude strings. Tune the violin using the tuning pegs in the pegbox for initial adjustments, then use the four fine tuners on the tailpiece for precise pitch adjustments. Apply peg compound to the pegs if they slip.
- Chinrest and Shoulder Rest: Attach your preferred chinrest and shoulder rest to the lower bout of the violin. Adjust them to ensure a comfortable and stable playing position.
- Battery Installation: Locate the battery compartment, typically on the back of the violin near the control panel. Insert a 9V battery (not always included) to power the active pickup system. Ensure correct polarity.

Figure 3: Proper bridge and string placement.

Figure 4: Back view showing control panel and battery compartment location.
4. Operating Instructions
- Power On: Once the battery is installed, the violin's active pickup system is ready for use. There is no separate power switch.
- Connecting to Headphones: For private practice, connect standard 1/8" (3.5mm) headphones to the dedicated headphone jack. Adjust the violin's volume knob to a comfortable listening level.
- Connecting to an Amplifier or Audio System: Use a 1/8" (3.5mm) mini line-out jack to connect the violin to an amplifier, mixing console, or other audio equipment. An unbalanced cable is typically used for direct amplifier connections. For connecting to a computer or professional audio interfaces, a dedicated preamp may be required for optimal sound quality.
- Playing Along with External Media: Connect an external media player (e.g., smartphone, MP3 player) to the 1/8" (3.5mm) mini line-in jack. This allows you to hear the external audio through your headphones or connected amplifier along with your violin's sound.
- Volume and Tone Control: Adjust the volume and tone knobs on the violin's control panel to achieve your desired sound. The tone control allows you to shape the brightness or warmth of the violin's output.
5. Maintenance
- Cleaning: After each use, wipe down the violin body, strings, and bow stick with a soft, dry cloth to remove rosin dust, fingerprints, and oils. Avoid using harsh chemicals or abrasive materials.
- Rosin Application: Apply rosin to the bow hair as needed to create friction for sound production. Over-rosining can lead to excessive dust and sticky strings.
- String Care: Replace strings periodically as they wear out, lose their tone, or break. When replacing, ensure the small black protective tubes are positioned correctly on the bridge to prevent premature string breakage.
- Bridge Care: Regularly check that the bridge remains upright and properly positioned. If it leans, gently adjust it back to a perpendicular position to prevent warping or damage.
- Case Storage: Always store the violin in its lightweight rigid foam case when not in use. This protects it from physical damage, dust, and fluctuations in temperature and humidity.
- Battery Replacement: Replace the 9V battery when the sound becomes weak or distorted, or if the violin fails to produce sound when connected.
6. Troubleshooting
- No Sound or Low Volume:
- Check the battery level and ensure it is correctly installed.
- Verify all cables are securely connected to the violin, headphones, or amplifier.
- Ensure the volume knob on the violin and any connected device is turned up.
- Distorted Sound:
- Adjust the tone settings on the violin and any connected amplifier.
- If connecting to a computer or audio interface, ensure proper impedance matching. A dedicated preamp might be necessary for optimal signal quality.
- Strings Breaking Frequently:
- Ensure the bridge is not leaning and the strings are properly seated in the bridge grooves.
- Verify the small black protective tubes are on the strings where they cross the bridge.
- If issues persist, consult a professional luthier for a setup check.
- Tuning Pegs Slipping or Not Holding Tune:
- Apply peg compound to the pegs. This can be purchased at most music stores.
- Ensure pegs are pushed firmly into the pegbox while tuning.
- New strings require time to stretch and settle, which may cause them to go out of tune frequently initially.
- If problems persist, a luthier can adjust the pegs or install geared fine-tuning pegs.
7. Specifications
- Brand:
- Cremona
- Model Number:
- SV-180BKE
- Size:
- 4/4 Size
- Color:
- Sparkling Black
- Item Dimensions (L x W x H):
- 31 x 6 x 10.5 inches
- Item Weight:
- 1 Pounds
- Top Material Type:
- Ebony, Rosewood
- Back Material Type:
- Rosewood, Wood
- String Material Type:
- Stainless Steel (D'Addario Prelude)
- Finish Type:
- Powder Coated
- Instrument:
- Violin
- Connector Type:
- 3.5 mm (1/8")
- Operation Mode:
- Electric
- Number of Strings:
- 4
- Included Components:
- Brazil wood bow, Lightweight rigid foam case, D'Addario Prelude strings
- UPC:
- 688382044319
8. Additional Resources
For a visual overview of Cremona violins and their manufacturing philosophy, please watch the official brand video:
Video 1: Official video showcasing the Cremona brand's history, manufacturing process, and commitment to quality in violin making.
9. Warranty & Support
The Cremona SV-180BKE Electric Violin comes with a 1-year limited warranty. For detailed warranty information, technical support, or further assistance, please refer to the official user guide documents provided with your product or contact Cremona customer service directly.
Related documentsSV-180BKE


Ask a question about this manual
Ask about setup, troubleshooting, compatibility, parts, safety, or missing instructions. Manuals+ will review the question and use this page’s manual context to help answer it.