Introduction
This manual provides comprehensive instructions for the installation, maintenance, and troubleshooting of the Direct Store DG186 Gas Grill Burner and Heat Plate Replacement Kit. This kit is designed to restore the performance of compatible gas grills by replacing worn or damaged components.
Compatibility: This replacement kit is compatible with various gas grill models, including:
- Outdoor Gourmet Models: B09SMG1-3F, BQ05037-2, BQ05046-6A, BQ06042-1, BQ06W03-1, BQ06W03-1-N, BQ06W06-A
- Sam's Club Models: BQ05046-6, BQ05046-6A, BQ06042-1
- Members Mark Models: BQ05046-6
- BBQ Pro Models: BQ05041-28, BQ51009
- Kenmore Models: 119.16675, 119.17675, 166750, 176750, BQ06W03-1, BQ06W03-1-N
Always verify the dimensions of your original parts against the specifications provided in this manual before purchasing and installation to ensure proper fitment.
Product Components
The Direct Store DG186 Parts Kit includes the following components:
- 3 Stainless Steel Burners
- 3 Porcelain Steel Heat Plates
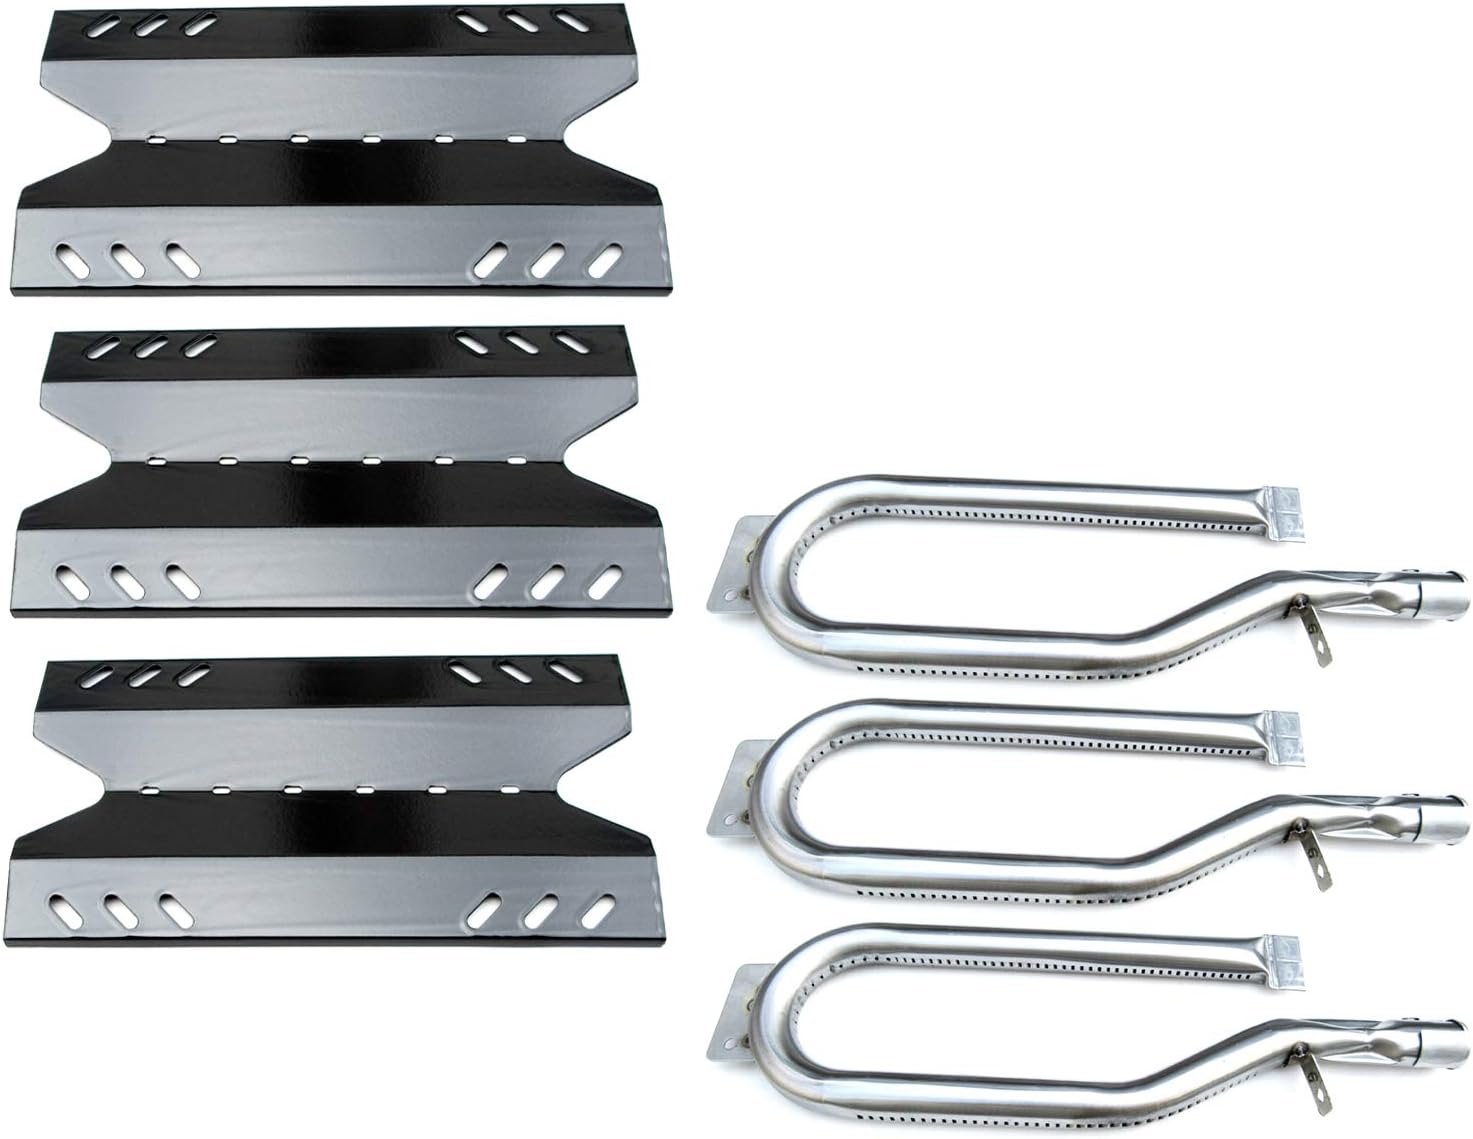
Figure 1: Overview of the Direct Store DG186 Replacement Kit components.

Figure 2: Detailed dimensions of the stainless steel burner (15 1/2" x 4 1/2") and porcelain steel heat plate (16 1/8" x 8 3/8").
Setup and Installation
Before beginning installation, ensure your grill is completely cool and disconnected from its gas supply. It is recommended to wear protective gloves during this process.
- Remove Old Components: Carefully remove the existing grill grates, heat tents (flavorizer bars), and burners from your grill. Note their placement for reference.
- Clean Grill Interior: Thoroughly clean the interior of your grill, removing any grease, food debris, or rust. A good degreaser and nylon brush are recommended.
- Install New Burners: Place the new stainless steel burners into their designated positions. Ensure they are properly seated and aligned with the gas orifices. Some models may require securing with a single screw; if rusted, drilling off the head and using pliers for removal may be necessary.
- Check Gas Flow and Flame: After installing burners, reconnect the gas supply and perform a flame check. Turn on each burner individually, then all three. The flame should be primarily blue with orange/white tips. If the flame is all orange, adjust the air venturi on the burner. Refer to your grill's original manual or online resources for specific air venturi adjustment procedures.
- Install New Heat Plates: Position the new porcelain steel heat plates (also known as flavorizer bars or heat tents) over the burners. Ensure they fit securely and cover the burners adequately to disperse heat evenly. Be cautious as edges may be sharp.
- Replace Grill Grates: Once burners and heat plates are installed, replace the grill grates.
- Initial Burn-In: Conduct an initial burn-in by turning all burners to high for approximately 5-10 minutes to eliminate any manufacturing residues and ensure proper operation.
Video 1: Installation overview for Direct Store DG186 Replacement Kit, showing placement of burners and heat plates in a grill.
Video 2: Demonstration of burner and heat plate installation for Members Mark BQ05046-6 grill.
Operating Instructions
Once installed, operate your grill according to its original manufacturer's instructions. The new burners and heat plates are designed to provide efficient and even heat distribution, comparable to original parts.
- Ensure all gas connections are secure and leak-free before lighting.
- Always open the grill lid before lighting burners.
- Adjust burner controls to achieve desired cooking temperatures.
- Monitor food closely to prevent overcooking or burning, especially during initial uses with new components.
Maintenance
Regular maintenance extends the lifespan of your grill components and ensures optimal performance.
- Cleaning Heat Plates: The porcelain steel heat plates feature a smooth, non-stick surface for easy cleaning. After each use, allow the grill to cool. Remove the heat plates and soak them in hot water with detergent for a few minutes. Use a brush to remove any residue. Dry thoroughly before reinstalling or storing in a dry place.
- Cleaning Burners: Periodically inspect burners for clogged ports. Use a wire brush or a stiff wire to clear any blockages. Ensure the air intake openings are free from spider webs or debris.
- General Cleaning: Keep the grill interior clean to prevent grease buildup, which can lead to flare-ups and uneven heating.
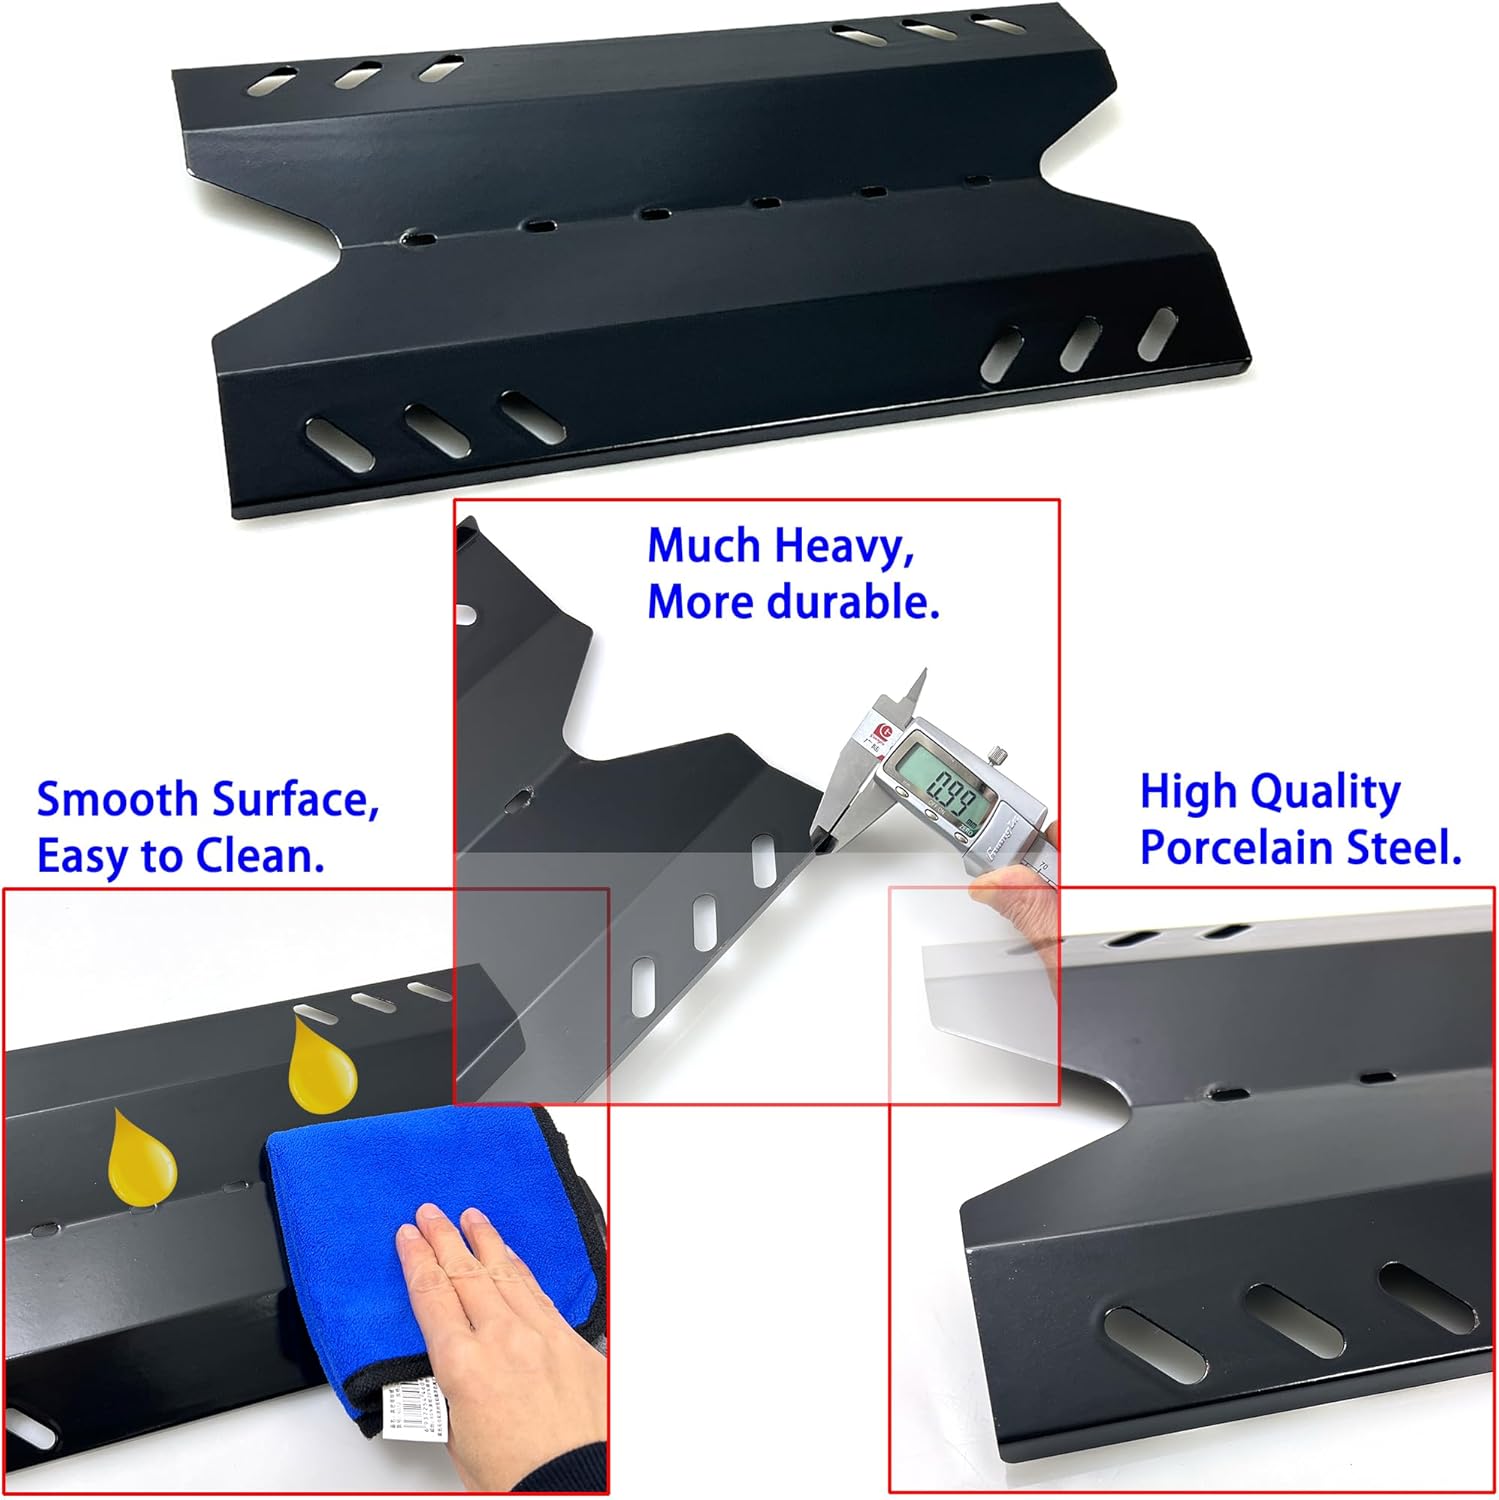
Figure 3: The smooth surface of the porcelain steel heat plate facilitates easy cleaning.
Troubleshooting
This section addresses common issues that may arise with gas grill burners and heat plates.
| Problem | Possible Cause | Solution |
|---|---|---|
| Uneven heating or hot spots | Clogged burner ports, improperly seated heat plates, or incorrect air/gas mixture. | Clean burner ports. Ensure heat plates are correctly positioned. Adjust air venturi if flames are not blue. |
| Burner not lighting | Clogged burner, faulty igniter, or gas supply issue. | Check gas supply. Clean burner ports. Inspect igniter for spark. |
| Orange or yellow flames | Insufficient air in the air/gas mixture. | Adjust the air venturi on the burner to allow more air into the gas stream. |
| Excessive flare-ups | Grease buildup, or heat plates not properly deflecting grease. | Clean grill interior and heat plates regularly. Ensure heat plates are correctly installed. |
If problems persist after attempting these solutions, consult a qualified grill technician or contact Direct Store customer support.
Specifications
- Model Number: DG186
- Burner Material: Stainless Steel
- Burner Dimensions: 15 1/2" x 4 1/2"
- Heat Plate Material: Porcelain Steel
- Heat Plate Dimensions: 16 1/8" x 8 5/8"
- Product Dimensions (Overall): 16.5 x 8.75 x 2 inches
- Item Weight: 5.48 pounds
- Manufacturer: Direct Store

Figure 4: Stainless steel burner with adjustable air shutter for flame control.
Figure 5: Porcelain steel heat plate demonstrating its thickness and smooth, easy-to-clean surface.
Customer Support
For any questions, concerns, or assistance with your Direct Store DG186 Replacement Kit, please contact our customer support team. We are available to help you 7 days a week, 24 hours a day.
Contact Information: Please refer to the product packaging or the retailer's website for the most current contact details.