1. Introduction
This user manual provides detailed instructions for the safe and effective operation of your Jumper Medical Infrared Ear Thermometer, Model JPD-FR301. This device is designed for accurate body temperature measurement in the ear canal for all ages, including infants, children, and adults.
Please read this manual thoroughly before first use and keep it for future reference.
2. Product Features
- Digital Infrared (IR) Ear Thermometer with protective cap.
- Fast 1-second measurement for quick results.
- Acoustic fever alarm for elevated temperatures (> 37.5 °C).
- Memory storage for the last 20 measurement readings.
- Switchable temperature display between Celsius (°C) and Fahrenheit (°F).
- Ergonomic design for comfortable handling and use.
- High sensitivity for maximum precision.
- Meets high hygienic standards.
- Certified with CE, FDA, ISO 13485 + AC:2012, ISO 10993-1, ISO 10993-10, Norm IEC 60601-1-2, and conforms to the Medical Devices Directive - MDD (EU).
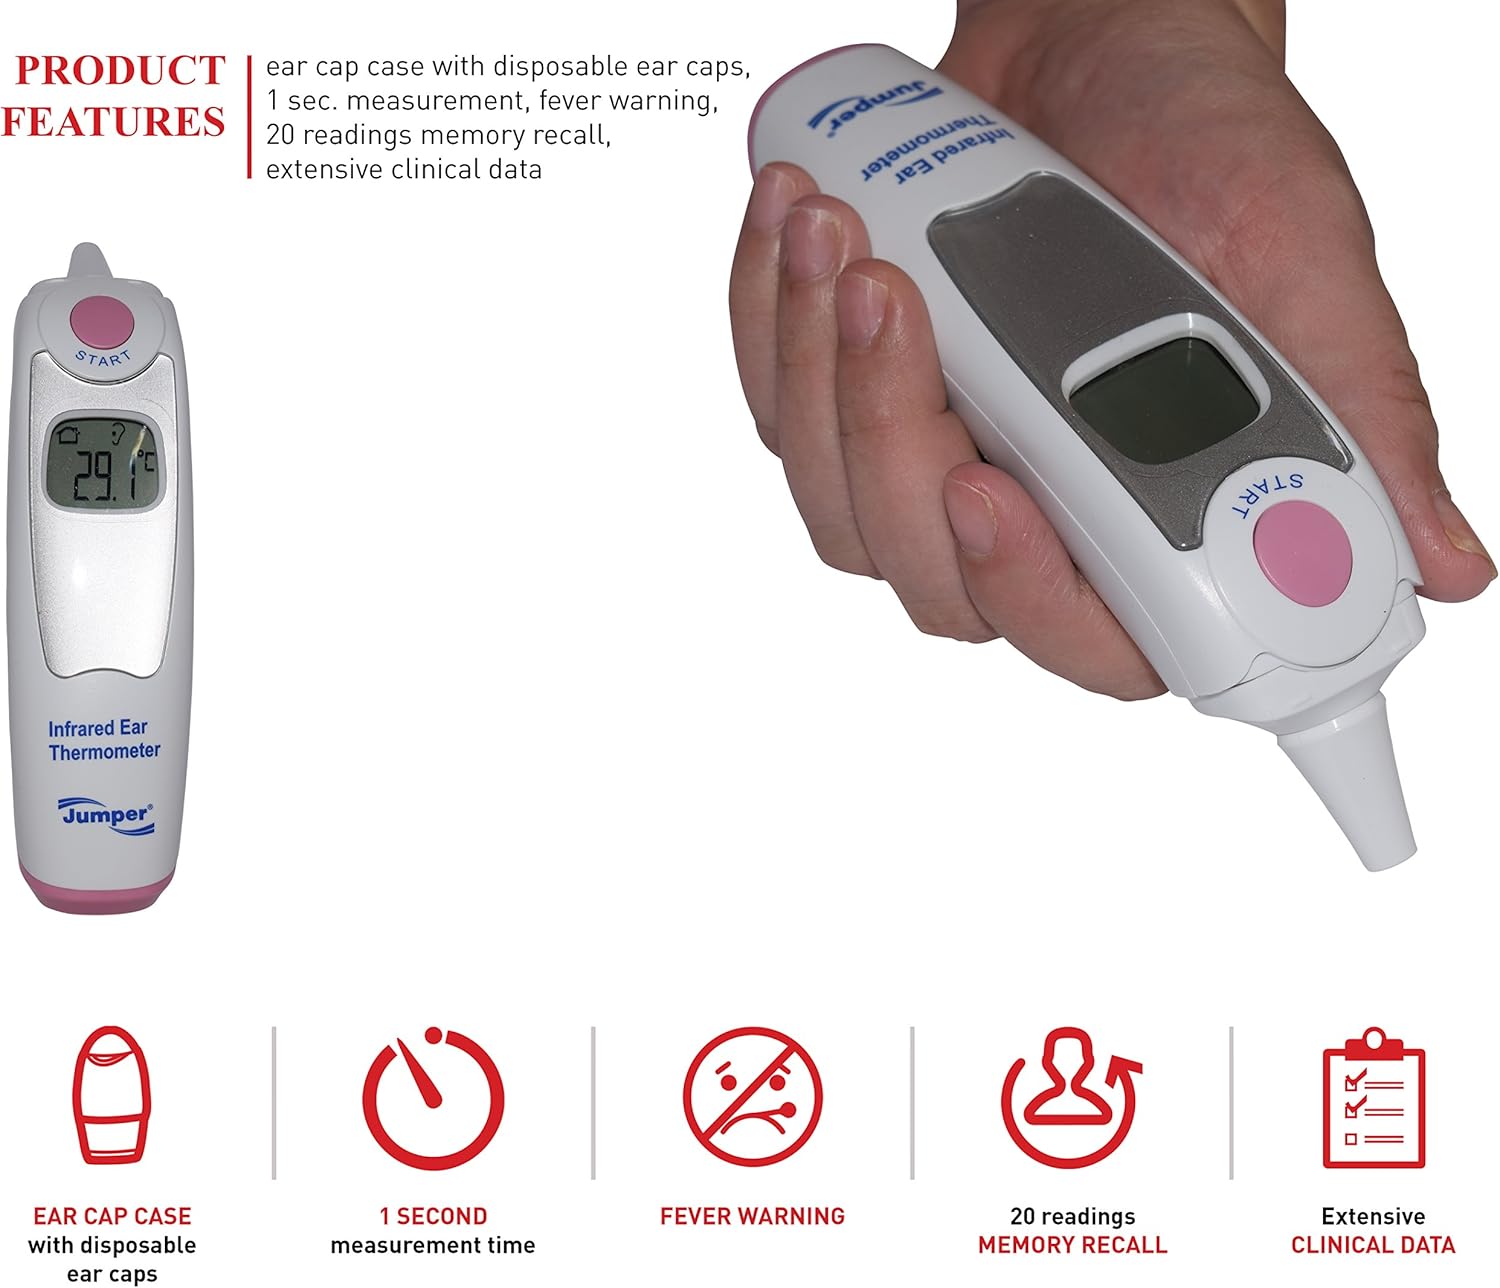
Figure 2.1: The Jumper Medical Infrared Ear Thermometer held in a hand, showcasing its ergonomic shape and the clear LCD display.
3. Get to Know Your Product (Components)

Figure 3.1: Labeled diagram of the JPD-FR301 thermometer components.
- Measuring button: Used to initiate a temperature measurement.
- LCD display: Shows temperature readings, mode indicators, and battery status.
- Sensor: The infrared sensor located at the tip for accurate ear temperature detection.
- Battery cover: Protects the battery compartment.
- Ear cap case: Storage for disposable ear caps.
- Disposable ear caps: Hygienic covers for the sensor.
- Top cover: Part of the ear cap case.
- Rear cover: Part of the ear cap case.
4. Packaging Contents
Upon opening the package, please verify that all items listed below are present and in good condition:
- Jumper Medical Infrared Ear Thermometer unit (JPD-FR301)
- Pouch or storage bag
- Ear cap case with disposable ear caps
- 2 pcs of AAA battery

Figure 4.1: All items included in the product packaging.
5. Setup
5.1 Battery Installation
The thermometer requires 2 AAA batteries for operation. To install or replace batteries:
- Locate the battery cover (4) on the back of the thermometer.
- Slide the battery cover open.
- Insert two AAA batteries, ensuring correct polarity (+ and -) as indicated inside the compartment.
- Close the battery cover securely until it clicks into place.
5.2 Attaching/Using Ear Cap Case
The ear cap case (5) holds disposable ear caps (6) for hygienic use. Always use a new, undamaged ear cap for each measurement.

Figure 5.1: Steps for handling the ear cap case and disposable ear caps.
- To open the ear cap case, gently lift the top cover (7) or slide the rear cover (8).
- Take out a disposable ear cap.
- Carefully place the ear cap onto the sensor (3) of the thermometer until it is securely fitted.
- After use, dispose of the used ear cap properly.
6. Operating Instructions
6.1 Taking a Measurement
- Ensure a new, clean disposable ear cap is securely attached to the sensor.
- Press the "START" (Measuring button 1) to turn on the thermometer. The display will show the last measurement or a standby indicator.
- Gently insert the sensor tip with the ear cap into the ear canal. For accurate readings, ensure the tip is pointing towards the eardrum.
- Press the "START" button again to initiate the measurement.
- The measurement will be completed in approximately 1 second, and the result will be displayed on the LCD (2).
- If the temperature is elevated (fever alarm), an audible alert will sound.
- The thermometer will automatically store the reading in its memory.
- Remove the thermometer from the ear and dispose of the used ear cap.
6.2 Switching Between °C and °F
To switch the temperature unit between Celsius (°C) and Fahrenheit (°F):
- With the thermometer turned off, press and hold the "START" button for approximately 5 seconds until the unit changes on the display.
- Release the button. The new unit will be set for future measurements.
6.3 Memory Recall
The thermometer stores the last 20 measurement readings. To recall them:
- Turn on the thermometer.
- Briefly press the "START" button repeatedly to cycle through the stored readings. Each press will display the next previous reading.
7. Maintenance
7.1 Cleaning the Thermometer
- Always clean the thermometer after each use, especially the sensor area.
- Use a soft cloth lightly dampened with 70% isopropyl alcohol to wipe the sensor and the body of the thermometer.
- Do not immerse the thermometer in water or any other liquid.
- Allow the thermometer to air dry completely before storing.
- Do not use abrasive cleaners or harsh chemicals.
7.2 Storage
Store the thermometer in its original pouch or the ear cap case in a cool, dry place, away from direct sunlight and extreme temperatures.
If the thermometer will not be used for an extended period, remove the batteries to prevent leakage and damage.
7.3 Operating and Storage Conditions

Figure 7.1: Recommended environmental conditions for operation and storage.
Operating Environment Conditions:
- Temperature: +10°C ~ +40°C (50°F ~ 104°F)
- Atmospheric Pressure: 86kPa ~ 106kPa
- Humidity: 15-85% RH, non-condensing
Storage & Transportation Conditions:
- Temperature: -10°C ~ +50°C (14°F ~ 122°F)
- Atmospheric Pressure: 50kPa ~ 106kPa
- Humidity: <93% RH, non-condensing
8. Troubleshooting
| Problem | Possible Cause | Solution |
|---|---|---|
| Thermometer does not turn on. | Batteries are dead or incorrectly inserted. | Replace batteries with new AAA batteries, ensuring correct polarity. |
| Inaccurate readings. | Used or damaged ear cap; sensor dirty; improper insertion into ear canal; extreme environmental conditions. | Use a new, clean ear cap. Clean the sensor. Ensure correct insertion. Operate within specified temperature and humidity ranges. |
| "Lo" or "Hi" displayed. | Temperature is outside the measurable range. | Ensure the thermometer is used in the correct operating temperature range and the subject's temperature is within human body temperature limits. |
| Fever alarm sounds frequently. | Subject's temperature is consistently above 37.5 °C (99.5 °F). | This indicates an elevated temperature. Consult a medical professional if fever persists. |
9. Specifications
| Feature | Detail |
|---|---|
| Model: | JPD-FR301 |
| Product Type: | Infrared Ear Thermometer |
| Power Source: | 2 x AAA Batteries (Battery-operated) |
| Measurement Time: | 1 second |
| Memory Capacity: | 20 readings |
| Temperature Units: | Celsius (°C) / Fahrenheit (°F) switchable |
| Material: | Plastic |
| Age Range: | Child and Adult |
| UPC: | 635833227234 |
| Certifications: | CE, FDA, ISO 13485 + AC:2012, ISO 10993-1, ISO 10993-10, Norm IEC 60601-1-2, MDD (EU) |
| Packaging Dimensions: | 19.4 x 13.2 x 6.4 cm |
| Weight: | 300 Grams (packaged) |
10. Warranty and Support
For warranty information or technical support, please refer to the warranty card included in your product packaging or contact Jumper Medical customer service directly. Contact details can typically be found on the manufacturer's official website or on the product packaging.
Please have your model number (JPD-FR301) and purchase information ready when contacting support.