Masterbuilt: Crafting quality outdoor cooking experiences since 1973.
1. Important Safety Information
Read all instructions carefully before assembling and operating this propane smoker. Failure to follow these instructions could result in property damage, bodily injury, or death. This appliance is for outdoor use only. Do not use in an enclosed area such as a garage, shed, or other building.
Always operate the smoker on a level, non-combustible surface.
Maintain a minimum distance of 10 feet (3 meters) from any combustible materials.
Keep children and pets away from the smoker at all times.
Do not store a spare LP cylinder under or near this appliance.
Never use charcoal or lighter fluid in the smoker.
Always ensure proper ventilation.
Proposition 65 Warning: This product can expose you to chemicals including carbon monoxide, which is known to the State of California to cause birth defects or other reproductive harm. For more information go to www.P65Warnings.ca.gov.
2. Package Contents
Verify that all components are present before beginning assembly. If any parts are missing or damaged, do not attempt to assemble or operate the smoker. Contact Masterbuilt customer service for assistance.
Smoker Body
Leg Assembly (with folding legs)
Two Chrome-Coated Smoking Racks
Wood Chip Tray
Water Bowl
Removable Grease Tray
Propane Hose and Regulator
Hardware Pack
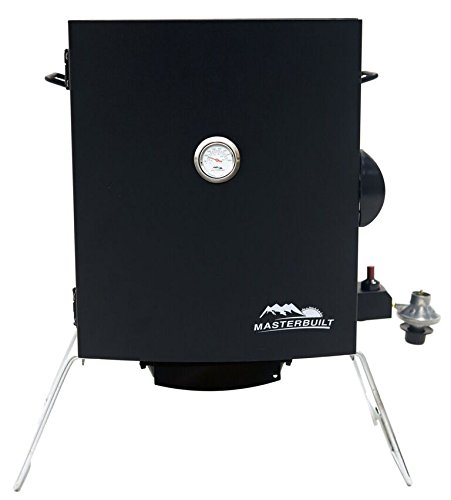
Image: Main components of the Masterbuilt Patio-2-Portable Propane Smoker.
3. Assembly Instructions
Assembly typically requires two people. Ensure all hardware is securely tightened before use.
Attach Legs: Secure the leg assembly to the bottom of the smoker body using the provided hardware. Ensure the folding mechanism operates correctly.
Install Internal Components: Place the grease tray, water bowl, and wood chip tray into their designated positions inside the smoker.
Insert Racks: Slide the two chrome-coated smoking racks onto the support brackets within the smoker.
Connect Propane: Attach the propane hose and regulator to the smoker's gas inlet. Ensure a tight connection.
Leak Test: Before first use, perform a leak test on all gas connections. Apply a soapy water solution to connections; bubbles indicate a leak. Tighten connections or replace parts as necessary.
Image: Fully assembled Masterbuilt propane smoker, ready for use.
4. Operating Instructions
4.1 Pre-Use Checklist
Ensure the smoker is on a stable, non-combustible surface outdoors.
Check that the propane tank is full and securely connected.
Fill the water bowl with water, juice, or other liquids for moisture and flavor.
Place desired wood chips (dry or pre-soaked) into the wood chip tray.
Ensure the grease tray is clean and properly positioned.
4.2 Lighting Instructions
Open the smoker door.
Ensure the burner control knob is in the "OFF" position.
Slowly open the valve on the propane cylinder fully.
Turn the burner control knob to "HIGH".
Press and hold the push-button ignitor. You should hear a clicking sound and see a flame.
If the burner does not light within 5 seconds, turn the control knob to "OFF", wait 5 minutes, and repeat the lighting procedure.
Once lit, close the smoker door.
4.3 Smoking Process
Allow the smoker to preheat to the desired temperature, typically 225-275°F (107-135°C), as indicated by the built-in temperature gauge.
Place food on the chrome-coated smoking racks. Distribute food evenly for consistent cooking.
Monitor internal food temperature with a separate meat thermometer for safety and doneness.
Replenish wood chips as needed to maintain smoke flavor. The wood chip tray slides out for easy access.
Check water bowl levels periodically and refill to maintain moisture.
Image: Various foods being smoked on the racks inside the Masterbuilt smoker.
4.4 Temperature and Smoke Control
The regulator knob adjusts the flame for desired temperature. Turn clockwise to decrease heat, counter-clockwise to increase.
The air damper on top of the smoker allows for control of moisture, temperature, and smoke intensity. Open to release heat/smoke, close to retain.
Wind conditions can affect temperature stability. Position the smoker to minimize direct wind exposure.
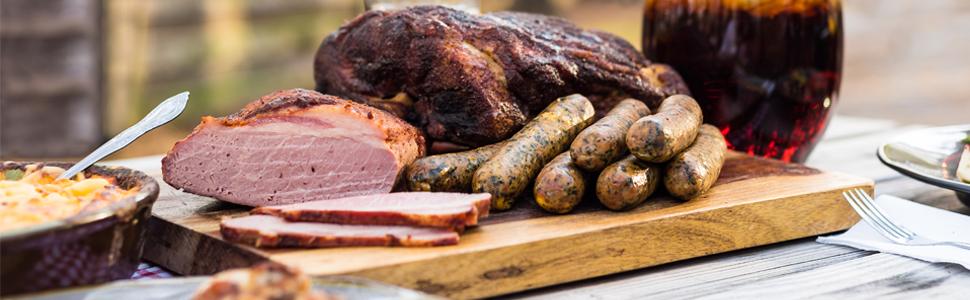
Image: Example of various smoked foods prepared using the Masterbuilt smoker.
5. Maintenance and Cleaning
Regular cleaning and maintenance ensure optimal performance and longevity of your smoker.
After Each Use: Allow the smoker to cool completely. Remove and clean the water bowl, wood chip tray, and grease tray. These can be washed with warm, soapy water.
Smoking Racks: Clean chrome-coated racks with a grill brush or warm, soapy water.
Interior: Wipe down the interior surfaces with a damp cloth. Avoid abrasive cleaners.
Exterior: Clean the exterior with mild soap and water.
Grease Management: The removable grease tray catches food drippings, making cleanup easier. Empty and clean regularly to prevent flare-ups.
6. Storage
Proper storage protects your smoker from the elements and extends its lifespan.
Ensure the smoker is completely clean and dry before storing.
Disconnect the propane cylinder and store it in a well-ventilated area, away from direct sunlight and heat sources.
Fold the legs under the smoker for compact transport and storage.
Store the smoker in a dry, protected location. Using a Masterbuilt smoker cover (sold separately) is recommended for outdoor storage.
Image: Masterbuilt smoker with a protective cover for storage.
7. Troubleshooting
Problem
Possible Cause
Solution
Burner does not light after pressing ignitor button.
Low or no gas flow; Vapor lock at coupling nut to LP cylinder.
Turn burner control and gas cylinder valve knob to OFF. Disconnect regulator from cylinder to relieve vapor lock. Reconnect and slightly open the gas cylinder valve slowly, then open further by turning one full turn. Turn the burner control knob to HIGH and light with ignitor.
Temperature too low.
Insufficient gas flow; Air damper closed too much; Cold ambient temperature; Wind.
Increase gas flow with regulator knob. Open air damper slightly. Allow more preheat time. Position smoker away from direct wind or use a wind block.
Excessive smoke or flare-ups.
Too many wood chips; Grease accumulation.
Reduce amount of wood chips. Ensure wood chips are not flaming. Clean grease tray regularly.
8. Specifications
Feature
Detail
Brand
Masterbuilt
Model Name
Patio-2-Portable Propane Smoker
Model Number
20050116
Power Source
Propane (Liquefied Petroleum Gas)
Color
Black
Outer Material
Stainless Steel
Item Weight
22.2 Pounds (10.07 kg)
Product Dimensions (L x W x H)
15.91 x 23.62 x 23.15 inches (40.4 x 60.0 x 58.8 cm)
BTU Burner
5,000 BTU Stainless Steel Burner
Racks
Two Chrome-Coated Smoking Racks
Ignition
Push-button ignition
UPC
094428270909
9. Warranty and Support
Masterbuilt products are designed for quality and durability. For specific warranty information, please refer to the warranty card included with your product or visit the official Masterbuilt website.
If you require technical assistance, have questions about assembly, operation, or need to order replacement parts, please contact Masterbuilt Customer Service:
Phone: Refer to the Masterbuilt website for current contact numbers.
Ask a question about this manual
Ask about setup, troubleshooting, compatibility, parts, safety, or missing instructions. Manuals+ will review the question and use this page’s manual context to help answer it.