
1. Introduction
Thank you for choosing the Cinolink Dual Bay USB 3.0 HDD/SSD Docking Station, Model HA133. This device is designed to provide a convenient and efficient solution for accessing, backing up, and cloning 2.5-inch and 3.5-inch SATA hard disk drives (HDDs) and solid-state drives (SSDs). It supports both direct connection to a computer via USB 3.0 for data transfer and an independent offline cloning function, allowing you to duplicate drives without a computer.

Figure 1: Cinolink Dual Bay USB 3.0 HDD/SSD Docking Station
2. Product Features
- Dual Bay Design: Supports two 2.5-inch or 3.5-inch SATA I/II/III HDDs/SSDs simultaneously, up to 12TB per drive.
- Offline Clone Function: Duplicate hard drives without connecting to a computer.
- SuperSpeed USB 3.0: Equipped with USB 3.0 for high-speed data transfer, supporting SATA III (6 Gbps) and UASP for optimal performance. Backward compatible with USB 2.0/1.1.
- Universal Compatibility: Compatible with Windows XP/7/8/10, Linux, Mac OS 9.1/10.8.4 and above.
- Stable Power Supply: Includes a highly efficient 12V, 3000mA DC power source for reliable operation.
- Automatic Sleep Mode: Enters sleep mode after 30 minutes of inactivity to conserve energy.
3. Package Contents
Please verify that all items are present in your package:
- Cinolink Dual Bay HDD/SSD Docking Station (Model HA133)
- USB 3.0 Type-A to Type-B Cable
- 12V/3A Power Adapter
- User Manual (this document)

Figure 2: Included components of the Cinolink Docking Station
4. Setup and Installation
4.1 Identifying Components
Familiarize yourself with the docking station's ports and indicators:

Figure 3: Rear panel of the docking station
- START Button: Used for initiating the offline clone function.
- USB 3.0 Port: Connects the docking station to your computer.
- DC Power Input: Connects to the included power adapter.
- ON/OFF Switch: Powers the docking station on or off.
- LED Indicators (Front Panel): Power, Source, Target, and 25%/50%/75%/100% clone progress indicators.
4.2 Inserting Hard Drives/SSDs
The docking station supports both 2.5-inch and 3.5-inch SATA drives. Ensure the docking station is powered off before inserting or removing drives.
- Locate the 'Source' and 'Target' bays on the top of the docking station.
- Align your 2.5-inch or 3.5-inch SATA HDD/SSD with the SATA connector inside the bay.
- Gently push the drive down until it is firmly seated. Do not force the drive.

Figure 4: Inserting a 3.5-inch HDD and a 2.5-inch SSD
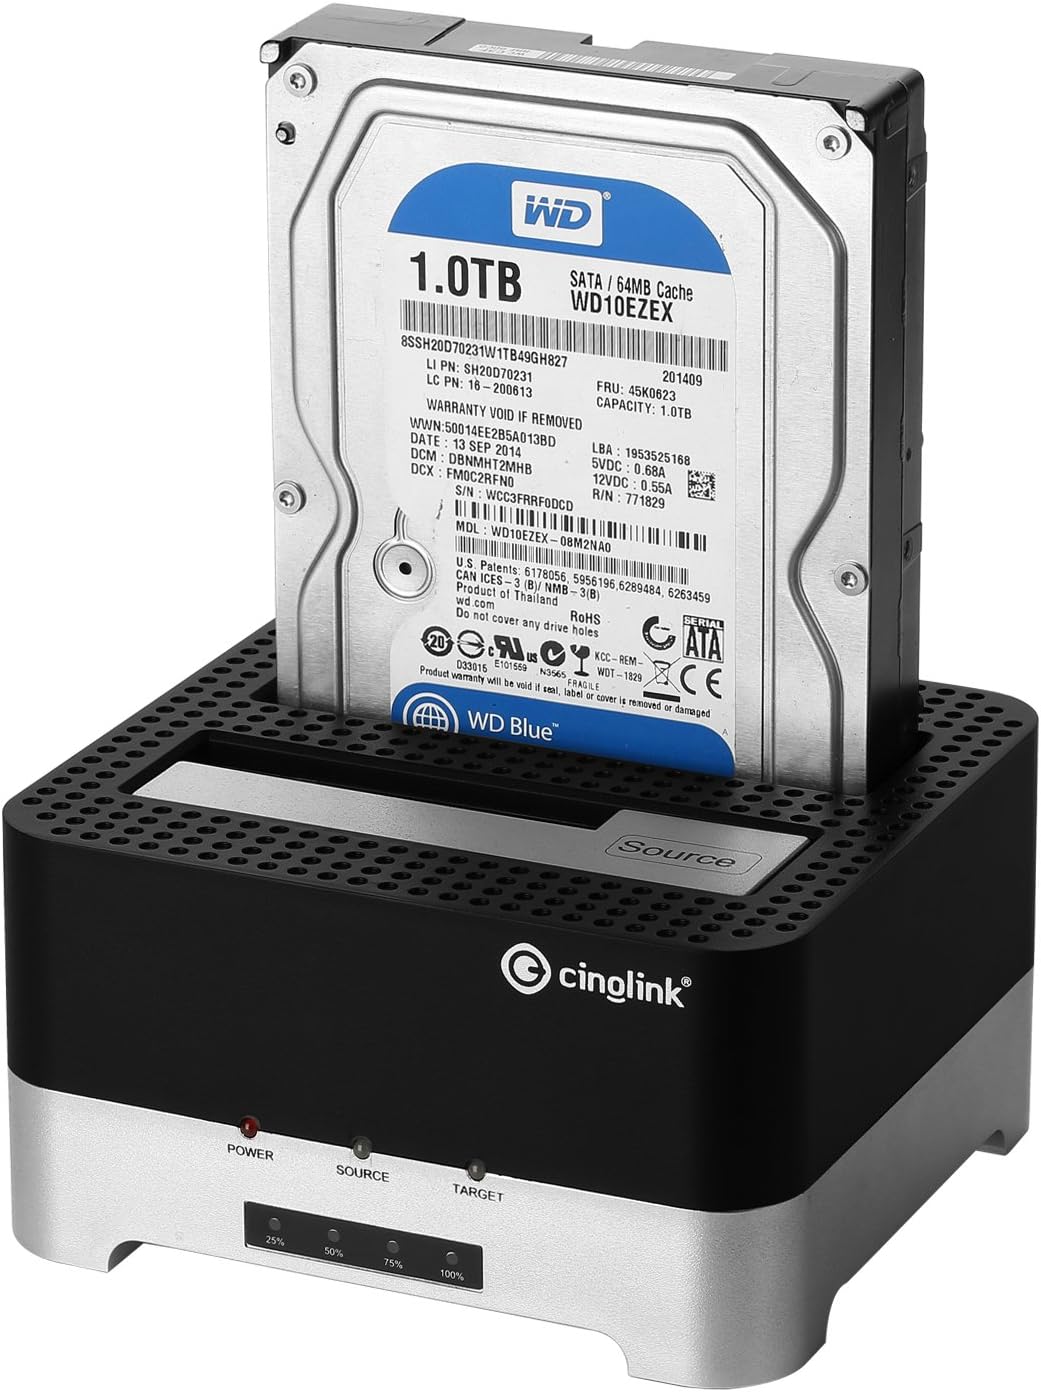
Figure 5: A 3.5-inch HDD correctly inserted into the Source bay
5. Operating Instructions
5.1 Mode 1: Data Transfer (Connected to Computer)
Use this mode to access your hard drives as external storage devices on your computer.
- Ensure the docking station is powered OFF.
- Insert your 2.5-inch or 3.5-inch SATA HDD/SSD into the 'Source' or 'Target' bay (or both).
- Connect the 12V/3A power adapter to the DC power input port on the back of the docking station, then plug it into a wall outlet.
- Connect the USB 3.0 cable from the docking station's USB 3.0 port to an available USB port on your computer.
- Flip the ON/OFF switch on the back of the docking station to the 'ON' position. The 'Power' LED will illuminate.
- Your computer should automatically detect the drives. For new drives, you may need to initialize and format them through your operating system's Disk Management utility before use.

Figure 6: Connecting the docking station to a computer
Important: Always use the 'Safely Remove Hardware' option in your operating system before disconnecting the docking station or removing drives to prevent data loss or corruption.
5.2 Mode 2: Offline Clone Function
The offline clone function allows you to duplicate a source drive to a target drive without a computer connection. This is ideal for system upgrades or data backups.
Critical Precaution: The target drive will be overwritten with all data from the source drive. Ensure the target drive contains no important data or that you have backed it up before proceeding. The target drive must have a capacity equal to or greater than the source drive. If the target drive capacity is smaller, the cloning process will fail.
- Ensure the docking station is powered OFF and the USB cable is DISCONNECTED from the computer. The cloning process must be performed offline.
- Insert the Source drive (the drive you want to copy FROM) into the 'Source' bay.
- Insert the Target drive (the drive you want to copy TO) into the 'Target' bay.
- Connect the 12V/3A power adapter to the DC power input port, then plug it into a wall outlet.
- Flip the ON/OFF switch on the back of the docking station to the 'ON' position. The 'Power' LED will illuminate.
- Press and hold the 'START' button on the back of the docking station for approximately 3 seconds.
- Release the 'START' button, then immediately press it again briefly. The 25% LED indicator will begin to flash, indicating the cloning process has started.
- The 25%, 50%, 75%, and 100% LEDs will sequentially light up and flash as the cloning progresses. When all four LEDs (25%, 50%, 75%, 100%) are solid blue, the cloning process is complete.
- Once cloning is complete, flip the ON/OFF switch to 'OFF' and safely remove the drives.
Video 1: Demonstration of the offline cloning process with the Cinolink Docking Station. This video illustrates how to set up the source and target drives and initiate the cloning sequence.
Note on Cloning: If the target drive's capacity is smaller than the source drive's capacity, the cloning process will not start, and the 100% LED will flash to indicate an error. Ensure the target drive is equal to or larger than the source drive.
6. Maintenance
To ensure the longevity and optimal performance of your Cinolink Docking Station, follow these maintenance guidelines:
- Cleaning: Use a soft, dry cloth to clean the exterior of the docking station. Avoid using liquid cleaners or solvents, as they may damage the finish or internal components.
- Storage: When not in use, store the docking station in a cool, dry place away from direct sunlight and extreme temperatures.
- Handling: Handle the device with care. Avoid dropping it or subjecting it to strong impacts.
- Ventilation: Ensure the ventilation holes on the docking station are not obstructed during operation to prevent overheating.
7. Troubleshooting
If you encounter issues with your Cinolink Docking Station, please refer to the following common problems and solutions:
| Problem | Possible Cause | Solution |
|---|---|---|
| Drive not recognized by computer. |
|
|
| Offline cloning fails or does not start. |
|
|
| Slow data transfer speeds. |
|
|
| Docking station enters sleep mode too quickly. | No activity for 30 minutes. | This is normal behavior. Accessing the drive will wake it up. |
8. Specifications
| Feature | Specification |
|---|---|
| Model Number | HA133 |
| Compatible Devices | 2.5-inch & 3.5-inch SATA I/II/III HDD/SSD |
| Max Supported Capacity | 2 x 12TB (24TB total) |
| Interface | USB 3.0 (backward compatible with USB 2.0/1.1) |
| Data Transfer Rate | Up to 6 Gbps (SATA III) |
| Chipset | ASMedia 1156 |
| Power Supply | DC 12V/3A |
| Operating System Compatibility | Windows XP/7/8/10, Linux, Mac OS 9.1/10.8.4 and above |
| Item Weight | 1.28 pounds (approx. 0.58 kg) |
| Package Dimensions | 7.68 x 5.59 x 3.78 inches (approx. 19.5 x 14.2 x 9.6 cm) |
9. Warranty and Support
Cinolink products are designed for reliability and performance. For warranty information, technical support, or any questions regarding your Cinolink Dual Bay USB 3.0 HDD/SSD Docking Station (Model HA133), please refer to the contact information provided with your purchase or visit the official Cinolink website. Please retain your proof of purchase for warranty claims.