1. Introduction
This manual provides detailed instructions for the safe and effective operation of your SNDWAY SW-T80 Digital Laser Distance Meter. This device is designed for precise measurement of distances, areas, and volumes, and includes advanced functions such as Pythagorean calculations and continuous measurement. Please read this manual thoroughly before using the device.

Figure 1: Front view of the SNDWAY SW-T80 Digital Laser Distance Meter, showing the display, control buttons, and laser aperture.
2. Safety Instructions
To ensure safe operation and prevent damage to the device or injury, please observe the following safety precautions:
- Laser Radiation: This device emits Class II laser radiation. Do not stare directly into the laser beam or direct it at other people or reflective surfaces.
- Eye Protection: Avoid direct eye exposure to the laser beam.
- Children: Keep the device out of reach of children.
- Operating Environment: Do not operate the device in explosive environments or near flammable materials.
- Modifications: Do not attempt to modify or disassemble the device. Repairs should only be performed by authorized service personnel.
- Water and Dust: The device has an IP54 rating for dust and splash protection. However, avoid submerging it in water or exposing it to heavy rain.
- Batteries: Use only specified battery types (2 x 1.5V AAA). Ensure correct polarity when installing. Remove batteries if the device will not be used for an extended period.
3. Package Contents
Verify that all items are present in the package:
- 1 x SNDWAY SW-T80 Digital Laser Distance Meter (80m range)
- 1 x Carrying Pouch
- 1 x Hanging Rope (Wrist Strap)
- 1 x User Manual
- Note: 2 x 1.5V AAA batteries are not included due to shipping regulations.
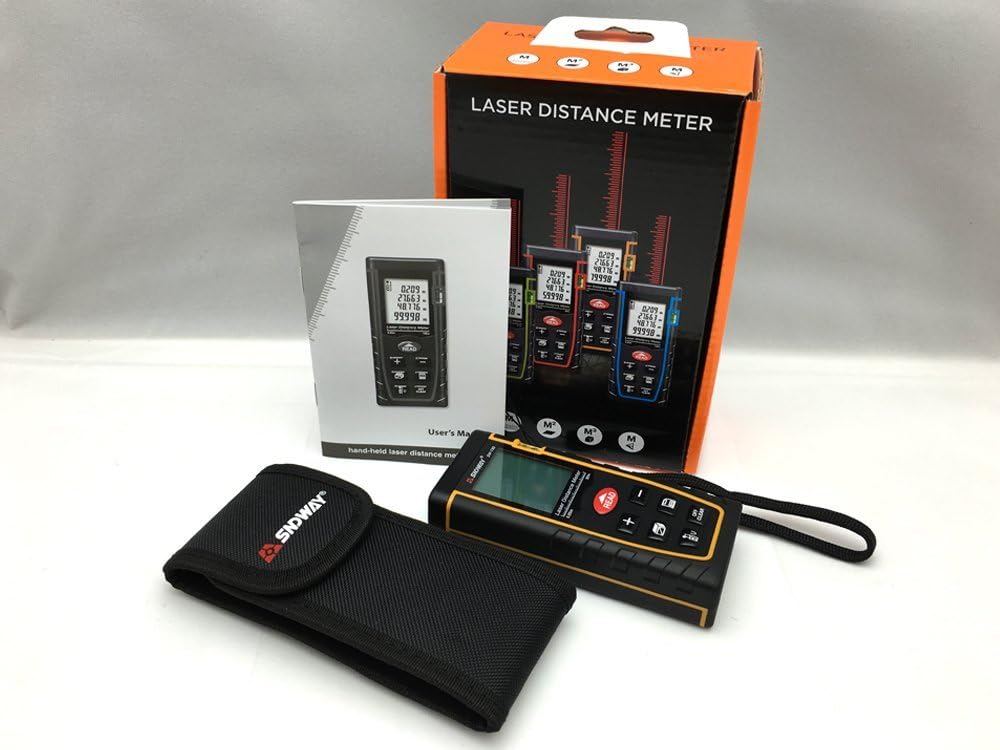
Figure 2: Contents of the SNDWAY SW-T80 package, including the device, carrying pouch, wrist strap, and user manual.
4. Device Overview
4.1. Physical Components

Figure 3: Angled view of the SNDWAY SW-T80, highlighting its compact design and button layout.
- Laser Aperture: Located at the top of the device, emits the laser beam.
- Receiver Lens: Located near the laser aperture, receives the reflected laser beam.
- LCD Display: Large, backlit screen showing measurement data, units, battery status, and function indicators.
- Control Buttons: Various buttons for power, measurement, function selection, and data management.
- Bubble Level: Integrated bubble level for horizontal alignment.
- Battery Compartment: Located on the rear of the device.
4.2. Display Indicators
The LCD display provides various indicators:
- Measurement Value: Displays the current measurement.
- Unit Indicator: Shows selected unit (m, in, ft).
- Battery Status: Indicates remaining battery life.
- Laser On/Off: Icon indicating laser status.
- Reference Point: Indicates whether measurements are taken from the front or rear of the device.
- Function Mode: Icons for single measurement, continuous measurement, area, volume, and Pythagorean modes.
- Data Storage: Indicates when data is stored or recalled.

Figure 4: Close-up of the SW-T80 display, illustrating the bubble level, and icons for area, volume, and Pythagorean measurement modes.
5. Setup
5.1. Battery Installation
- Locate the battery compartment cover on the rear of the device.
- Slide the cover downwards to open the compartment.
- Insert two (2) 1.5V AAA batteries, ensuring correct polarity (+/-) as indicated inside the compartment.
- Close the battery compartment cover by sliding it upwards until it clicks into place.
Important: Remove batteries if the device will not be used for an extended period to prevent leakage and damage.

Figure 5: Rear view of the SNDWAY SW-T80 with the battery compartment open, showing where to insert two AAA batteries.
6. Basic Operation
6.1. Power On/Off
- Power On: Press the READ button once to turn on the device. The laser will activate.
- Power Off: Press and hold the OFF/CLEAR button for approximately 2 seconds to turn off the device. The device will automatically power off after 150 seconds of inactivity, and the laser will turn off after 20 seconds of inactivity.
6.2. Single Distance Measurement
- Turn on the device.
- Aim the laser pointer at the target point.
- Press the READ button once. The measurement will be displayed on the screen.
6.3. Continuous Measurement (Tracking)
- Turn on the device.
- Press and hold the READ button for approximately 2 seconds. The device will enter continuous measurement mode, displaying real-time distance updates.
- The display will show the maximum and minimum measured distances during the continuous measurement.
- Press the READ button again to stop continuous measurement.
6.4. Changing Measurement Units
To cycle through measurement units (meters, inches, feet), press the UNIT button (often labeled with 'U' or 'UNIT' icon).
6.5. Changing Measurement Reference Point
The device can measure from its front or rear edge. Press the REFERENCE button (often labeled with an icon showing a measurement line from front/rear) to switch between these reference points. An icon on the display will indicate the current reference point.
7. Advanced Functions
7.1. Area Measurement
- Press the FUNCTION button (often labeled with a square icon) until the area measurement icon appears on the display.
- Measure the first side (length) by pressing READ.
- Measure the second side (width) by pressing READ again.
- The device will automatically calculate and display the area.
7.2. Volume Measurement
- Press the FUNCTION button until the volume measurement icon (cube) appears.
- Measure the length by pressing READ.
- Measure the width by pressing READ.
- Measure the height by pressing READ.
- The device will automatically calculate and display the volume.
7.3. Pythagorean Measurement (Indirect Measurement)
This mode allows indirect measurement of heights or distances using the Pythagorean theorem.
- Press the FUNCTION button until the Pythagorean measurement icon (triangle) appears. There might be different Pythagorean modes (e.g., two-point or three-point). Select the appropriate mode.
- Follow the on-screen prompts or diagram to measure the required sides (hypotenuse, base). Ensure the device remains stationary for each measurement.
- The device will calculate and display the unknown side.
7.4. Addition and Subtraction of Measurements
After a measurement is taken, you can add or subtract subsequent measurements:
- Perform a measurement.
- Press the + button to add the next measurement, or the - button to subtract it.
- Perform the next measurement by pressing READ. The result will be added or subtracted from the previous total.
- Repeat as needed.
8. Data Management
8.1. Storing Data
After a measurement is displayed, press the SAVE button (often labeled with a memory icon) to store the value. The device typically has a limited memory capacity for storing multiple measurements.
8.2. Recalling Data
Press the RECALL button (often labeled with a memory icon or arrow) to view previously stored measurements. Repeated presses will cycle through the stored values.
8.3. Clearing Data
To clear the current measurement from the display, press the OFF/CLEAR button once. To clear all stored data, refer to the device's specific instructions, as this may involve holding a button or a menu option.
9. Maintenance
- Cleaning: Use a soft, damp cloth to clean the device. Do not use abrasive cleaners or solvents. Clean the laser aperture and receiver lens with a soft, lint-free cloth.
- Storage: Store the device in its carrying pouch in a cool, dry place when not in use. Avoid extreme temperatures and direct sunlight.
- Batteries: Remove batteries if the device is not used for extended periods to prevent corrosion.
- Calibration: The device is factory calibrated. If you suspect accuracy issues, contact customer support.
10. Troubleshooting
| Problem | Possible Cause | Solution |
|---|---|---|
| Device does not power on. | Low or dead batteries; incorrect battery installation. | Replace batteries; ensure correct polarity. |
| Inaccurate measurements. | Unstable surface; laser beam obstructed; target surface too reflective/absorbent; incorrect reference point. | Ensure stable measurement; clear obstructions; use a reflective target plate if needed; check reference point setting. |
| "Error" message on display. | Measurement out of range; strong light interference; internal error. | Ensure target is within range (0.05-80m); avoid strong light; restart device. If persistent, contact support. |
| Laser not visible. | Bright ambient light; laser off. | Use in lower light conditions; ensure device is powered on and laser is active. |
11. Specifications
| Measurement Range | 0.05 to 80 meters |
| Measurement Accuracy | ±2 mm |
| Laser Class | Class II |
| Maximum Laser Output | <1 MW |
| Dust & Splash Protection | IP54 |
| Automatic Laser Shut-off | 20 seconds |
| Automatic Device Shut-off | 150 seconds |
| Operating Temperature | 0 °C to 40 °C (32 °F to 104 °F) |
| Storage Temperature | -20 °C to 60 °C (-4 °F to 140 °F) |
| Power Supply | 2 x 1.5V AAA batteries (not included) |
| Dimensions | 112 x 50 x 25 mm |
| Weight | Approx. 250 g |
| Material | Plastic |
| Color | Black |
| UPC | 714532989770 |
12. Warranty and Support
Warranty information for the SNDWAY SW-T80 Digital Laser Distance Meter is typically provided at the point of purchase or included with the product packaging. Please retain your proof of purchase for warranty claims.
For technical support, troubleshooting assistance beyond this manual, or warranty inquiries, please contact SNDWAY customer service through their official website or the retailer from whom you purchased the product.