1. Introduction
This manual provides essential information for the safe and effective use of your Technical Precision Replacement Light Bulb, designed as a compatible substitute for the REFLECTA 3002 model. Please read these instructions carefully before installation and retain them for future reference.
2. Important Safety Information
WARNING: Risk of electric shock or burns. Always disconnect power before installation or removal.
- Ensure the power supply is turned off at the circuit breaker or fuse box before handling the bulb.
- Allow the old bulb to cool completely before removal to prevent burns.
- Avoid touching the glass part of the new bulb directly with bare hands. Oils from your skin can create hot spots, reducing bulb life. Use a clean cloth or gloves.
- Do not exceed the maximum wattage specified for your fixture. This bulb is rated for 300 Watts.
- Dispose of old bulbs according to local regulations.
3. Installation
This replacement bulb is designed for fixtures compatible with the REFLECTA 3002 light bulb. Ensure your fixture is suitable for a 120V, 300W bulb.
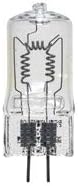
Image: A clear glass halogen-style light bulb with two coiled filaments and two pin-like electrical contacts at the base.
Installation Steps:
- Power Off: Turn off the power to the light fixture at the main switch or circuit breaker.
- Cool Down: Allow the existing bulb to cool down completely if it was recently in use.
- Remove Old Bulb: Carefully remove the old bulb from the fixture. Depending on the fixture type, this may involve gently pulling it straight out or twisting it.
- Handle New Bulb: Using a clean cloth or gloves, carefully remove the new Technical Precision replacement bulb from its packaging. Avoid touching the glass envelope directly.
- Insert New Bulb: Align the pins of the new bulb with the sockets in the fixture. Gently push or twist the bulb into place until it is securely seated. Do not force it.
- Restore Power: Once the bulb is securely installed, restore power to the fixture.
- Test: Turn on the light switch to confirm the bulb is working correctly.
4. Operation
Once installed, the light bulb operates by simply turning on the power switch connected to the fixture. Turn the switch off to extinguish the light.
5. Maintenance
- Cleaning: If the bulb's glass becomes dirty, ensure the power is off and the bulb is cool. Gently wipe it with a clean, dry, lint-free cloth. Do not use liquid cleaners.
- Handling: Always handle the bulb by its base or with a cloth/gloves to avoid transferring skin oils to the glass.
- Replacement: Replace the bulb when it burns out. Follow the installation steps outlined above.
6. Troubleshooting
| Problem | Possible Cause | Solution |
|---|---|---|
| Bulb does not light up. | No power to the fixture. | Check the light switch, circuit breaker, or fuse. |
| Bulb does not light up. | Bulb not properly seated. | Turn off power, allow to cool, then re-seat the bulb firmly. |
| Bulb does not light up. | Bulb is faulty or has reached end of life. | Replace the bulb with a new one. |
| Bulb flickers. | Loose connection. | Turn off power, allow to cool, then re-seat the bulb. Check fixture wiring if issue persists (consult a qualified electrician). |
7. Specifications
- Product Type: Replacement Light Bulb
- Brand: Technical Precision
- Replacement For: REFLECTA 3002
- Voltage: 120 Volts
- Wattage: 300 Watts
- Units Per Sale: 1
- Manufacturer Reference: 3002-AZ-4QLW-9
8. Disposal
Please dispose of the old bulb responsibly and in accordance with local environmental regulations. Many communities have recycling programs for light bulbs. Do not dispose of bulbs in general household waste if specific recycling is required in your area.
9. Warranty and Support
For information regarding warranty, returns, or technical support, please refer to the retailer or the Technical Precision website where the product was purchased. Keep your purchase receipt as proof of purchase.