1. Introduction
This manual provides instructions for the Philips AJT5300W/12 Bluetooth Digital FM Clock Radio. This device combines a digital FM tuner, a clock with dual alarms, Bluetooth audio streaming, a 3.5mm audio input, and a convenient USB charging port for mobile devices. Please read these instructions carefully to ensure proper use and to maximize the product's performance.
2. Safety Information
Please observe the following safety precautions:
- Do not expose the device to rain or moisture.
- Do not place any sources of danger on the device (e.g., liquid-filled objects, lit candles).
- Ensure adequate ventilation around the device.
- Only use attachments/accessories specified by the manufacturer.
- Refer all servicing to qualified service personnel.
3. Package Contents
Verify that your package contains the following items:
- Philips AJT5300W/12 Clock Radio
- Quick Start Guide
- Warranty Card
4. Product Overview
Front View

This image displays the front of the Philips AJT5300W/12 clock radio, highlighting its large digital time display and the integrated speaker grille on the right side.
Top and Angled View

An angled view of the clock radio, illustrating the top-mounted control buttons and the digital display. The top also features a slot for device placement.
Rear View with USB Charging

This image shows the rear of the clock radio, detailing the USB charging port, 3.5mm audio input, and the power input. A smartphone is shown connected for charging.
Device Docked for Playback/Charging
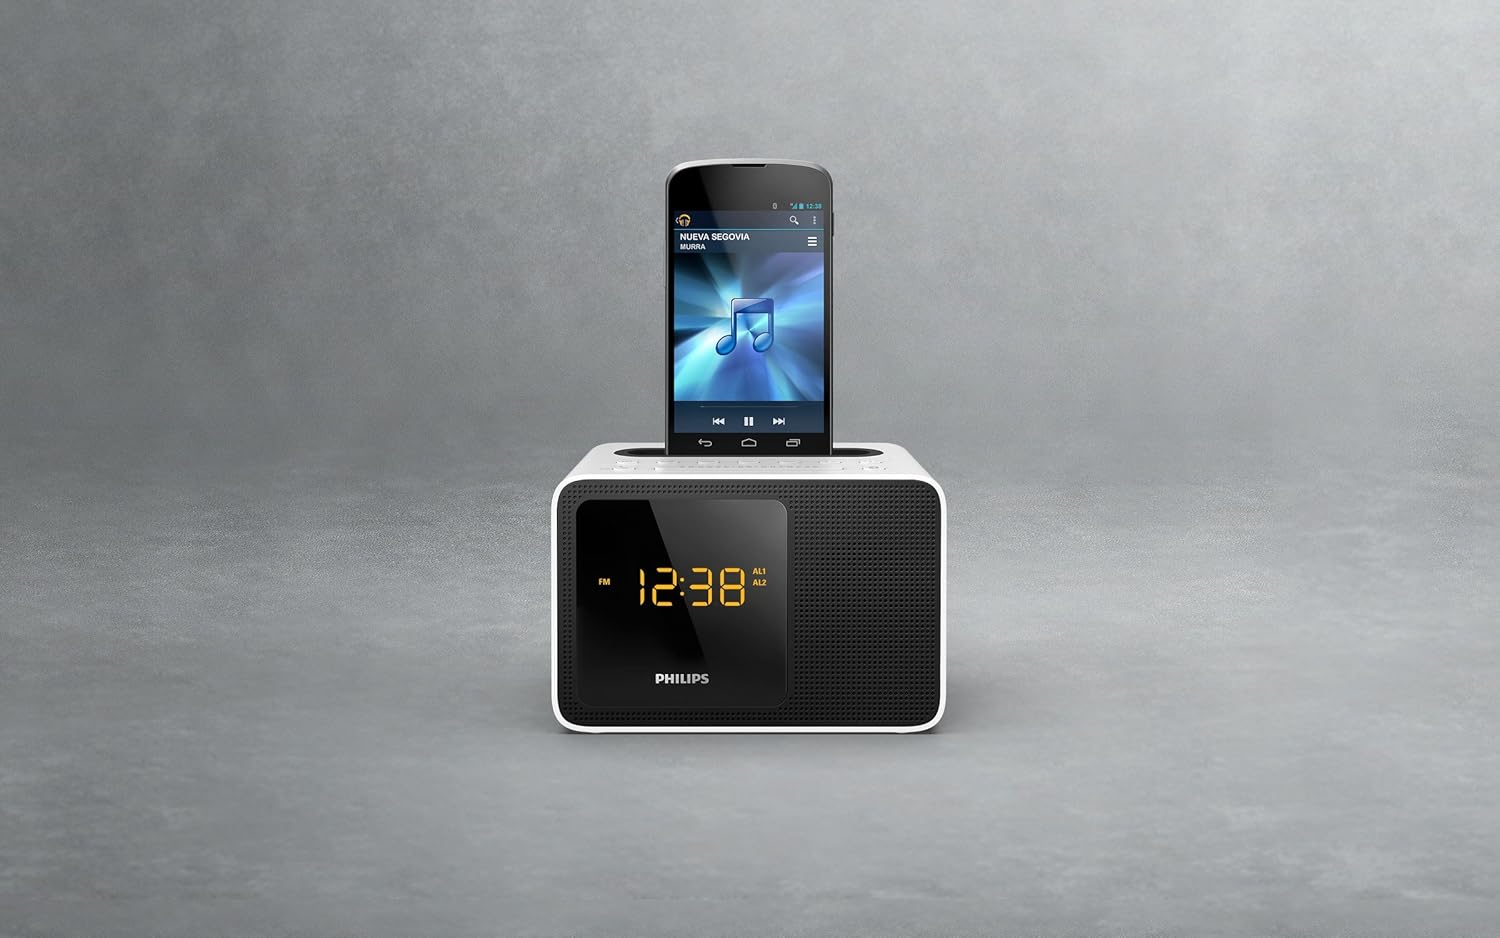
The clock radio with a smartphone placed in the top slot, demonstrating its use as a charging station and for audio playback via Bluetooth or AUX.
5. Setup
5.1 Power Connection
- Connect the AC power adapter to the DC IN socket on the back of the clock radio.
- Plug the other end of the power adapter into a wall outlet.
- For time backup during power outages, insert 1 AA battery (not included) into the battery compartment.
5.2 Antenna Setup
Extend the FM antenna wire fully for optimal radio reception. Adjust its position to improve signal quality if needed.
5.3 Setting the Clock
- In standby mode, press and hold the 'TIME SET' button. The hour digits will flash.
- Press the 'HOUR' or 'MINUTE' buttons to adjust the time.
- Press 'TIME SET' again to confirm.
6. Operating Instructions
6.1 FM Radio
- Press the 'FM' button to switch to FM radio mode.
- Press and hold the 'TUNE +' or 'TUNE -' buttons to automatically search for the next available station.
- Press 'TUNE +' or 'TUNE -' briefly to manually tune the frequency.
- To save a preset station, press and hold a 'PRESET' button (e.g., P1, P2). The preset number will flash. Press the 'PRESET' button again to confirm.
6.2 Bluetooth Audio Streaming
The clock radio can function as a wireless speaker, streaming music from any compatible Bluetooth device.
- Press the 'SOURCE' button repeatedly until 'BT' appears on the display.
- On your Bluetooth device, enable Bluetooth and search for 'Philips AJT5300W'.
- Select the device to pair. Once connected, you can stream audio.
6.3 Setting Alarms
The device features two independent alarms (AL1, AL2).
- Press and hold the 'ALARM 1' or 'ALARM 2' button. The hour digits will flash.
- Press 'HOUR' or 'MINUTE' to set the alarm time.
- Press the 'ALARM' button again to select the alarm source (Buzzer, FM Radio, Bluetooth).
- Press the 'ALARM' button one more time to confirm.
- To activate/deactivate an alarm, press the corresponding 'ALARM' button briefly. An alarm icon will appear/disappear on the display.
6.4 Sleep Timer
The sleep timer allows the radio to automatically turn off after a set duration.
- While the radio is playing, press the 'SLEEP' button repeatedly to cycle through available sleep times (e.g., 120, 90, 60, 30, 15 minutes, OFF).
- The radio will play for the selected duration and then turn off automatically.
6.5 Audio Input (AUX)
Connect external audio devices via the 3.5mm audio input.
- Connect a 3.5mm audio cable from your external device's headphone jack to the 'AUDIO IN' port on the back of the clock radio.
- Press the 'SOURCE' button repeatedly until 'AUX' appears on the display.
- Play audio from your connected device.
6.6 USB Charging
Charge your mobile devices using the integrated USB port.
- Connect your mobile device's USB charging cable to the USB port on the back of the clock radio.
- Place your device in the top slot for convenience.
- Charging will begin automatically.
6.7 Display Brightness
Adjust the display brightness to your preference.
- Press the 'SNOOZE/BRIGHTNESS' button briefly to cycle through three levels of display brightness.
7. Maintenance
To maintain your clock radio in optimal condition:
- Clean the device with a soft, dry cloth. Do not use abrasive cleaners or solvents.
- Keep the device away from direct sunlight, high temperatures, and dusty environments.
8. Troubleshooting
| Problem | Possible Cause | Solution |
|---|---|---|
| No power | Power adapter not connected or faulty outlet. | Ensure the power adapter is securely connected and the outlet is functional. |
| Poor FM reception | Antenna not fully extended or positioned incorrectly. | Extend the FM antenna fully and adjust its position for better signal. |
| Bluetooth pairing fails | Device is out of range or not in pairing mode. | Ensure the clock radio is in Bluetooth mode and your device is within range (approx. 10 meters). Try restarting both devices. |
| Alarm does not sound | Alarm is not activated or volume is too low. | Check if the alarm icon is displayed. Increase the volume. |
9. Specifications
- Model Number: AJT5300W/12
- Brand: Philips Audio
- Dimensions (W x H x D): 18.2 x 10 x 11.1 cm
- Weight: 485 g
- Color: Black and White
- Display Type: Digital
- Special Features: Bluetooth docking, Digital FM Tuner, 3.5mm Audio Input, USB Charging, Sleep Timer
- Power Source: AC, USB
- Battery for Backup: 1 AA battery (not included)
10. Warranty and Support
For warranty information and customer support, please refer to the warranty card included in your package or visit the official Philips support website. Keep your proof of purchase for any warranty claims.


