Introduction
This manual provides detailed instructions for the operation and maintenance of your Savetek Mini Clip Voice Activated Digital Audio Voice Recorder, Model GS-R22. Please read this guide thoroughly to ensure proper use and to maximize the device's functionality. This device features 16GB of storage, voice-activated recording, and MP3 playback capabilities.
Package Contents
Verify that all items listed below are included in your package:
- 1 x Savetek 16GB Clip Digital Voice Recorder
- 1 x Mini USB Data Cable
- 1 x USB Data Cable (Standard USB to 3.5mm audio jack)
- 1 x Instructions Manual
- 1 x Magnetic Adsorption Plug
- 1 x Earphones
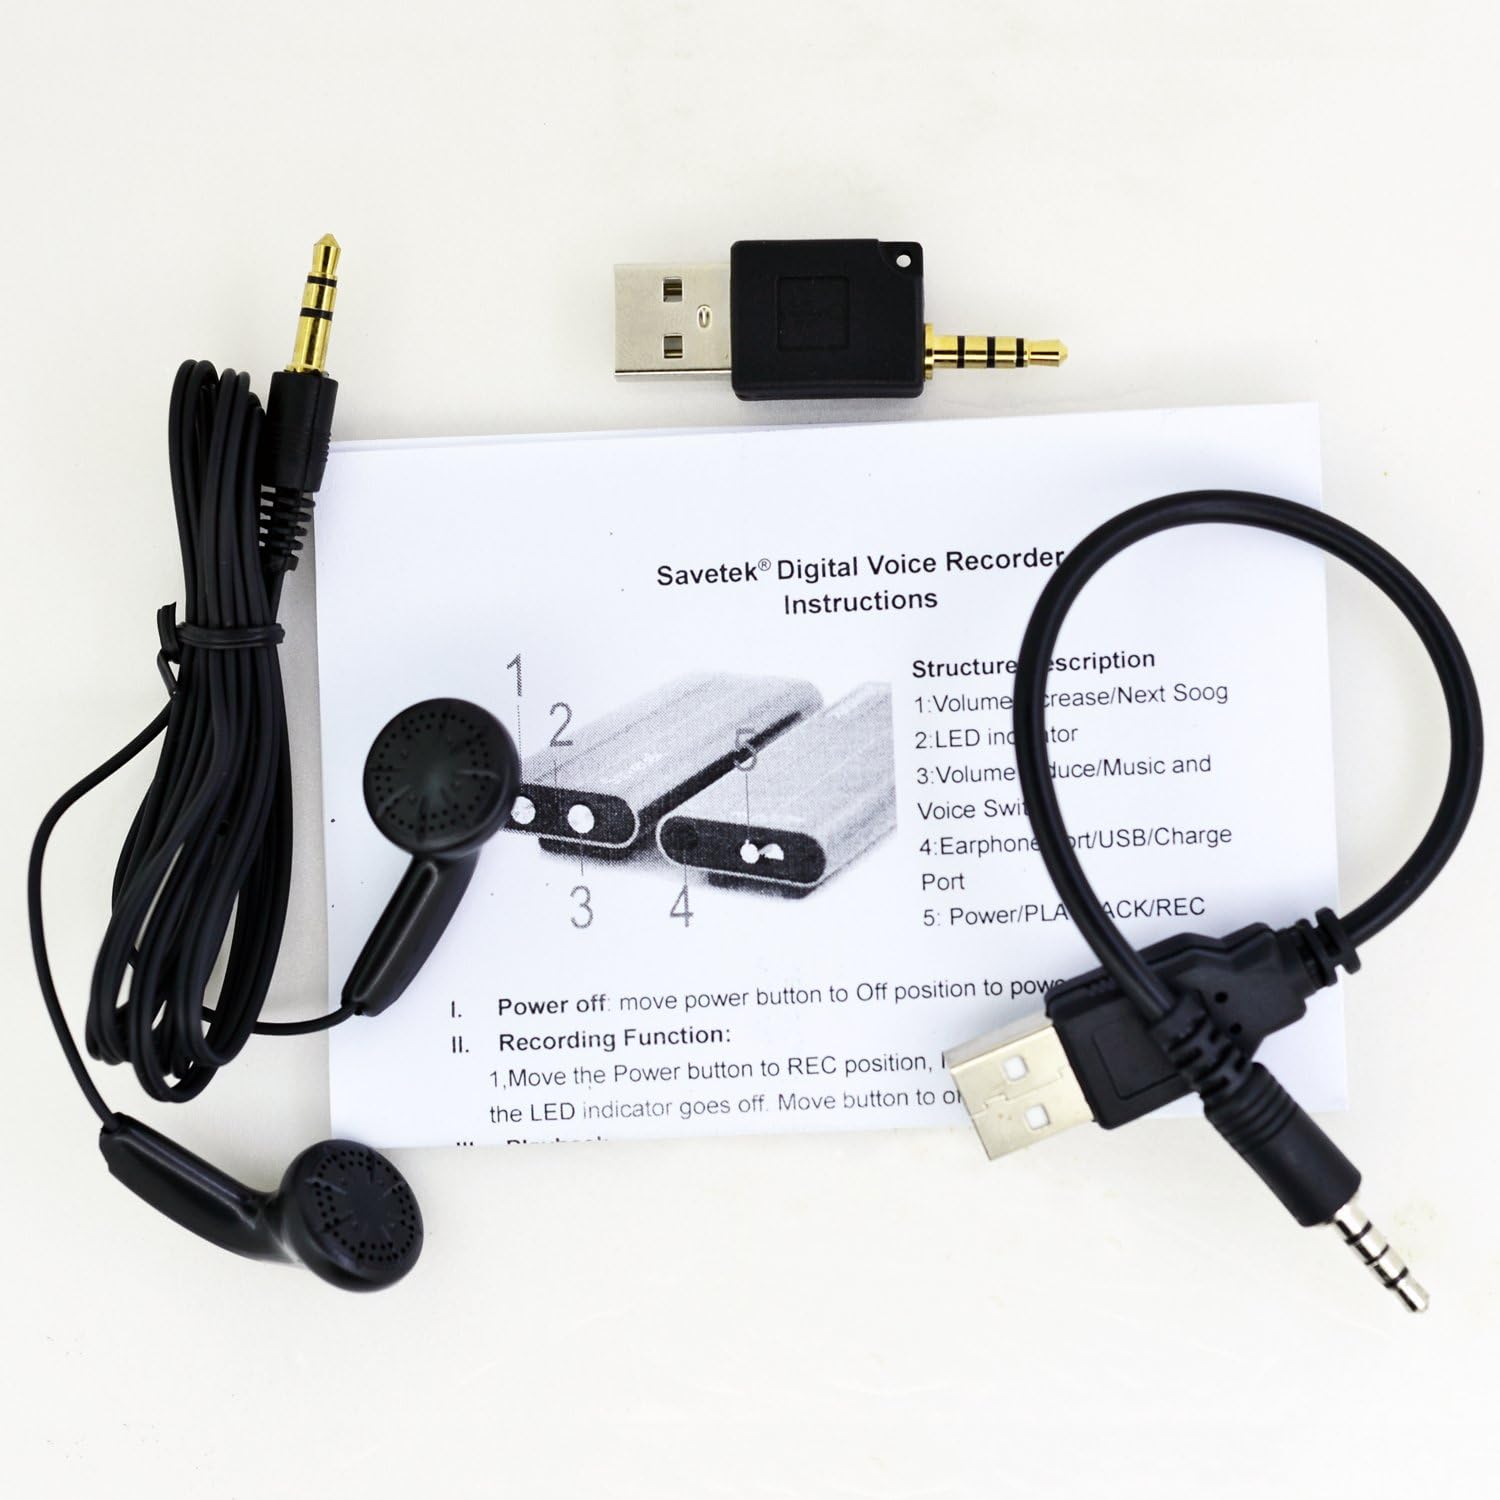
Image: All items included in the Savetek Mini Clip Voice Recorder package.
Product Overview
The Savetek Mini Clip Voice Recorder is a compact and portable device designed for discreet audio recording. It features a simple three-position switch for recording, playback, and power off, along with a headphone jack and USB port.

Image: The Savetek Mini Clip Voice Recorder, demonstrating its compact size and the main control switch.

Image: Detailed dimensions of the voice recorder, highlighting its small form factor.
Clip and Magnetic Adsorption
The device includes a removable plastic clip for easy attachment to clothing or other objects. Additionally, it features a magnetic adsorption plug, allowing it to be securely attached to metallic surfaces.

Image: Rear view of the recorder showing the attached plastic clip.

Image: The recorder with its plastic clip detached, illustrating the clip mechanism.
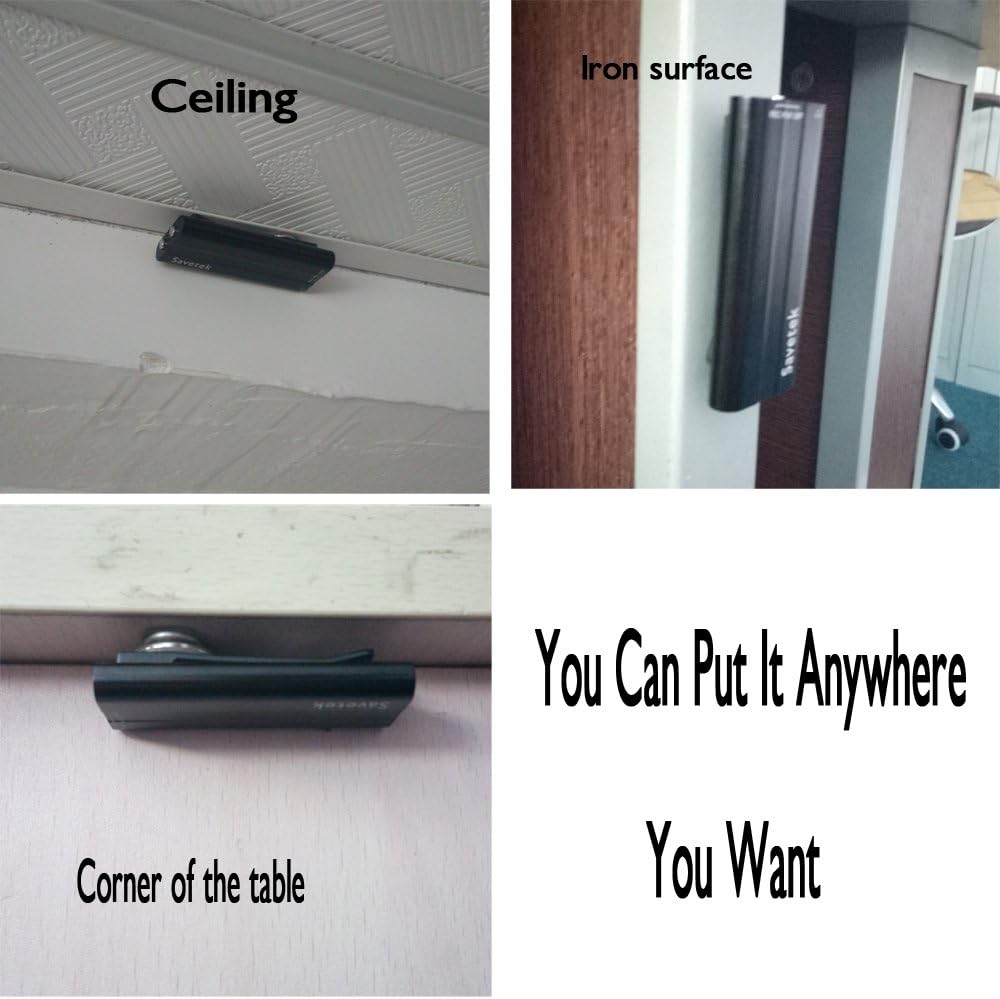
Image: Examples of the recorder's magnetic adsorption feature, showing it attached to various surfaces.
Setup
Charging the Device
Before first use, fully charge the recorder. The device has a 300mAh rechargeable battery.
- Connect the recorder to a computer's USB port or a USB wall adapter using the provided USB data cable.
- The LED indicator light will illuminate during charging.
- A full charge typically takes a few hours. The LED indicator will change or turn off when charging is complete.
- The device supports recording while charging, extending recording time significantly (up to 180 hours with 16GB storage).
Initial Connection to Computer
To access files or set the time, connect the recorder to your computer.
- Ensure the recorder is powered off (switch in 'OFF' position).
- Connect the recorder to your computer using the provided USB data cable.
- The computer will recognize the device as a removable disk.

Image: The voice recorder connected to a USB port via its adapter, ready for charging or data transfer.
Operating Instructions
Recording Audio
The recorder supports both continuous and voice-activated recording.
Standard Recording
- Locate the 'REC PLAY OFF' switch on the side of the device.
- Push the switch to the 'REC' position.
- The indicator light will blink briefly and then turn off, indicating that recording is in progress.
- The device will begin recording audio in WAV format. Initial recording may take approximately 6 seconds to start.
Voice Activated Recording (VAV)
The device automatically starts recording when sound is detected and pauses when there is no sound, optimizing storage space.
- This feature is active by default when recording is initiated.
- The device will not emit any blinking lights or beeps during voice-activated recording, ensuring discreet operation.
Image: The main control switch on the recorder, showing the 'REC', 'PLAY', and 'OFF' positions.
Stopping and Saving Recordings
To stop recording and save the current file:
- While recording, push the 'REC PLAY OFF' switch to the 'OFF' position.
- The LED indicator will flash a few times and then turn off.
- The recording file will be automatically saved to the device's internal memory.
Playback
To listen to recorded files or MP3 music:
- Insert the earphones into the headphone jack.
- Push the 'REC PLAY OFF' switch to the 'PLAY' position.
- The LED indicator will blink slowly, indicating playback mode.
- Volume Control: Press and hold the '+' button to increase volume. Press and hold the '-' button to reduce volume.
- Next Track: Press the '+' button briefly to play the next song or voice file.
- Switch File Type: Press the '-' button briefly to switch between music files and voice recording files.

Image: The voice recorder with earphones plugged in, ready for audio playback.
Setting the Device Time
To synchronize the recorder's internal clock with your computer's system time:
- Connect the recorder to your computer (ensure the switch is in 'OFF' position).
- Open the removable disk drive associated with the recorder.
- Navigate to the folder named "SetUDiskTime".
- Double-click the program "SetUDiskTime.exe" within this folder.
- The recorder's time will automatically synchronize with your computer's current system time.
Maintenance
- Keep the device dry. Avoid exposure to moisture or liquids.
- Do not expose the device to extreme temperatures (hot or cold).
- Clean the device with a soft, dry cloth. Do not use harsh chemicals or solvents.
- Avoid dropping or subjecting the device to strong impacts.
- Regularly back up important recordings to your computer.
- Charge the device periodically if not used for extended periods to maintain battery health.
Troubleshooting
| Problem | Possible Cause | Solution |
|---|---|---|
| Device does not turn on or record. | Low battery. | Charge the device fully. |
| Cannot hear playback. | Earphones not properly connected or faulty. Volume too low. | Ensure earphones are fully inserted. Increase volume using the '+' button. Try different earphones. |
| Device not recognized by computer. | Loose USB connection. Device switch not in 'OFF' position. Driver issue. | Ensure USB cable is securely connected. Set switch to 'OFF'. Try a different USB port or computer. |
| Recording quality is poor. | Microphone obstructed. Recording in a noisy environment. | Ensure microphone is clear. Record in a quieter environment. |
| Time stamp on recordings is incorrect. | Device time not synchronized. | Connect to computer and run "SetUDiskTime.exe" as described in 'Setting the Device Time' section. |
Specifications
| Feature | Detail |
|---|---|
| Model | GS-R22 |
| Storage Capacity | 16 GB |
| Recording Format | WAV |
| Recording Bit Rate | 192 Kbps |
| Sampling Rate | 48 KHz |
| Frequency Response | -20Hz ~ 20KHz |
| Microphone | Non-directional Condenser MIC (Built-in) |
| Battery | 300mAh Rechargeable Battery |
| Continuous Recording Time | More than 45 hours |
| Recording While Charging | Yes (up to 180 hours with 16GB) |
| Interface | USB 2.0 |
| Compatible OS | Windows, Mac OS |
| Dimensions | 2.3 x 1 x 0.4 inches (60 x 25 x 11 mm) |
| Weight | 15g (approx. 0.53 oz) |
Warranty and Support
For warranty information and technical support, please refer to the documentation provided at the time of purchase or contact your retailer. Keep your proof of purchase for any warranty claims.