GODOX X1T-N
Godox X1T-N 2.4G Wireless TTL Flash Trigger User Manual
Brand: GODOX
Model: X1T-N
Introduction
The Godox X1T-N is a 2.4G wireless TTL flash trigger designed for Nikon DSLR cameras. It functions as a single transmitter, enabling multi-channel triggering, stable signal transmission, and sensitive reaction for various flash applications.
This device supports i-TTL II Autoflash and is compatible with Nikon cameras that have a PC Sync Socket. It can be used to trigger camera shutters, studio flashes, and camera flashes wirelessly.
Key Features:
- Built-in 2.4G wireless transmission for extended range (over 100m) and versatile triggering.
- Supports i-TTL II Autoflash, 1/8000s High-Speed Sync (HSS), Flash Exposure Compensation (FEC), Flash Exposure Lock (FEL), and modeling flash.
- Wireless remote control and grouping system with support for 5 groups (A/B/C/D/E) and 32 channels in GR grouping mode, or 3 groups (A/B/C) in Ratio grouping mode.
- Features a large, clear LCD panel with backlight for easy operation.
- Micro USB port for firmware upgrades.
Package Contents
Please verify that all items listed below are included in your package:
- 1 x Godox X1T-N Transmitter
- 1 x CEARI MicroFiber Clean Cloth

Image: The included CEARI MicroFiber Clean Cloth, useful for cleaning camera equipment.
Product Overview
Familiarize yourself with the components and controls of the Godox X1T-N transmitter.

Image: Front view of the Godox X1T-N transmitter, showing the hot shoe mount, 'TEST' button, and 'STATUS' indicator.
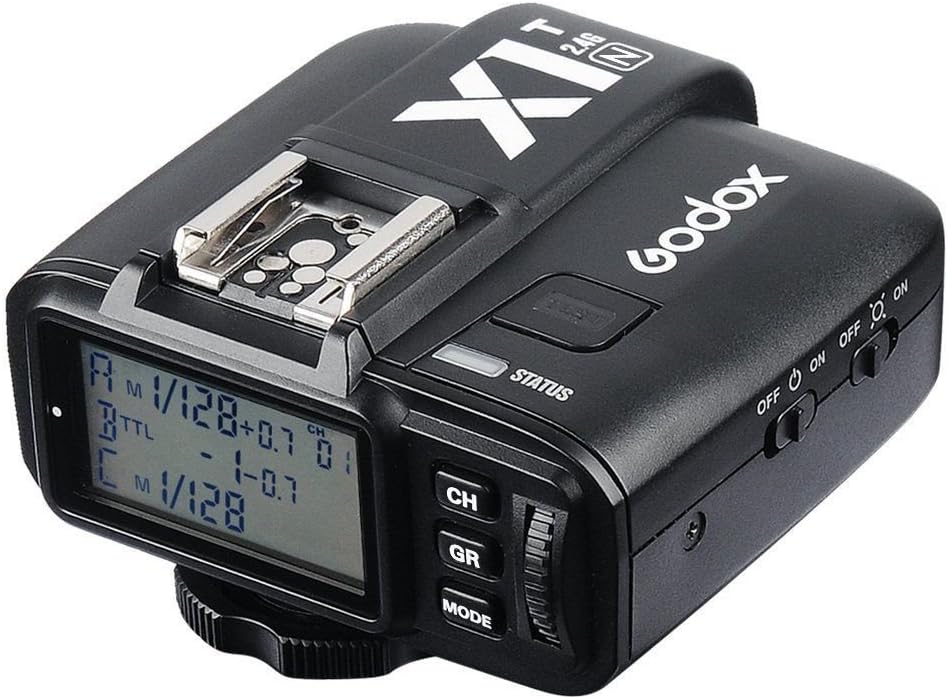
Image: Angled view of the Godox X1T-N transmitter, highlighting the LCD screen and control buttons (CH, GR, MODE).
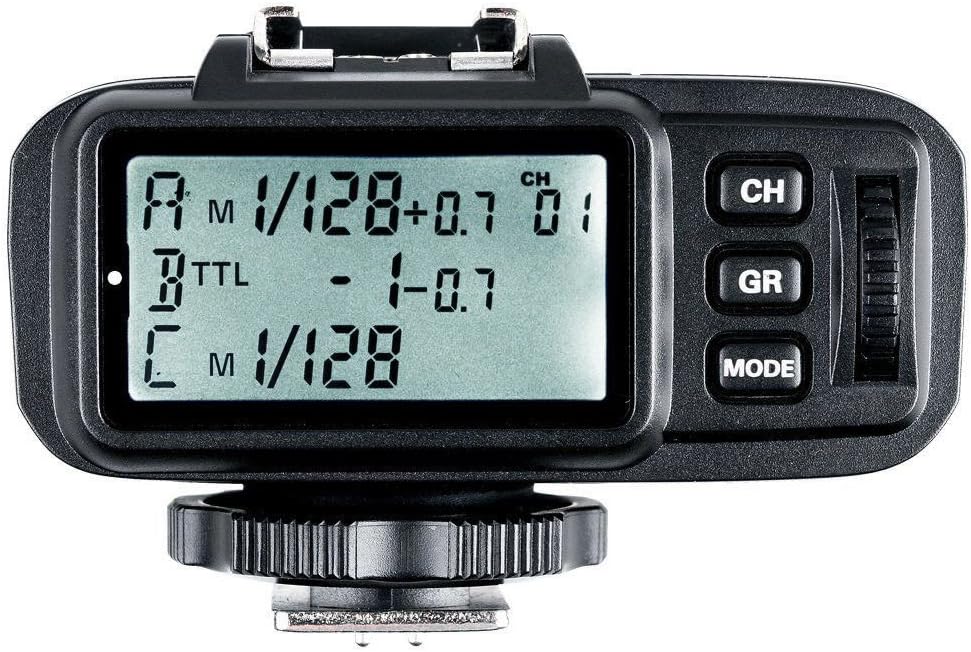
Image: Top-down view of the Godox X1T-N transmitter, clearly showing the LCD display with group and channel settings, and the control buttons (CH, GR, MODE) and dial.

Image: Side view of the Godox X1T-N transmitter, displaying the power ON/OFF switch and the backlight ON/OFF switch.

Image: Side view of the Godox X1T-N transmitter, showing the covered ports for PC sync input/output and Micro USB for firmware upgrades.

Image: Bottom view of the Godox X1T-N transmitter, showing the hot shoe mounting foot and the locking wheel.
Setup
1. Battery Installation
- Locate the battery compartment on the side or bottom of the X1T-N transmitter.
- Slide the battery compartment cover open.
- Insert two (2) AA batteries, ensuring correct polarity (+/-) as indicated inside the compartment.
- Close the battery compartment cover securely.
2. Mounting on Camera
- Ensure your camera is powered off.
- Slide the hot shoe mounting foot of the X1T-N transmitter into the hot shoe of your Nikon DSLR camera.
- Tighten the locking wheel on the transmitter to secure it firmly to the camera's hot shoe.
3. Initial Power-On
- Locate the power ON/OFF switch on the side of the transmitter.
- Slide the switch to the "ON" position. The LCD panel should illuminate.
- If the LCD does not illuminate, check battery installation or replace batteries.
Operating Instructions
1. Power On/Off and Backlight
- To power on/off: Use the main ON/OFF switch on the side.
- To control backlight: Use the separate backlight ON/OFF switch on the side.
2. Channel and Group Settings
- Channels (CH): The X1T-N supports 32 channels. Press the "CH" button to cycle through or adjust the channel number. Ensure the transmitter and receiver (if applicable) are set to the same channel.
- Groups (GR): The transmitter supports 5 controllable slave groups (A/B/C/D/E) in GR grouping mode and 3 groups (A/B/C) in Ratio grouping mode. Press the "GR" button to select or activate groups.
3. Flash Modes and Exposure Control
- Mode (MODE): Press the "MODE" button to switch between different flash modes (e.g., i-TTL II Autoflash, Manual Flash).
- Flash Exposure Compensation (FEC): Adjust flash output compensation in ±3 stops in 1/3 stop increments. Use the dial to change values after selecting the FEC option.
- Flash Exposure Lock (FEL): Supported. Refer to your camera's manual for specific FEL procedures.
- High-Speed Sync (HSS): The X1T-N supports 1/8000s HSS. This function allows you to sync your flash at shutter speeds faster than your camera's native sync speed.
- Modeling Flash: Supported. Fired with the camera's depth-of-field preview button.
4. Wireless Shutter Release
The receiver (not included with this transmitter) can control camera shooting through its 2.5mm sync port, enabling wireless shutter release functionality.
5. Zoom Setting
Adjust the flash's focal length (zoom) through the transmitter. This feature allows you to match the flash coverage to your lens's focal length.

Image: The Godox X1T-N transmitter connected via a sync cable to a studio flash, demonstrating a typical setup for remote flash triggering.
Maintenance
Cleaning
- Use the provided CEARI MicroFiber Clean Cloth or a soft, dry cloth to wipe the exterior of the transmitter.
- Do not use liquid cleaners, solvents, or abrasive materials, as these can damage the device.
- Keep the hot shoe contacts clean and free of debris.
Storage
- When not in use for extended periods, remove the AA batteries to prevent leakage and damage.
- Store the transmitter in a cool, dry place, away from direct sunlight, high temperatures, and high humidity.
- Protect the LCD screen from scratches.
Troubleshooting
| Problem | Possible Cause | Solution |
|---|---|---|
| Transmitter does not power on. | Batteries are dead or incorrectly installed. | Check battery polarity or replace with fresh AA batteries. |
| Flash does not fire. | Incorrect channel/group settings; Transmitter not securely mounted; Flash unit not powered on or not receiving signal. | Ensure transmitter and receiver/flash are on the same channel and group. Securely mount the transmitter. Check flash unit power and settings. |
| Inconsistent triggering. | Interference from other 2.4G devices; Out of range. | Change to a different channel. Reduce distance between transmitter and flash unit. Avoid obstacles. |
| LCD backlight not working. | Backlight switch is off. | Slide the backlight switch to the "ON" position. |
Specifications
| Feature | Detail |
|---|---|
| Brand | Godox |
| Model | X1T-N |
| Compatible Camera | Nikon DSLR Cameras (Support i-TTL II Autoflash), Cameras with a PC Sync Socket |
| Built-in Remote System | 2.4G Wireless transmission |
| Modulation Mode | MSK |
| Power Supply | 2* AA Batteries (Not Included) |
| Exposure Control | Manual Flash, i-TTL II Flash Autoflash |
| Synchronization Delay Setting | Yes |
| Flash Exposure Compensation | ±3 Stops in 1/3 stop increments |
| Flash Exposure Lock | Yes |
| Focus Assist | Manual Open |
| Second Curtain Sync | No |
| Modeling Flash | Yes, Fired with Camera's depth-of-field preview button |
| Wireless Function | TTL Mode: Ratio Off; M Mode: Flash Ratio (A:B C); Support GR group flash, A-E group can set flash mode separately |
| Controllable Slave Group | GR Grouping Mode: 5 (A/B/C/D/E); Ratio Grouping Mode: 3 (A/B/C) |
| Transmission Range | >100m |
| Channels | 32 |
| Wireless Shutter Release | Receiver can control camera shooting through 2.5mm sync port |
| Zoom Setting | Adjust the Flash's focal length through the transmitter |
| LCD Panel | Wide LCD Panel, Backlight on/off |
| Output Interface (Transmitter) | PC cord input and output |
| Firmware Upgrade | Micro USB Port |
| Transmitter Dimension | 72x75x52 mm |
| Transmitter Weight | 100g |
| Product Dimensions (Overall) | 31.5 x 31.5 x 23.62 inches |
| Item Weight (Overall) | 3.53 ounces |
| Date First Available | April 12, 2016 |
| Manufacturer | Godox |
Warranty and Support
For warranty information and technical support, please refer to the official Godox website or contact your local distributor. Keep your purchase receipt as proof of purchase for warranty claims.
Regular firmware updates may be available to improve performance and add new features. Visit the Godox official website for the latest firmware and update instructions via the Micro USB port.