1. Introduction
Thank you for choosing the Melnor 53100 2-Outlet Digital Water Timer. This device is designed to automate your watering schedule, providing convenience and efficiency for your garden or lawn. It features independent programming for two zones, a large LCD screen for clear information, and an easy-to-use interface for setting up your watering cycles.
2. Safety Information
- This product is designed for outdoor use only. Do not use indoors or with potable water systems unless specifically approved.
- Ensure all connections are secure to prevent leaks and water damage.
- Do not expose the timer to freezing temperatures. Remove batteries and store indoors during winter months to prevent damage.
- Use only 1.5V AA alkaline batteries. Do not mix old and new batteries, or different types of batteries.
- California Proposition 65 Warning: This product can expose you to chemicals including styrene, which is known to the State of California to cause cancer. For more information, please visit www.P65Warnings.ca.gov.
3. Package Contents
The Melnor 53100 package includes:
- 1 x Melnor 53100 2-Outlet Digital Water Timer
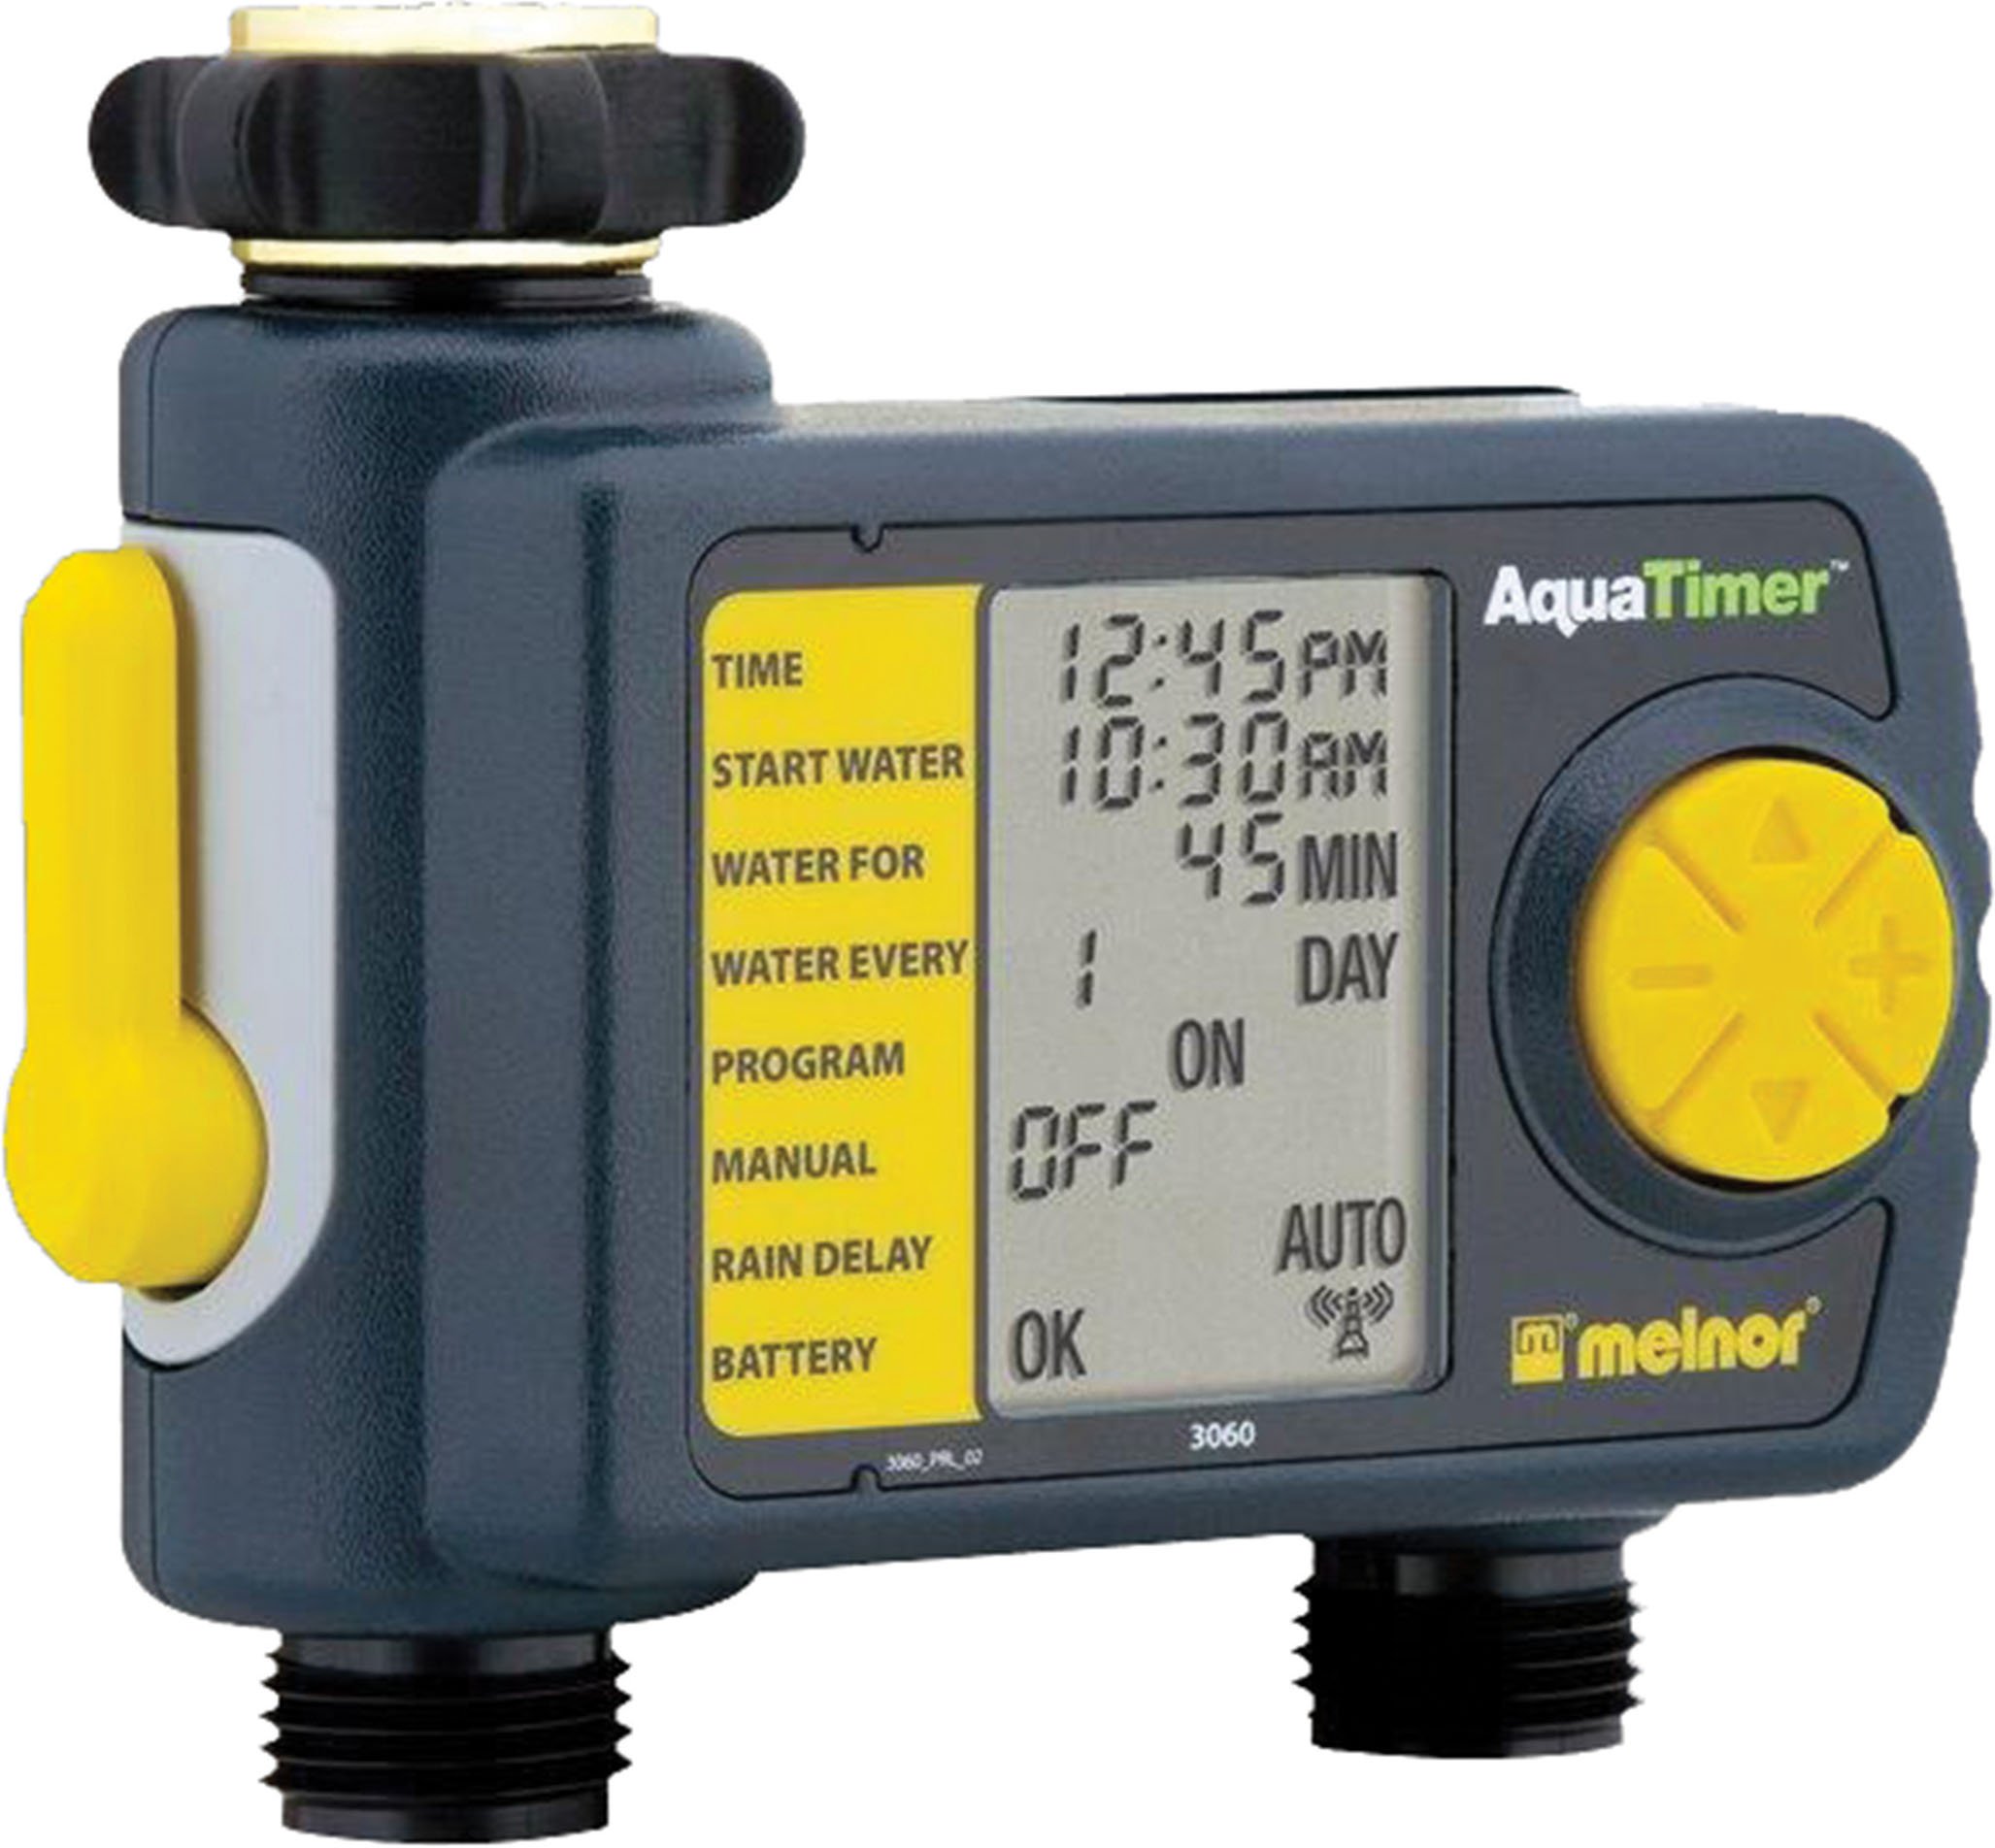
4. Product Features
- Dual Outlets: Independently program two watering zones.
- Large LCD Screen: Provides clear, easy-to-read information on current settings and next watering cycle.
- Flexible Programming: Set watering schedules up to 24 times per day for individual days of the week.
- Manual Override: Easily start or stop watering manually without affecting programmed schedules.
- Durable Construction: Features a zinc connection nut with a non-slip rubberized grip for secure attachment.
- Soil Moisture Sensor Compatibility: Can be used with the HydroLogic soil moisture sensor (sold separately, SKU 15339).
5. Installation
- Attach to Faucet: Screw the timer onto your outdoor faucet. Ensure the zinc connection nut is tightened securely by hand to prevent leaks. Do not overtighten with tools.
- Connect Hoses: Attach your garden hoses to the two outlets at the bottom of the timer. Tighten connections firmly.
6. Battery Installation
- Locate the battery compartment on the back of the timer.
- Slide open the battery cover.
- Insert two (2) fresh 1.5V AA alkaline batteries, observing the correct polarity (+/-) as indicated inside the compartment.
- Close the battery cover securely. The LCD screen should illuminate, and a battery status indicator will be visible.
- Note: Use only 1.5V AA alkaline batteries. Do not use 1.2V NiMH or NiCad rechargeable batteries, as they may not provide sufficient power for optimal operation.
7. Setting the Clock
- Turn the large dial to the SET TIME position.
- Use the UP/DOWN arrow buttons to adjust the current hour (AM/PM). Press OK to confirm.
- Use the UP/DOWN arrow buttons to adjust the current minute. Press OK to confirm.
- Use the UP/DOWN arrow buttons to set the current day of the week. Press OK to confirm.
- Turn the dial back to AUTO OFF or any other desired setting to save the time.
8. Programming Watering Schedules
The Melnor 53100 allows independent programming for two zones. Follow these steps for each zone:
8.1. Select Zone
- Press the ZONE 1 2 button to toggle between Zone 1 and Zone 2. Ensure the desired zone is selected before proceeding.
8.2. Set Start Time (START WATER)
- Turn the dial to START WATER.
- Use the UP/DOWN arrow buttons to set the desired start time for watering (AM/PM). Press OK to confirm.
- You can set multiple start times for each zone if needed.
8.3. Set Watering Duration (HOW LONG)
- Turn the dial to HOW LONG.
- Use the UP/DOWN arrow buttons to set the watering duration in minutes or hours. Press OK to confirm.
8.4. Set Watering Frequency (HOW OFTEN)
- Turn the dial to HOW OFTEN.
- Use the UP/DOWN arrow buttons to select the watering frequency:
- Every X hours (e.g., every 6 hours)
- Every X days (e.g., every 2 days)
- Specific days of the week (e.g., Mon, Wed, Fri)
- Press OK to confirm your selection.
After programming, turn the dial to AUTO OFF to activate the schedule. The display will show the next scheduled watering time.
9. Manual Operation
To manually water without affecting your programmed schedule:
- Ensure the dial is in the AUTO OFF position.
- Press the ON/OFF MANUAL button.
- Use the ZONE 1 2 button to select the desired zone (1 or 2).
- Use the UP/DOWN arrow buttons to set the desired manual watering duration.
- Press OK to start manual watering. The timer will water for the set duration and then automatically turn off.
- To stop manual watering prematurely, press the ON/OFF MANUAL button again.
10. Rain Delay Function
The rain delay function allows you to pause your watering schedule for a set period, conserving water after rainfall.
- Ensure the dial is in the AUTO OFF position.
- Press and hold the + (UP arrow) button for a few seconds. The display will show a rain delay duration.
- Use the UP/DOWN arrow buttons to select the desired delay duration (e.g., 24, 48, 72 hours).
- Press OK to confirm. The timer will pause all programmed watering cycles for the selected duration and resume automatically afterward.
- To cancel rain delay, press and hold the + (UP arrow) button again until the delay is cleared.
11. Maintenance
- Cleaning: Wipe the timer with a damp cloth as needed. Do not use abrasive cleaners or submerge the unit in water.
- Winterization: Before the first frost, disconnect the timer from the faucet and hoses. Remove the batteries. Store the timer in a dry, frost-free location indoors.
- Battery Replacement: Replace batteries when the low battery indicator appears on the LCD screen to ensure continuous operation.
12. Troubleshooting
| Problem | Possible Cause | Solution |
|---|---|---|
| Timer not watering | Batteries are low or dead Faucet is off Program not set or activated Rain delay is active | Replace batteries Turn on the faucet Ensure dial is on AUTO OFF and program is set Cancel rain delay |
| Water leaking from connections | Loose connection Damaged washer | Tighten connections by hand Check and replace rubber washers if damaged |
| LCD display is blank or dim | Low or dead batteries | Replace batteries with fresh 1.5V AA alkaline batteries |
| Timer not keeping correct time/settings reset | Extremely low batteries Internal malfunction | Replace batteries. If problem persists, contact customer support. |
13. Specifications
- Model: 53100
- Outlets: 2
- Power Source: 2 x 1.5V AA Alkaline Batteries (not included)
- Material: Solid construction
- Item Weight: Approximately 11.98 ounces
- Number of Settings: 8 (referring to programming options)
- Color: Black/Gray
14. Warranty and Support
Melnor products are designed for durability and performance. For warranty information or technical support, please refer to the warranty card included with your purchase or visit the official Melnor website. Please have your model number (53100) and purchase date available when contacting support.