1. Introduction
This manual provides detailed instructions for the installation, operation, and maintenance of your ISNATCH AHD-L + HVR 8CH 4-Camera Surveillance System. This system is designed to provide reliable video surveillance with high-definition recording capabilities, supporting both AHD and IP cameras, cloud connectivity, and ONVIF compatibility. Please read this manual thoroughly before using the product to ensure proper setup and functionality.
2. Product Overview
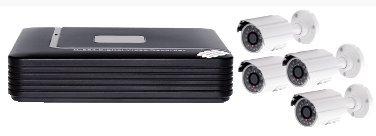
The ISNATCH AHD-L + HVR 8CH system includes a Hybrid Video Recorder (HVR) and four high-definition cameras. The HVR supports 8 channels, allowing for expansion beyond the included four cameras. Key features include 1080p and 720p video capture resolution, various recording modes, and remote access via compatible devices.
HVR Rear Panel Connections
This image displays the rear connections of the HVR unit. On the left, there are eight BNC inputs for connecting surveillance cameras, labeled 0 through 7. To the right of these are audio input and output jacks, followed by a VGA port and an HDMI port for monitor connection. Further to the right are two RJ45 Ethernet ports for network connectivity and a DC 12V power input.
- BNC Video Inputs (0-7): Connect AHD-L or other compatible analog cameras.
- Audio In/Out: For connecting external audio devices.
- VGA Port: Connect to a VGA monitor.
- HD-Port (HDMI): Connect to an HDMI-compatible monitor or TV for high-definition display.
- RJ45 (Ethernet) Ports: Connect to your network router for internet access and IP camera integration.
- DC 12V: Power input for the HVR unit.
3. Package Contents
Please verify that all items are present in your package:
- 1 x ISNATCH HVR 8CH Unit
- 4 x High-Definition AHD-L Cameras
- 1 x Power Adapter for HVR
- 4 x Power Adapters for Cameras
- 4 x Video/Power Cables for Cameras
- 1 x USB Mouse
- 1 x User Manual (this document)
4. Setup Instructions
4.1 Hardware Connection
- Connect Cameras: Connect each camera to one of the BNC video input ports (0-7) on the rear of the HVR using the provided video cables. Ensure a secure connection.
- Power Cameras: Connect each camera to its respective power adapter and plug into an electrical outlet.
- Connect Monitor: Connect a monitor to the HVR using either the VGA or HDMI port.
- Connect Network: Connect an Ethernet cable from one of the HVR's RJ45 ports to your router or network switch.
- Connect USB Mouse: Plug the USB mouse into one of the HVR's USB ports for navigation.
- Power On HVR: Connect the HVR's power adapter to the DC 12V input and then plug it into an electrical outlet. The system will power on automatically.
4.2 Initial Configuration
Upon first boot, the system may prompt you to set up an administrator password. Follow the on-screen instructions to create a strong password. It is recommended to configure network settings to enable remote access and cloud features.
- Network Setup: Navigate to the network settings menu to configure IP address, subnet mask, gateway, and DNS. DHCP is usually enabled by default for automatic configuration.
- Cloud Connectivity (Internet One Click): Follow the specific instructions in the HVR's on-screen menu to activate the 'Internet One Click' cloud feature for easy remote access. This typically involves scanning a QR code or entering a device ID into a mobile application.
- Date and Time: Set the correct date and time for accurate recording timestamps.
5. Operating Instructions
5.1 Live View
After successful setup, the HVR will display the live video feed from all connected cameras on the monitor. You can switch between single-camera view, multi-camera grid view, and sequence display using the on-screen controls or mouse.
5.2 Recording Modes
The HVR supports several recording modes:
- Continuous Recording: Records video constantly, 24/7.
- Motion Detection Recording: Records only when motion is detected in the camera's field of view. Sensitivity and detection areas can be configured in the settings.
- Scheduled Recording: Records during specific times of the day or week.
- Night Vision: Cameras automatically switch to infrared night vision in low-light conditions.
5.3 Playback
To review recorded footage, access the playback menu. You can search for recordings by date, time, and event type (e.g., motion detection). Use the on-screen controls to play, pause, fast forward, and rewind.
5.4 Remote Access
Utilize the dedicated mobile application (compatible with smartphones and tablets) to view live feeds, play back recordings, and receive alerts remotely. Ensure your HVR is connected to the internet and the cloud service is activated.
5.5 ONVIF Compatibility
The system is ONVIF compliant, allowing integration with other ONVIF-supported network devices and software. Refer to the ONVIF configuration settings within the HVR menu for details.
6. Maintenance
- Cleaning: Regularly clean camera lenses and the HVR unit with a soft, dry cloth. Avoid abrasive cleaners or solvents.
- Connection Check: Periodically inspect all cable connections (BNC, power, Ethernet) to ensure they are secure and free from damage.
- Firmware Updates: Check the manufacturer's website for available firmware updates for your HVR. Updating firmware can improve performance and add new features. Follow update instructions carefully.
- Hard Drive Management: If an internal hard drive is installed (not included in all kits), monitor its status and ensure sufficient storage space. Configure overwrite settings if continuous recording is desired.
7. Troubleshooting
- No Video Signal:
- Check all camera power connections.
- Verify BNC cable connections between cameras and HVR.
- Ensure the monitor is correctly connected and powered on.
- Test cameras individually if possible.
- No Network Connection:
- Verify the Ethernet cable is securely connected to both the HVR and the router.
- Check router status and internet connectivity.
- Ensure HVR network settings (IP address, gateway) are correct.
- Recording Not Working:
- Check if a hard drive is installed and properly initialized.
- Verify recording schedules and motion detection settings.
- Ensure sufficient storage space on the hard drive.
- Remote Access Issues:
- Confirm HVR has internet access.
- Ensure the cloud service or P2P function is enabled and correctly configured.
- Check firewall settings on your network.
8. Specifications
| Feature | Specification |
|---|---|
| Brand | ISNATCH |
| Connectivity Technology | Wired |
| Video Capture Resolution | 1080p, 720p |
| Number of Channels | 8 |
| Compatible Devices | Smartphone, Tablet |
| Signal Format | Digital, Analog |
| Frame Rate | 25 frames per second |
| Recording Modes | Continuous, Motion Detection, Night Vision |
| Optical Sensor Technology | CMOS |
| Hardware Interface | Ethernet |
| Lens Type | Wide-angle |
| Supported Video Input | AHD, AHD-L, BNC |
9. Warranty and Support
This product comes with a standard manufacturer's warranty. For specific warranty terms and conditions, please refer to the documentation included with your purchase or contact ISNATCH customer support. For technical assistance, troubleshooting, or further inquiries, please visit the official ISNATCH website or contact their support team directly.