
1. Introduction
This manual provides essential information for the safe assembly, operation, and maintenance of your Dynacraft Krusher 26-Inch Mens BMX Bike. Please read this manual thoroughly before using the bicycle to ensure proper function and safety.
The Dynacraft Krusher Fat Tire Bike is designed for rugged terrain capabilities. It features a sturdy steel frame, mountain bike-style handlebars for precise steering, and disc brakes for superior stopping power. The single-speed design is suitable for casual riding.
2. Safety Information
Always prioritize safety when riding your bicycle. Failure to follow safety guidelines can result in serious injury or death.
- Always wear a helmet that meets safety standards.
- Perform a pre-ride inspection before each use, checking brakes, tires, and steering.
- Ensure all quick-release levers and bolts are securely tightened.
- Ride defensively and be aware of your surroundings.
- Obey all traffic laws and signals.
- Avoid riding at night without proper lighting (front white light, rear red reflector/light).
- Do not ride under the influence of alcohol or drugs.
- Adjust the seat height correctly for comfortable and efficient pedaling, ensuring your feet can touch the ground when stopped.
3. Components Overview
Familiarize yourself with the main components of your Dynacraft Krusher bike:
- Frame: Deluxe BMX steel frame with a glossy finish and custom rim cutouts.
- Tires: Fat tires designed for rugged terrain.
- Handlebars: Mountain bike style for easy handling.
- Brakes: Front and rear disc brakes for secure stopping.
- Crank: Three-piece crank for lightweight and durable riding.
- Seat Post: Quick-adjusting seat post for comfortable setup.
- Drivetrain: Single-speed for casual riding.

Image: The Dynacraft Krusher 26-inch BMX bike, showcasing its fat tires with custom rim cutouts and overall design.
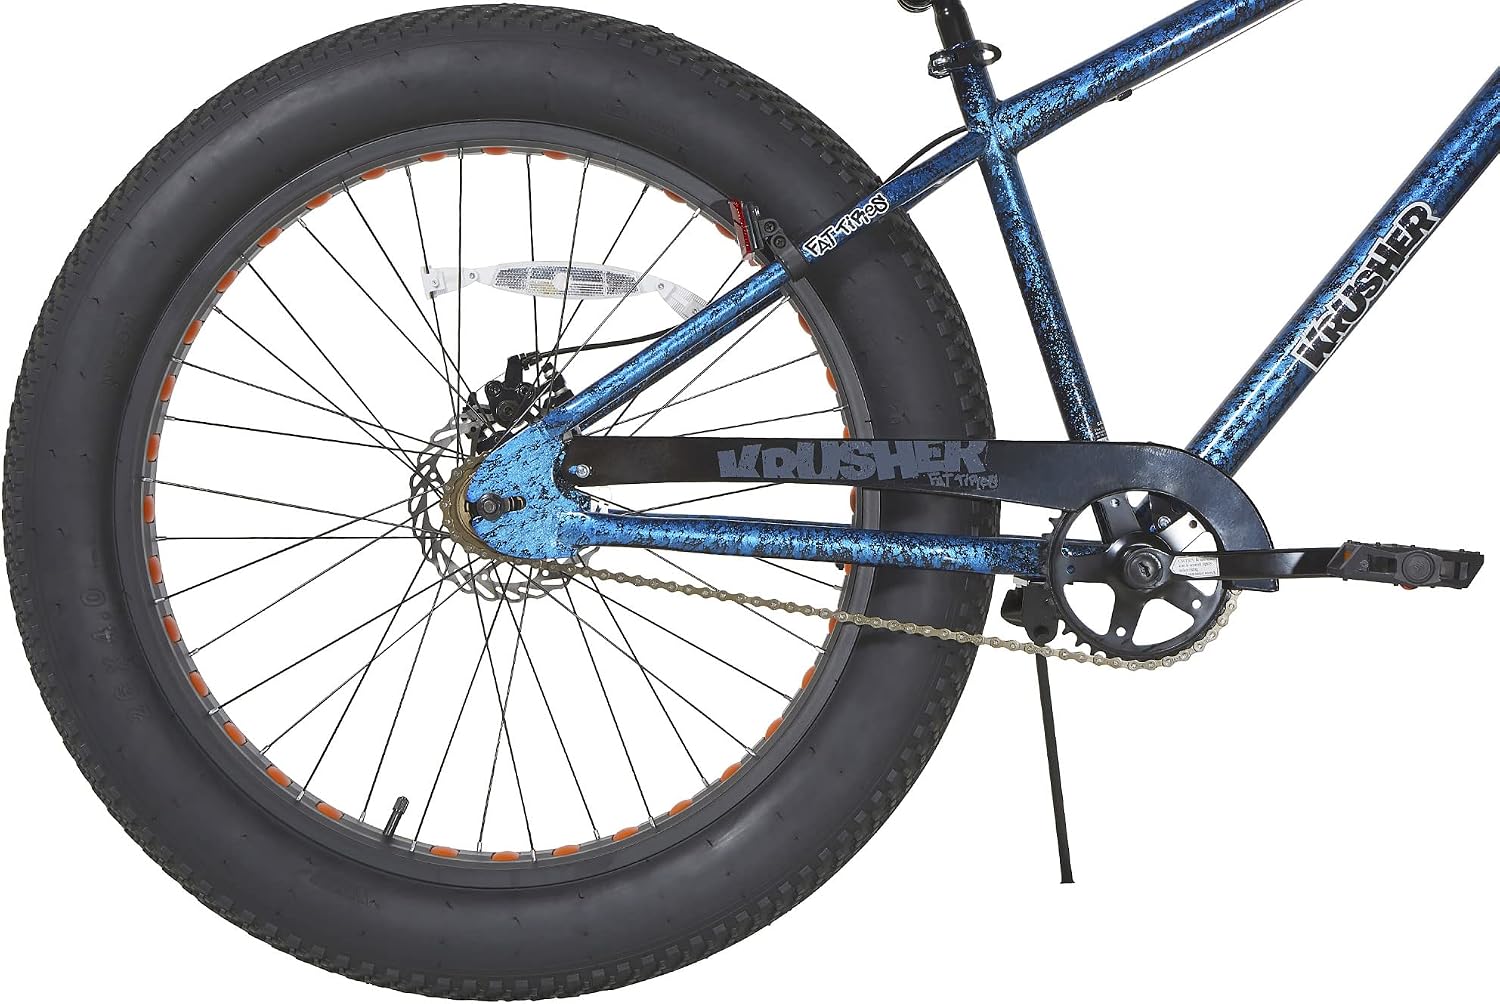
Image: A detailed view of the front disc brake assembly on the Dynacraft Krusher bike, highlighting the rotor and caliper.

Image: A close-up of the bicycle seat and the quick-release mechanism for seat post adjustment on the Dynacraft Krusher.

Image: A detailed view of the rear wheel, chain, and disc brake system of the Dynacraft Krusher bike.

Image: A close-up of the handlebar grip and brake lever on the Dynacraft Krusher bike, showing the control mechanism.
4. Setup
Your Dynacraft Krusher bike requires some assembly. Follow these general steps. Refer to the included assembly guide for detailed instructions specific to your model.
- Unpacking: Carefully remove all components from the packaging. Inspect for any damage.
- Front Wheel Installation: Attach the front wheel to the fork, ensuring the disc brake rotor aligns correctly with the caliper. Secure the axle nuts tightly.
- Handlebar Installation: Insert the handlebar stem into the fork steerer tube and tighten the stem bolt. Adjust the handlebar angle for comfort and secure it.
- Seat Post and Saddle: Insert the seat post with the saddle attached into the frame's seat tube. Adjust the height using the quick-release lever. Ensure the minimum insertion mark is not visible.
- Pedal Installation: Identify the left (L) and right (R) pedals. Thread the pedals into the crank arms. The right pedal threads clockwise, and the left pedal threads counter-clockwise. Tighten securely with a wrench.
- Brake Adjustment: Ensure both front and rear disc brakes are properly aligned and adjusted for effective stopping power. The brake levers should engage smoothly without excessive travel.
- Tire Inflation: Inflate tires to the recommended pressure indicated on the tire sidewall.
5. Operating Instructions
Once assembled and inspected, your Dynacraft Krusher bike is ready for use. Always ensure you are comfortable with the controls before riding in traffic or on challenging terrain.
- Starting: Mount the bike, place one foot on a pedal, and push off with the other foot to gain momentum.
- Pedaling: This is a single-speed bike, so maintain a consistent pedaling rhythm.
- Steering: Use the mountain bike-style handlebars for precise control. Lean into turns and use your body weight to guide the bike.
- Braking: The bike is equipped with front and rear disc brakes. Apply both brakes simultaneously and smoothly to slow down or stop. Avoid sudden, hard braking, especially with the front brake, as this can cause loss of control.
- Seat Adjustment: The quick-adjusting seat post allows for on-the-fly height changes. Ensure the seat is at a height where your leg has a slight bend at the knee when the pedal is at its lowest point.
6. Maintenance
Regular maintenance will prolong the life of your Dynacraft Krusher bike and ensure safe operation.
- Cleaning: Regularly clean your bike with mild soap and water. Avoid high-pressure washers directly on bearings.
- Lubrication: Keep the chain clean and lubricated with bicycle-specific chain lubricant. Lubricate pivot points on brakes and derailleurs (if applicable, though this is single-speed).
- Tire Pressure: Check tire pressure before each ride. Maintain the recommended PSI found on the tire sidewall.
- Brake Inspection: Regularly check brake pads for wear and replace them when necessary. Ensure brake cables are not frayed and are properly tensioned.
- Bolt Tightness: Periodically check all bolts and quick-release levers for tightness, especially on the handlebars, seat post, and wheels.
- Professional Service: Consider having your bike professionally serviced at least once a year, or more frequently if you ride often or in harsh conditions.
7. Troubleshooting
Here are solutions to common issues you might encounter:
| Problem | Possible Cause | Solution |
|---|---|---|
| Brakes feel spongy or weak. | Loose cable, worn pads, air in hydraulic system (if applicable). | Tighten brake cable, replace pads. For hydraulic systems, professional bleeding may be required. |
| Tires lose air quickly. | Puncture in inner tube, faulty valve stem. | Locate and patch puncture, or replace inner tube. Check valve stem for leaks. |
| Chain makes noise or feels rough. | Dry chain, dirty chain, worn chain. | Clean and lubricate chain. If worn, replace the chain. |
| Pedals feel loose or make clicking sound. | Loose pedals, worn bottom bracket. | Tighten pedals to crank arms. If bottom bracket is worn, professional replacement is recommended. |
8. Specifications
| Feature | Detail |
|---|---|
| Bike Type | BMX Bike |
| Age Range (Description) | 13+ |
| Brand | Dynacraft |
| Number of Speeds | 1 |
| Color | Blue/Black/Red |
| Wheel Size | 26 Inches |
| Frame Material | Alloy Steel |
| Suspension Type | Rigid |
| Special Feature | Adjustable Seat |
| Size | 26" |
| Brake Style | Disc |
| Specific Uses For Product | Cycling |
| Item Weight | 19 Pounds |
| Style | BMX |
| Model Name | Krusher |
| Power Source | Pedal power |
| Wheel Material | Aluminum |
| Maximum Weight Recommendation | 275 Pounds |
| Assembly Required | Yes |
| Bicycle Drivetrain Type | Single-speed |
| Frame Size | 26 inches |
| Frame Type | Hard Tail |
9. Warranty Information
Your Dynacraft Krusher bike comes with a Lifetime Warranty on the Frame and Fork. Additionally, there is a Limited 1 Year Warranty covering other components. Please retain your proof of purchase for warranty claims. For specific details regarding coverage and terms, refer to the warranty documentation included with your product or contact Dynacraft customer support.
10. Customer Support
For further assistance, parts, or service inquiries, please contact Dynacraft customer support. You can typically find contact information on the manufacturer's website or in the packaging materials.
Online Resources: Visit the official Dynacraft website for FAQs, additional manuals, and support contact details.
Model Number: 8208-42
UPC: 087876208426