1. Introduction
The ALLOSUN ETP110 is a multifunctional digital thermo-hygrometer designed for monitoring temperature, relative humidity, and dew point. This instrument is suitable for various environments including laboratories, workshops, warehouses, greenhouses, and residential settings. It features a large LCD display for clear readings and includes a humidity alarm function.
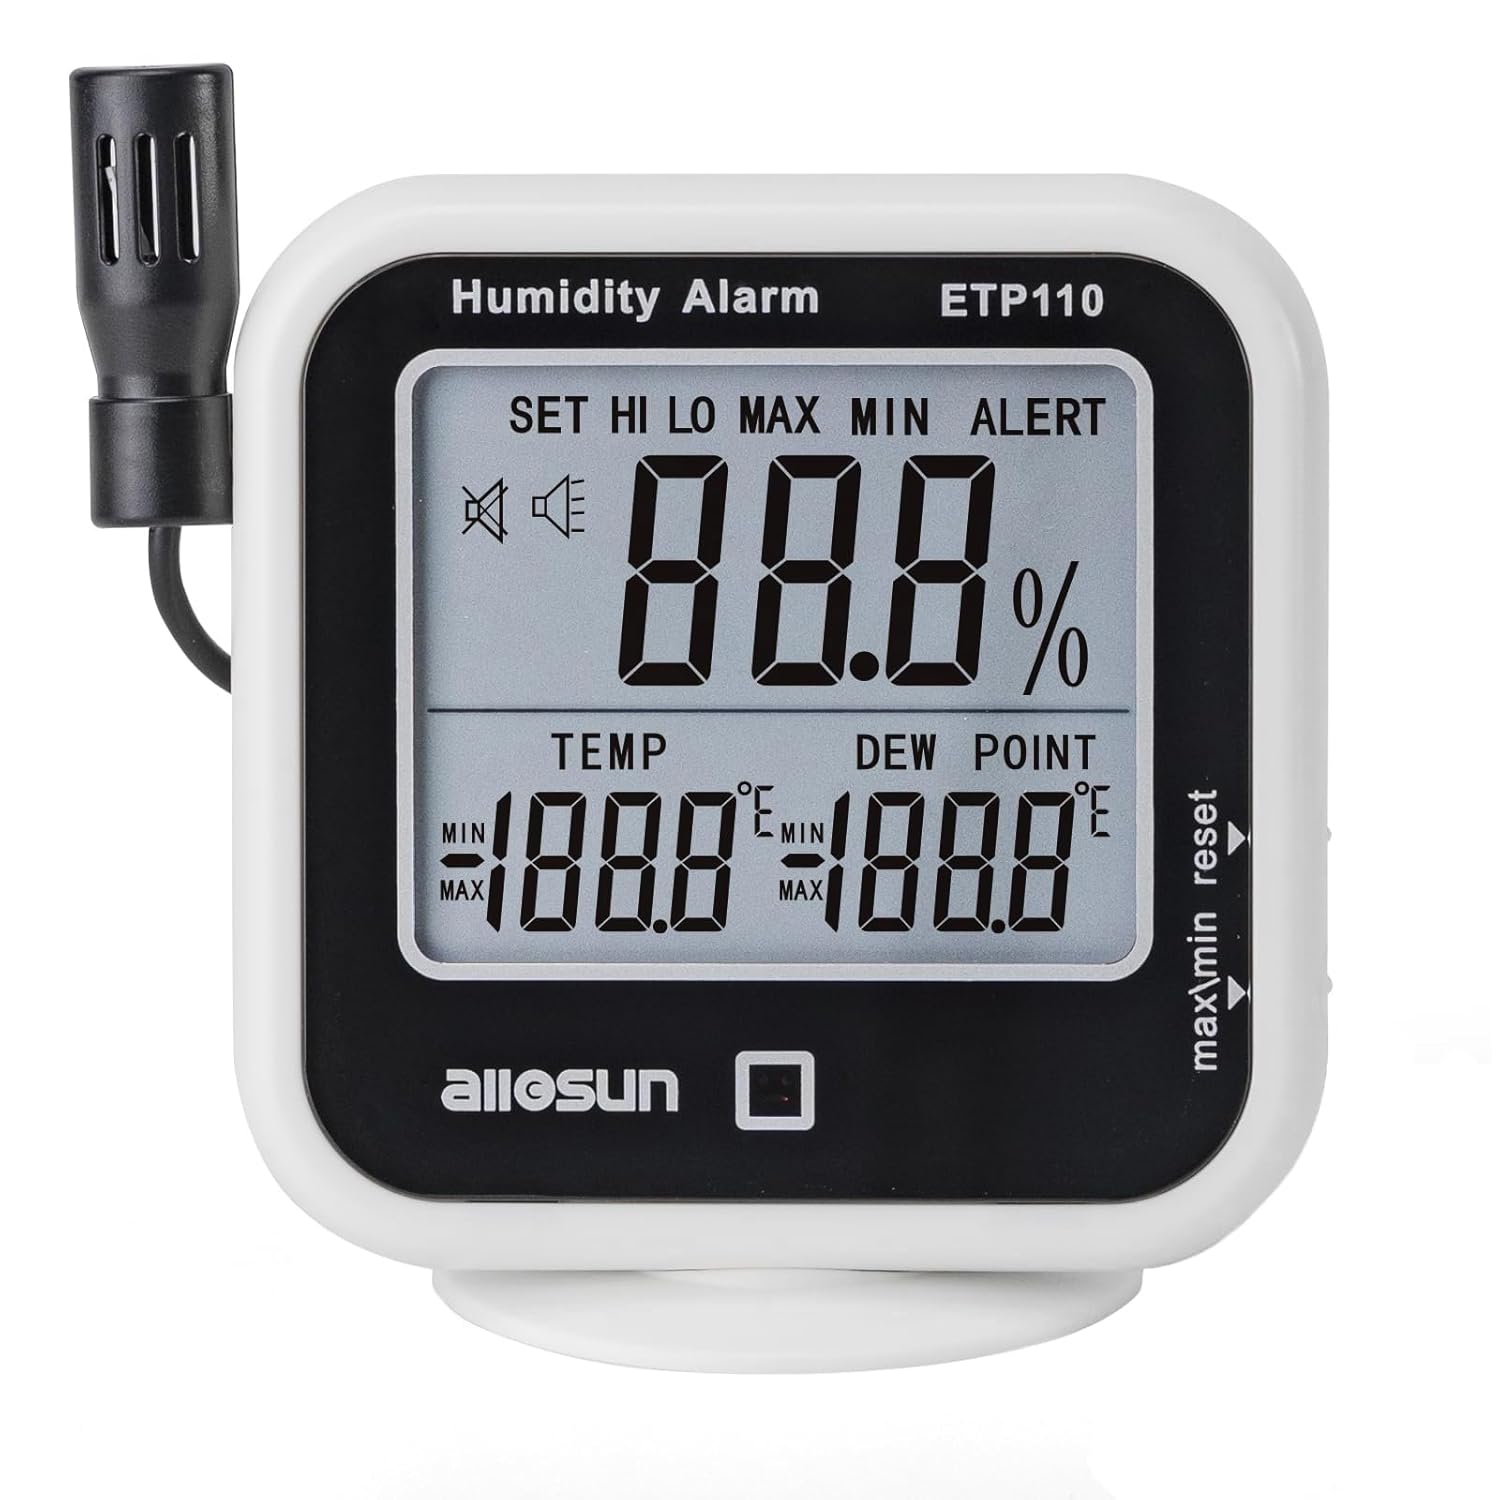
Image 1.1: The ALLOSUN ETP110 Digital Thermometer Hygrometer, displaying temperature, humidity, and dew point readings on its LCD screen.
2. Safety Information
Please read and understand all safety instructions before operating the device. Retain this manual for future reference.
- Battery Safety: Use only 1.5V AAA batteries. Ensure correct polarity when inserting batteries. Do not mix old and new batteries or different types of batteries. Remove batteries if the device will not be used for an extended period to prevent leakage.
- Environmental Conditions: Do not expose the device to extreme temperatures, direct sunlight, high humidity, or corrosive environments.
- Probe Handling: Handle the sensor probe carefully. Avoid bending or damaging the cable.
- Cleaning: Clean the device with a soft, dry cloth. Do not use abrasive cleaners or immerse the device in water.
3. Package Contents
Verify that all items are present upon unpacking:
- ALLOSUN Digital Thermometer Hygrometer (Model ETP110)
- Integrated/Detachable Sensor Probe
- User Manual (this document)
Note: 2 x 1.5V AAA batteries are required and are not included in the package.
4. Product Overview
Familiarize yourself with the components of the ETP110 device:

Image 4.1: Labeled diagram of the ALLOSUN ETP110, indicating the Temperature-Humidity Sensor, Humidity Display, Temperature Display, Dew Point Display, Alarm LED, "reset" Button, "max/min" Button, and Holder.
- Temperature-Humidity Sensor: Measures ambient temperature and humidity. Can be mounted on the meter or extended via its cable.
- Humidity Display: Shows the current relative humidity percentage.
- Temperature Display: Shows the current temperature in Celsius or Fahrenheit.
- Dew Point Display: Shows the current dew point temperature.
- Alarm LED: Illuminates when humidity alarm limits are exceeded.
- "reset" Button: Used to clear maximum/minimum recorded values and for setting alarm parameters.
- "max/min" Button: Toggles between current, maximum, and minimum recorded values for temperature and humidity. Also used for unit conversion.
- Holder: Provides a stand for placing the device on a flat surface. The base is detachable.
5. Specifications

Image 5.1: The ALLOSUN ETP110 device illustrating its temperature, humidity, and dew point measurement ranges.
| Parameter | Value |
|---|---|
| Temperature Measurement Range | -10℃ ~ 60℃ / 14℉ ~ 140℉ |
| Temperature Resolution | 0.1℃ / 0.2℉ |
| Temperature Precision | ±1.0℃ / ±1.8℉ |
| Relative Humidity Measurement Range | 20%RH ~ 95%RH |
| Humidity Resolution | 1% |
| Humidity Precision | ±5%RH (within 25% to 85%RH and 0℃ to 50℃) |
| Dew Point Measurement Range | -29℃ ~ 59℃ / -20.2℉ ~ 138.2℉ |
| Dew Point Resolution | 0.1℃ / 0.2℉ |
| Dew Point Precision | ±2℃ @ 20℃ / ±3.6℉ @ 68℉ |
| Sampling Rate | Approximately 1 time per 3 seconds |
| Setting Range of Humidity Alarm Limit | 20% ~ 95% |
| Operating Temperature (Main Body) | 0℃ ~ +50℃ |
| Operating Temperature (Sensor) | -10℃ ~ +60℃ |
| Storage Temperature | -20℃ ~ +50℃ |
| Battery | 2 x 1.5V AAA batteries (not provided) |
| Size | 115mm × 114mm × 66mm (4.53"W x 2.6"H) |
| Weight | Approximately 145g (5.29 ounces) |
| Sensor Probe Length | Approximately 1.64 feet (50cm) |

Image 5.2: Diagram illustrating the dimensions of the ALLOSUN ETP110 device.
6. Setup
6.1 Battery Installation
- Locate the battery compartment cover on the back of the device.
- Slide or unclip the cover to open the compartment.
- Insert two (2) 1.5V AAA batteries, ensuring the correct polarity (+/-) as indicated inside the compartment.
- Replace the battery compartment cover securely.
6.2 Sensor Probe Placement
The temperature-humidity sensor can be used in two configurations:
- Attached to the Meter: The sensor can remain connected to the left side of the main unit for integrated measurements.
- Extended Placement: For measurements in a different location (e.g., inside a greenhouse, refrigerator, or another room), extend the sensor probe using its cable. Ensure the cable is not pinched or damaged.
6.3 Mounting Options
The device offers flexible placement options:
- Flat Surface: Use the integrated holder to place the device on a desk, shelf, or any flat surface. The holder base is detachable.
- Wall Mounting: The device can be mounted on a wall using a suitable screw (not included) through the designated mounting hole on the back.
7. Operating Instructions
7.1 Power On/Off
The device powers on automatically once batteries are installed. There is no manual power on/off button. To turn off, remove the batteries.
7.2 Reading Measurements
Upon power-on, the LCD will display the current temperature, relative humidity, and dew point. Readings update approximately every 3 seconds.
7.3 Switching Temperature Units (℃/℉)
To switch between Celsius (℃) and Fahrenheit (℉):
- Press and hold the "max/min" button for approximately 3 seconds. The temperature unit will change, and all related temperature readings (temperature, dew point) will adjust accordingly.
7.4 Viewing Maximum/Minimum Values
The device records the maximum and minimum temperature and humidity values since the last reset.
- Press the "max/min" button once to display the maximum recorded values (MAX indicator will appear).
- Press the "max/min" button a second time to display the minimum recorded values (MIN indicator will appear).
- Press the "max/min" button a third time to return to current readings.
7.5 Resetting Maximum/Minimum Values
To clear the recorded maximum and minimum values:
- While viewing either MAX or MIN values, press the "reset" button. The recorded values will reset to the current readings.
7.6 Setting Humidity Alarm
The device can alert you when humidity levels go above a preset upper limit or below a preset lower limit.
- Press and hold the "reset" button for approximately 3 seconds until the "SET" indicator appears and the upper humidity limit (HI) starts flashing.
- Use the "max/min" button to adjust the desired upper humidity limit.
- Press the "reset" button again to confirm the HI limit and proceed to set the lower humidity limit (LO), which will start flashing.
- Use the "max/min" button to adjust the desired lower humidity limit.
- Press the "reset" button a third time to confirm the LO limit and exit the alarm setting mode.
When the humidity exceeds the set HI limit or falls below the set LO limit, the Alarm LED will flash, and an audible alarm will sound. To silence the alarm, press any button. To disable the alarm function, repeat the setting process and set the HI and LO limits to their default or desired off state (refer to specific device behavior if an 'OFF' option is available, otherwise set limits outside expected range).
8. Maintenance
8.1 Cleaning
Wipe the device casing with a soft, dry cloth. Do not use liquid cleaners, solvents, or abrasive materials, as these can damage the display or internal components.
8.2 Battery Replacement
When the display becomes dim or the device functions erratically, replace the batteries. Follow the battery installation steps in Section 6.1.
8.3 Storage
If the device will not be used for an extended period, remove the batteries to prevent potential leakage and damage. Store the device in a cool, dry place, away from direct sunlight and extreme temperatures.
9. Troubleshooting
| Problem | Possible Cause | Solution |
|---|---|---|
| No display or dim display | Low or dead batteries; incorrect battery installation. | Replace batteries with new 1.5V AAA batteries, ensuring correct polarity. |
| Inaccurate readings | Sensor probe obstructed or damaged; device placed in an unsuitable environment (e.g., near heat source, direct airflow). | Ensure the sensor probe is clean and unobstructed. Relocate the device to a stable environment away from direct influences. Allow time for readings to stabilize. |
| Humidity alarm not functioning | Alarm limits set incorrectly; alarm function disabled. | Review and adjust the humidity alarm HI/LO limits as described in Section 7.6. Ensure the current humidity is within or outside the set limits as expected. |
| Buttons unresponsive | Temporary software glitch; low batteries. | Remove and reinsert batteries to perform a soft reset. Replace batteries if they are low. |
10. Warranty and Support
For warranty information or technical support, please refer to the documentation provided at the time of purchase or contact your retailer or the manufacturer directly. Keep your purchase receipt as proof of purchase.