1. Product Overview
The Fairchild Automotive F4055 is a front removable roof seal designed for 1978-1996 Ford Bronco vehicles. This weatherstrip component is crucial for maintaining a sealed environment within the vehicle, preventing water and debris ingress, and reducing wind noise. It is an OEM equivalent part to D8TZ-9851322-A.
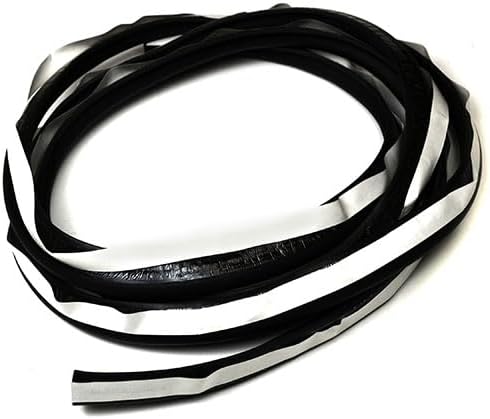
Figure 1: The Fairchild Automotive F4055 Removable Roof Seal, shown coiled with its adhesive backing visible. This black rubber weatherstrip is designed for sealing the front removable roof section of compatible vehicles.
2. Specifications
| Part Number | F4055 |
| Included Components | Weatherstrip |
| OEM Equivalent Part Number | D8TZ-9851322-A |
| Product Dimensions | 14 x 14 x 4 inches (35.56 x 35.56 x 10.16 cm) |
| Item Weight | 11.4 ounces (323 grams) |
| Manufacturer | Fairchild Automotive |
| Compatible Vehicles | 1978-1996 Ford Bronco |
3. Installation Guide
Proper installation of the roof seal is essential for optimal performance and longevity. Follow these general steps for installing the Fairchild Automotive F4055 seal. Specific vehicle service manuals may provide more detailed instructions for your particular model year.
- Preparation: Ensure the installation area on the vehicle's roof frame is clean, dry, and free of any old adhesive, rust, or debris. Use an appropriate cleaner to remove any residues.
- Remove Old Seal: Carefully remove the existing, worn, or damaged roof seal. Note its orientation and how it was attached to aid in the new seal's placement.
- Test Fit: Before removing the adhesive backing, gently place the new F4055 seal along the channel to confirm it fits correctly and understand its contours.
- Apply Seal: Begin peeling back a small section of the adhesive liner from one end of the seal. Carefully align the seal with the vehicle's roof frame channel and press it firmly into place. Continue peeling the liner and pressing the seal along the channel, ensuring a snug and even fit. Avoid stretching the seal during installation.
- Secure Ends: Once the seal is fully seated, ensure the ends are properly secured and trimmed if necessary, to prevent lifting.
- Final Check: After installation, inspect the entire length of the seal to ensure it is uniformly seated and there are no gaps or loose sections.
Note: For best adhesion, install in a warm, dry environment. Allow the adhesive to cure for at least 24 hours before exposing the vehicle to moisture or extreme temperatures.
4. Maintenance
Regular maintenance helps extend the life of your roof seal and ensures its continued effectiveness.
- Cleaning: Periodically clean the seal with mild soap and water to remove dirt, dust, and grime. Avoid harsh chemicals or abrasive cleaners that can damage the rubber.
- Inspection: Regularly inspect the seal for any signs of wear, cracking, tearing, or detachment. Pay close attention to corners and areas exposed to frequent movement.
- Lubrication (Optional): If the seal appears dry or stiff, a silicone-based lubricant designed for rubber weatherstripping can be applied to maintain flexibility and prevent sticking.
5. Troubleshooting
If you experience issues after installing the roof seal, consider the following common problems and solutions:
- Water Leaks:
- Cause: Improper installation, gaps, or damaged seal.
- Solution: Re-inspect the seal for proper seating. Ensure no sections are lifted or misaligned. If the seal is damaged, replacement may be necessary.
- Excessive Wind Noise:
- Cause: Seal not fully compressed or gaps allowing air passage.
- Solution: Check for any areas where the seal is not making full contact with the mating surface. Adjust or re-seat as needed.
- Seal Detachment:
- Cause: Insufficient surface preparation, improper adhesive curing, or extreme temperatures.
- Solution: Clean the detached area thoroughly. Apply a suitable automotive weatherstrip adhesive if the original adhesive has failed, or replace the seal if it's extensively damaged.
6. Customer Support
For further assistance or inquiries regarding the Fairchild Automotive F4055 Removable Roof Seal, please contact Fairchild Automotive customer support. Refer to the product packaging or the official Fairchild Automotive website for the most current contact information.
When contacting support, please have your product model number (F4055) and any relevant purchase details ready.