
1. Overview
The Canarm P16-2 Panel Exhaust Fan is a robust, direct-drive fan designed for effective ventilation in industrial, commercial, and farming environments. This 16-inch fan is engineered for horizontal discharge, providing efficient air movement to maintain air quality and temperature.
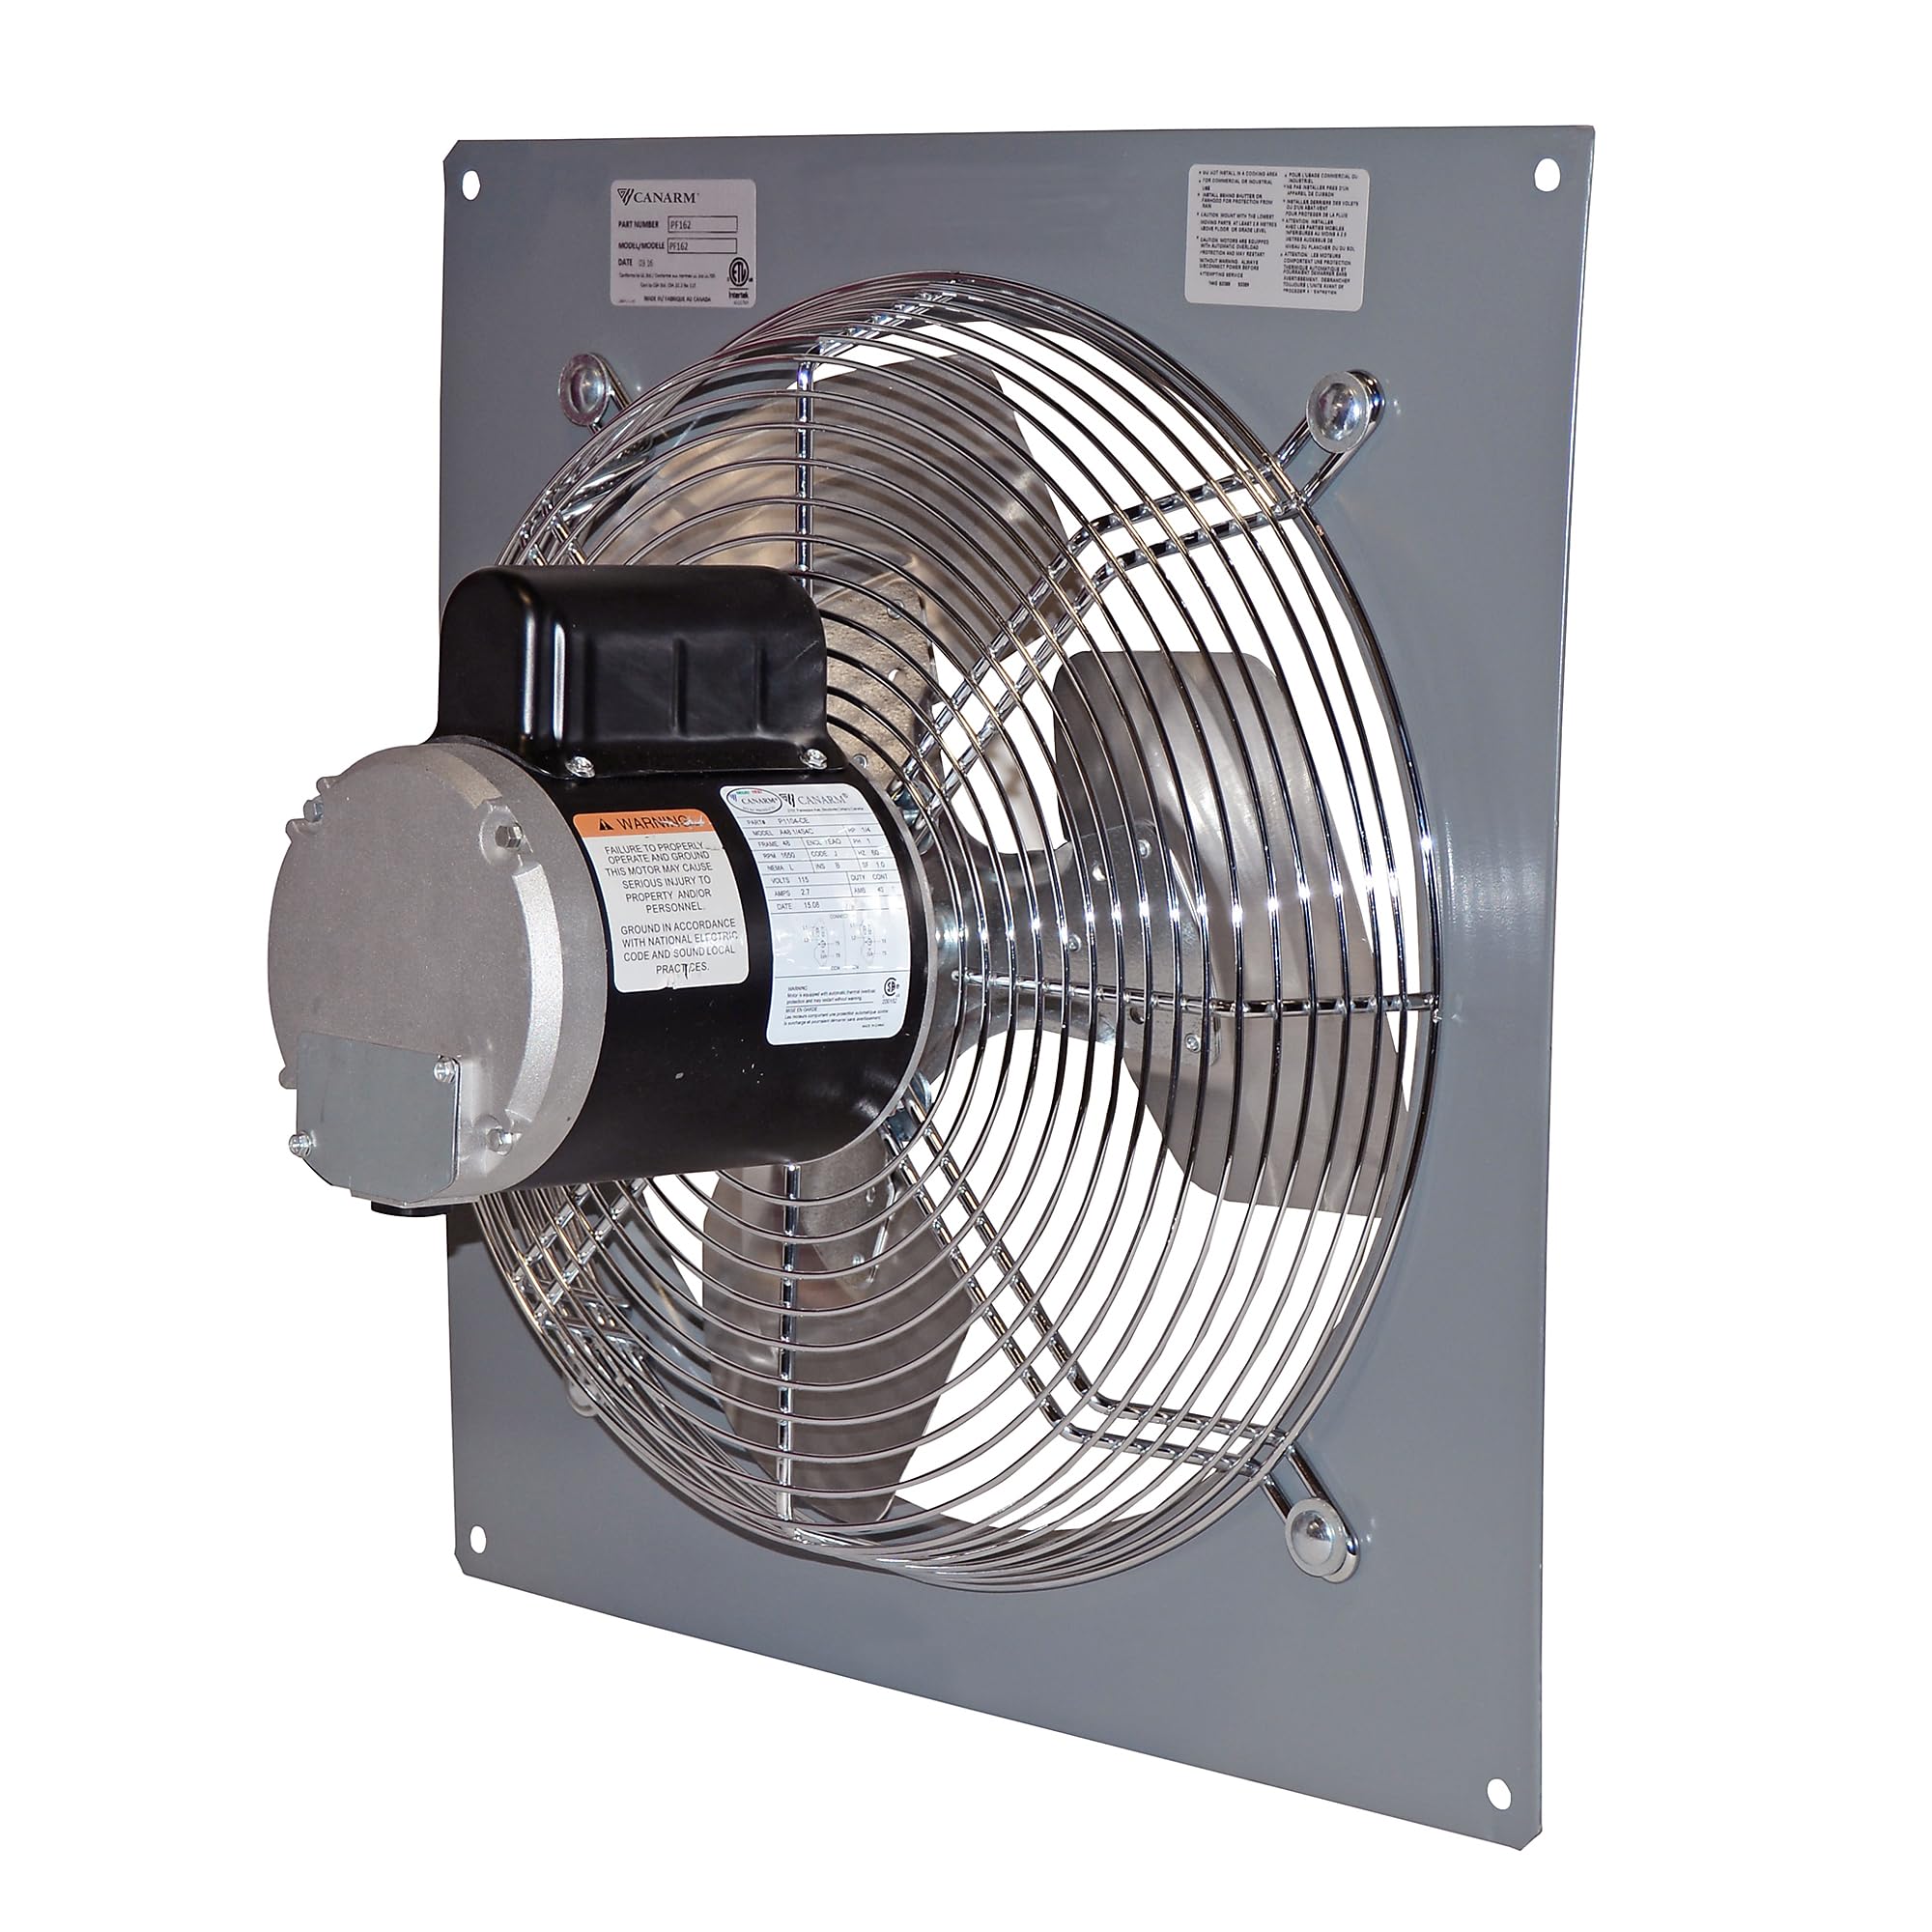
Figure 1: Canarm P16-2 16-inch Panel Exhaust Fan. This image displays the Canarm P16-2 16-inch Panel Exhaust Fan. The fan features a gray square panel with a central motor unit and a circular metal protective grille covering the fan blades. The motor has a black casing and a silver-colored housing. A warning label and product information label are visible on the panel near the motor.
2. Safety Information
Read all instructions carefully before installation and operation. Failure to follow these instructions may result in electric shock, fire, or serious injury.
⚠ WARNING
FAILURE TO PROPERLY OPERATE AND GROUND THIS MOTOR MAY CAUSE SERIOUS INJURY TO PROPERTY AND/OR PERSONNEL. GROUND IN ACCORDANCE WITH NATIONAL ELECTRIC CODE AND SOUND LOCAL PRACTICES.
- Ensure power is disconnected before installation, maintenance, or cleaning.
- All electrical wiring must be performed by a qualified electrician and comply with all local and national electrical codes.
- Do not operate the fan with damaged wiring or if the motor appears to be malfunctioning.
- Keep hands, clothing, and other objects away from moving parts during operation.
- Install the fan in a location where it is protected from direct weather exposure unless specifically rated for outdoor use.
3. Setup and Installation
3.1 Mounting
The Canarm P16-2 is designed for wall mount installation. Ensure the mounting surface is structurally sound and capable of supporting the fan's weight (approximately 31 pounds) and operational vibrations.
- Select a suitable wall location that allows for proper airflow and access for maintenance.
- Mark the mounting points on the wall using the fan's panel holes as a template.
- Drill appropriate pilot holes for mounting hardware (not included).
- Securely fasten the fan to the wall using heavy-duty screws or bolts suitable for the wall material. Ensure the fan is level and stable.
3.2 Electrical Connection
All electrical connections must be performed by a qualified electrician in accordance with the National Electric Code and local regulations.
- Ensure the power supply matches the fan's voltage requirements (refer to the motor label on the fan).
- Connect the fan to a dedicated, properly grounded circuit.
- Install an appropriate disconnect switch near the fan for safety and maintenance.
- Verify all connections are secure and insulated.
4. Operation
The Canarm P16-2 Panel Exhaust Fan is controlled via a remote control (included). Ensure the fan is properly installed and connected to power before operation.
- Power On: Ensure the main power supply to the fan is switched on.
- Remote Control: Use the provided remote control to turn the fan ON/OFF.
- Speed Control (if applicable): If your specific P16-2 model supports multiple speeds, use the remote control to adjust the fan speed as needed.
- Monitoring: Observe the fan during its initial operation to ensure smooth running and proper airflow.
5. Maintenance
Regular maintenance ensures optimal performance and extends the lifespan of your exhaust fan. Always disconnect power before performing any maintenance.
5.1 Cleaning
- Fan Blades and Grille: Periodically clean dust and debris from the fan blades and protective grille using a soft brush or damp cloth. Accumulation of dirt can reduce efficiency and cause imbalance.
- Motor Housing: Wipe down the exterior of the motor housing with a dry cloth. Do not allow moisture to enter the motor.
5.2 Inspection
- Wiring: Annually inspect all electrical wiring for signs of wear, fraying, or damage. Replace any damaged wiring immediately.
- Mounting Hardware: Check mounting bolts and screws for tightness. Tighten if necessary to prevent vibration and ensure stability.
- Motor Bearings: Listen for unusual noises from the motor, which may indicate worn bearings. Consult a qualified technician if unusual noises persist.
6. Troubleshooting
Before attempting any repairs, ensure the power supply to the fan is disconnected.
| Problem | Possible Cause | Solution |
|---|---|---|
| Fan does not start | No power supply Remote control battery low Motor malfunction | Check circuit breaker/fuse Replace remote control batteries Contact qualified technician |
| Low airflow | Dirty fan blades/grille Obstruction in airflow path | Clean fan blades and grille Remove any obstructions |
| Excessive noise or vibration | Loose mounting hardware Damaged fan blades Worn motor bearings | Tighten mounting hardware Inspect blades for damage; replace if necessary Contact qualified technician |
7. Specifications
- Model: P16-2
- Brand: Canarm
- Electric Fan Design: Exhaust Fan
- Style: Modern
- Recommended Uses: Exhausting
- Mounting Type: Wall Mount
- Controller Type: Remote Control
- Included Components: Remote
- Item Weight: 31 Pounds (14.06 kg)
- Package Dimensions: 21.25 x 21.25 x 11 inches (54 x 54 x 28 cm)
- UPC: 062345206851
- Date First Available: June 10, 2021
8. Customer Support
For technical assistance, warranty inquiries, or replacement parts, please contact Canarm customer support. Refer to the official Canarm website for the most current contact information.
Canarm Website: www.canarm.com

