1. Introduction
Thank you for choosing the EKO Mirage Sensor Bin. This 30-liter stainless steel waste bin features an advanced sensor mechanism for hands-free operation, promoting hygiene and convenience in your home or office. Please read this manual thoroughly before use to ensure proper setup, operation, and maintenance.

Image: The EKO Mirage Sensor Bin, 30L, positioned in a contemporary kitchen environment, showcasing its sleek stainless steel design.
2. Safety Information
Please observe the following safety precautions to prevent injury or damage to the product:
- Do not immerse the lid or sensor mechanism in water or any other liquid. This can damage electronic components.
- Use only the specified battery type (AA batteries). Ensure correct polarity when installing batteries.
- Keep the sensor area clear of obstructions to ensure proper operation.
- Do not force the lid open or closed manually when the sensor is active, as this may damage the motor.
- This product is intended for indoor use only.
- Keep out of reach of children to prevent accidental injury or misuse.
3. Setup
3.1. Package Contents
Verify that all components are present in the package:
- EKO Mirage Sensor Bin Body (Stainless Steel)
- Sensor Lid Assembly
- Inner Bucket (30L)
- Instruction Manual
3.2. Battery Installation
The sensor lid requires batteries for operation. Locate the battery compartment on the underside of the lid.
- Gently flip the lid over to access the battery compartment.
- Open the battery compartment cover.
- Insert 6 AA batteries (not included) according to the polarity indicators (+/-).
- Close the battery compartment cover securely.
- Locate the power switch (ON/OFF) on the underside of the lid and switch it to the "ON" position.

Image: Detailed view of the sensor bin lid, highlighting the infrared sensor, the power switch, and the open battery compartment with AA batteries inserted.
3.3. Inner Bucket and Liner Installation
Install the inner bucket and a trash liner:
- Place the inner bucket into the main body of the bin. Ensure it sits flush at the bottom.
- Drape a standard 30-liter trash bag over the rim of the inner bucket.
- Tuck the edges of the trash bag into the designated slots or under the rim of the inner bucket to secure it.
- Place the sensor lid assembly onto the main body of the bin, ensuring it is properly aligned and seated.

Image: The black inner bucket of the EKO Mirage Sensor Bin, partially inserted into the stainless steel outer body, demonstrating the liner installation step.
4. Operating Instructions
4.1. Sensor Operation (Automatic Mode)
The sensor bin is designed for hands-free operation:
- Ensure the power switch on the underside of the lid is in the "ON" position.
- Approach the sensor area (located on the front of the lid) with your hand or an object within 10-15 cm (4-6 inches).
- The lid will automatically open.
- After 5 seconds of inactivity, the lid will automatically close.
- If your hand or object remains within the sensor range, the lid will stay open.
4.2. Manual Open/Close
For extended opening or manual control:
- To keep the lid open for a longer period, press the "OPEN" button on the lid. The lid will remain open until you press the "CLOSE" button.
- To close the lid manually, press the "CLOSE" button.
- To return to sensor mode, ensure no buttons are pressed and the power switch is "ON".
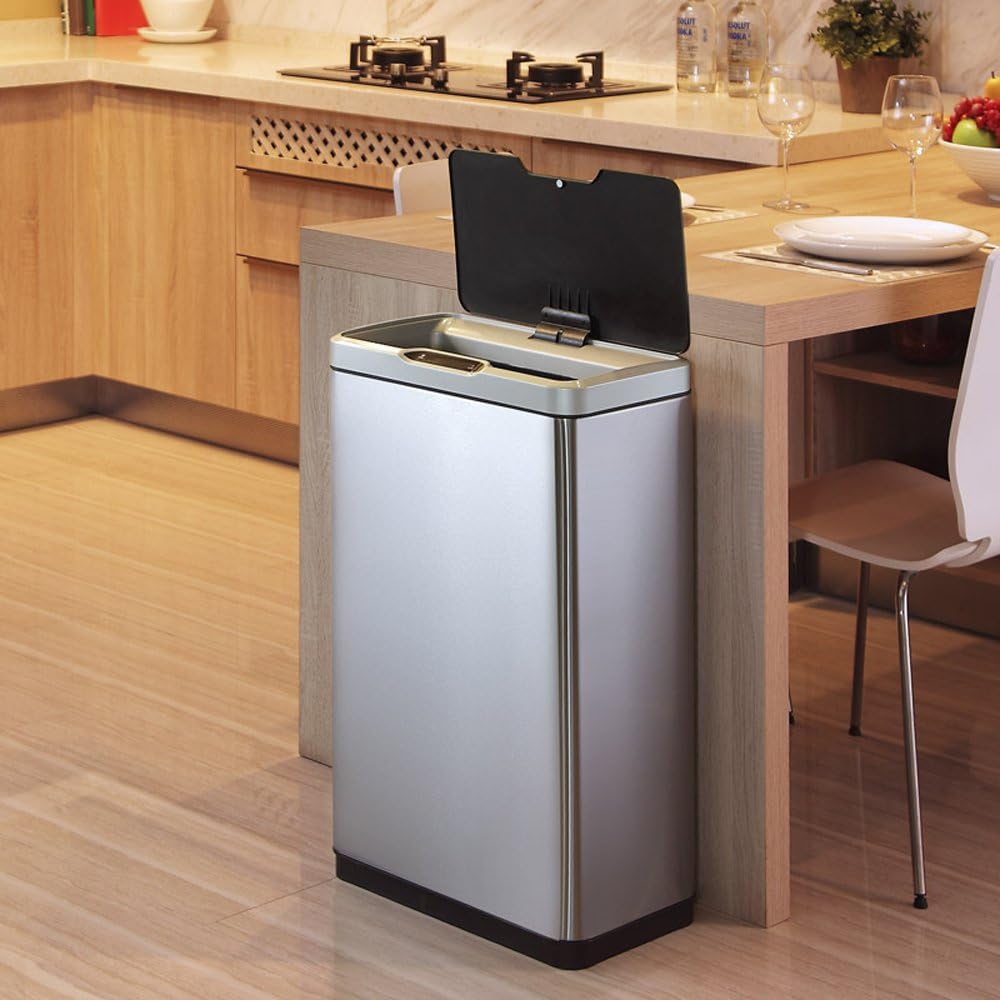
Image: The EKO Mirage Sensor Bin with its lid in the fully open position, demonstrating its operational state for waste disposal.
5. Maintenance and Care
Regular cleaning and proper care will extend the life of your sensor bin:
- Exterior Cleaning: Wipe the stainless steel exterior with a soft, damp cloth and a mild detergent. Dry immediately with a soft, dry cloth to prevent water spots. Do not use abrasive cleaners or scouring pads.
- Lid Cleaning: Clean the lid with a damp cloth. Do not submerge the lid in water. Ensure the sensor area is clean and free of dust or debris.
- Inner Bucket Cleaning: The inner bucket can be removed and washed with soap and water. Rinse thoroughly and dry completely before placing it back into the bin.
- Battery Replacement: Replace all batteries when the lid's operation becomes slow or inconsistent. Always replace with new batteries of the same type.
6. Troubleshooting
If you encounter issues with your EKO Mirage Sensor Bin, refer to the following table:
| Problem | Possible Cause | Solution |
|---|---|---|
| Lid does not open automatically. |
|
|
| Lid opens slowly or inconsistently. |
|
|
| Lid does not close. |
|
|
7. Specifications
- Model: EK9278MT-30L
- Capacity: 30 Liters
- Material: Stainless Steel (Body), ABS Plastic (Lid, Inner Bucket)
- Power: 6 x AA Batteries (not included)
- Opening Mechanism: Infrared Sensor, Manual Open/Close Buttons
- Finish Type: Matte
- Item Weight: Approximately 7.6 kg
- Color: Silver
8. Warranty & Support
EKO products are manufactured to high-quality standards. For warranty information or technical support, please contact EKO customer service through their official website or the retailer where the product was purchased.
Please retain your proof of purchase for warranty claims.
EKO Official Website: www.ekohome.com


