Introduction
This manual provides essential information for the safe and efficient use of your Acer KA240H 24-inch Full HD Monitor. Please read this manual thoroughly before operating your monitor and retain it for future reference. This monitor is designed for general computing tasks, offering a 1920x1080 resolution display.
Safety Information
- Always place the monitor on a stable, flat surface to prevent it from falling.
- Do not block ventilation openings. Ensure adequate space around the monitor for proper airflow.
- Use only the power adapter and cables supplied with the monitor or specified by Acer.
- Keep the monitor away from water, moisture, and extreme temperatures.
- If smoke, strange noises, or unusual odors occur, immediately unplug the monitor and contact qualified service personnel.
- Do not attempt to service the monitor yourself. Refer all servicing to qualified service personnel.
Package Contents
Verify that all items are present and in good condition upon unpacking. If any items are missing or damaged, contact your retailer.
- Acer KA240H Monitor Display Panel
- Monitor Stand Base
- Monitor Stand Neck
- Power Cord
- HDMI Cable (may vary by region)
- User Manual (this document)
Setup
1. Assembling the Monitor Stand
- Carefully place the monitor display panel face down on a soft, clean cloth to prevent scratches.
- Attach the stand neck to the monitor display panel by aligning the tabs and pushing until it clicks into place.
- Attach the stand base to the stand neck. Secure it with the captive screw located on the underside of the base.

2. Connecting Cables
Ensure the monitor and your computer are powered off before making any connections.
- Power Connection: Connect the power cord to the monitor's power input and then to a grounded electrical outlet.
- Video Connection:
- HDMI: Connect one end of the HDMI cable to the HDMI port on your monitor and the other end to the HDMI port on your computer.
- VGA: Connect one end of the VGA cable to the VGA port on your monitor and the other end to the VGA port on your computer. Tighten the screws on the VGA connector.
- DVI: Connect one end of the DVI cable to the DVI port on your monitor and the other end to the DVI port on your computer.
Note: The monitor supports HDMI, VGA, and DVI inputs. Use only one video connection at a time.
3. Initial Power On
After connecting all cables, power on your computer, then press the power button on the monitor. The monitor should automatically detect the input signal. If no image appears, refer to the Troubleshooting section.
Operating the Monitor
Power Button and OSD Controls
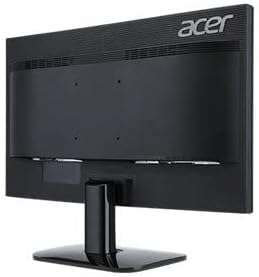
The power button and On-Screen Display (OSD) control buttons are typically located on the bottom right bezel of the monitor. Refer to the diagram below for button identification.
- Power On/Off: Press the power button to turn the monitor on or off.
- OSD Menu: Press any OSD button (usually indicated by icons) to bring up the On-Screen Display menu.
- Navigation: Use the arrow buttons to navigate through menu options.
- Selection: Press the 'Menu' or 'Enter' button to select an option or confirm a setting.
- Exit: Press the 'Exit' button to close the OSD menu.
Common OSD Settings
- Picture: Adjust brightness, contrast, sharpness, and color temperature.
- Color: Fine-tune color settings, including gamma and color space.
- Input: Manually select the input source (HDMI, VGA, DVI) if auto-detection fails.
- OSD: Adjust OSD language, transparency, and timeout.
- Management: Access information about the monitor, reset settings to factory defaults.
Maintenance
Cleaning the Monitor
- Always unplug the monitor from the power outlet before cleaning.
- Screen: Use a soft, lint-free cloth lightly dampened with water or a specialized screen cleaner. Do not spray cleaner directly onto the screen.
- Exterior: Use a soft, dry cloth to wipe the monitor casing. Avoid using abrasive cleaners or solvents.
Storage
If storing the monitor for an extended period, unplug it, disconnect all cables, and store it in a cool, dry place, preferably in its original packaging.
Troubleshooting
| Problem | Possible Solution |
|---|---|
| No image on screen |
|
| Image is blurry or distorted |
|
| Monitor flickers |
|
| No power indicator light |
|
Specifications
| Feature | Detail |
|---|---|
| Model Number | UM.FX0EE.005 |
| Screen Size | 24 inches (61 cm) |
| Resolution | FHD 1080p (1920 x 1080 Pixels) |
| Aspect Ratio | 16:9 |
| Refresh Rate | 60 Hz |
| Response Time | 5 Milliseconds |
| Display Type | LED |
| Connectivity Technology | HDMI, VGA, DVI |
| Mounting Type | Wall Mount (VESA compatible) |
| Color | Black |
| Item Dimensions (D x W x H) | 18"D x 0.78"W x 12"H (approximate, without stand) |
| Item Weight | 3.74 Kilograms |
| Manufacturer | Acer |
Warranty Information
Your Acer KA240H monitor comes with a standard warranty. The warranty covers 1 Year Parts and Labor from the date of purchase. Please retain your proof of purchase for warranty claims. For detailed terms and conditions, refer to the warranty card included with your product or visit the official Acer support website.
This warranty does not cover damage caused by accident, misuse, abuse, improper installation or operation, natural disaster, or unauthorized modifications or repairs.
Support
If you encounter issues that cannot be resolved using the troubleshooting guide, or if you require further assistance, please contact Acer customer support. You can typically find support contact information, FAQs, and driver downloads on the official Acer website.
For the most up-to-date support resources, please visit: www.acer.com/support


