
1. Introduction
Thank you for purchasing the Inter Link Genova A2 Sinfonier. This 3-drawer chest features a durable laminated structure in white with metal drawer guides. This manual provides essential information for the safe and correct assembly, operation, maintenance, and troubleshooting of your new furniture. Please read these instructions carefully before beginning assembly and retain them for future reference.
2. Safety Information
- Adult Assembly Required: This product requires adult assembly. Keep children away during the assembly process.
- Use Proper Tools: Ensure you have the correct tools for assembly as specified in the package contents.
- Secure to Wall: To prevent tipping, it is highly recommended to secure the sinfonier to a wall using appropriate anti-tip hardware (not included, but recommended for safety).
- Weight Limits: Do not overload drawers. Distribute weight evenly.
- Stable Surface: Place the sinfonier on a flat, stable, and level surface to prevent wobbling or tipping.
- Avoid Moisture: Do not expose the furniture to excessive moisture or direct sunlight, which can damage the finish.
3. Package Contents
Before assembly, verify that all components are present and undamaged. If any parts are missing or damaged, please contact Inter Link customer support.
- Side Panels (2)
- Top Panel (1)
- Bottom Panel (1)
- Back Panel (1)
- Drawer Fronts (3)
- Drawer Side Panels (6)
- Drawer Back Panels (3)
- Drawer Bottom Panels (3)
- Metal Drawer Guides (6 pairs)
- Assembly Hardware (screws, dowels, cam locks, etc.)
4. Setup and Assembly Instructions
Assembly is required for this product. Follow these general steps. Specific diagrams and hardware details are typically included in a separate assembly sheet within the packaging.
- Prepare Workspace: Clear a spacious, clean area. Lay out all parts and hardware.
- Assemble the Main Frame: Attach side panels to the top and bottom panels using the provided dowels and cam locks/screws. Ensure the structure is square.
- Install Back Panel: Secure the back panel to the main frame using small nails or screws. This adds stability.
- Assemble Drawers: For each of the three drawers, connect the side, front, and back panels. Slide the drawer bottom into the grooves.
- Attach Drawer Guides: Secure the metal drawer guides to the inside of the main frame and to the sides of each assembled drawer. Ensure they are level and aligned for smooth operation.
- Insert Drawers: Carefully slide each assembled drawer onto its respective guides within the sinfonier frame.
- Final Checks: Ensure all screws are tightened and the unit is stable.

Image: Detail of the metal drawer guide mechanism, crucial for smooth drawer operation.

Image: An open drawer, illustrating the internal capacity and how it extends on its guides.
5. Operating Instructions
The Inter Link Genova A2 Sinfonier is designed for straightforward use.
- Opening Drawers: Gently pull the integrated handle on the drawer front to open. The metal guides ensure smooth extension.
- Closing Drawers: Push the drawer firmly until it is fully closed and flush with the sinfonier frame.
- Weight Distribution: Distribute items evenly within the drawers. Avoid placing excessively heavy items in a single drawer, especially the top ones, to maintain stability.

Image: Detail of the ergonomically designed integrated handle on the drawer front.
6. Maintenance
Proper care will ensure the longevity and appearance of your sinfonier.
- Cleaning: Wipe with a dry cloth. For stubborn marks, a slightly damp cloth with mild soap can be used, followed immediately by drying with a clean, dry cloth.
- Avoid Harsh Chemicals: Do not use abrasive cleaners, solvents, or polishes containing silicone, as these can damage the laminated finish.
- Spills: Clean up spills immediately to prevent moisture absorption and staining.
- Hardware Check: Periodically check all screws and fittings to ensure they remain tight. Retighten if necessary.
7. Troubleshooting
If you encounter issues with your sinfonier, refer to the following common solutions:
- Drawers Stick or Don't Slide Smoothly:
- Check if the drawer guides are properly aligned and securely fastened.
- Ensure the drawer is not overloaded or unevenly weighted.
- Verify that the main frame is square and not warped.
- Sinfonier Wobbles:
- Ensure the unit is placed on a level surface.
- Check all assembly screws and tighten any loose ones.
- Consider securing the unit to a wall with anti-tip hardware for added stability.
- Damaged Finish:
- Minor scratches may be touched up with a furniture repair pen matching the white finish.
- For significant damage, contact customer support for advice.
8. Specifications
| Brand | Inter Link |
| Model Name | Genova A2 |
| Model Number | 19040012 |
| Material | Melamine |
| Finish Type | Laminated |
| Color | White |
| Number of Drawers | 3 |
| Product Dimensions (D x W x H) | 16.14" x 15.75" x 27.95" (41 cm x 40 cm x 71 cm) |
| Item Weight | 15 Kilograms |
| Assembly Required | Yes |
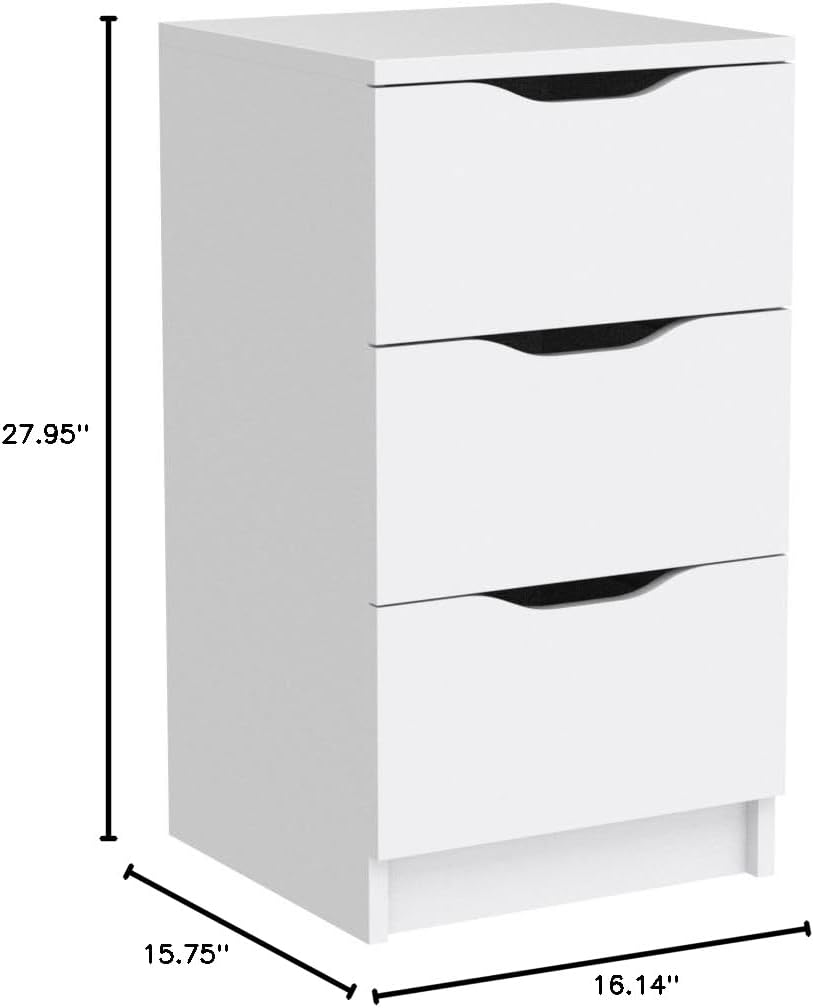
Image: Dimensional drawing of the sinfonier, indicating its width, depth, and height.

Image: Detail of the sinfonier's base, highlighting its construction and stability.
9. Warranty and Support
For information regarding warranty coverage, returns, or technical support, please refer to the documentation provided at the time of purchase or contact your retailer. You may also visit the official Inter Link website for further assistance.
