
1. Introduction
The Victron Energy BMV-700 Battery Monitor is a high-precision instrument designed to provide comprehensive monitoring of your battery system. It tracks various parameters for battery systems with voltage ranges from 6.5 to 95 VDC, offering insights into the state of charge, voltage, current, energy/time remaining, and more. This manual provides detailed instructions for installation, operation, and maintenance to ensure optimal performance and longevity of your battery monitor.
2. What's in the Box
Your Victron Energy BMV-700 package includes the following components:
- BMV-700 head unit
- 500A shunt
- 1.5m (59") red cable with a 1A fuse
- 10m (33ft) RJ12 UTP cable
- Bag with 4 small screws
- BMV Bezel Square

Figure 1: Components included with the Victron Energy BMV-700 Battery Monitor.
3. Setup and Installation
Proper installation is crucial for the accurate operation of your BMV-700. Please follow these guidelines carefully. Incorrect installation can be hazardous. Consult a licensed professional and follow all applicable electrical codes during installation.
3.1. Physical Installation
The head unit can be mounted in a variety of ways:
- Panel mounting: The head unit is secured at the back of a panel.
- Panel mounting: The head unit is secured at the front of the panel.
- Wall mounting: Using an optional wall mounting enclosure.

Figure 2: BMV-700 head unit dimensions and mounting flexibility.
3.2. Wiring the BMV-700 and Shunt
The BMV-700 connects to your battery system via the included 500A shunt. The shunt must be installed on the negative side of your battery bank. All loads and charge sources must be connected to the 'Load and Charger Only' side of the shunt, and the battery's negative terminal to the 'Battery Only' side.
Video 1: How to connect the Victron Energy BMV-700 battery monitor.
Connect the BMV-700 head unit to the shunt using the supplied RJ12 UTP cable. Ensure all connections are secure and properly tightened.

Figure 3: BMV-700 display showing current voltage and battery level.
3.3. Initial Configuration and Synchronization Parameters
After physical installation, configure the BMV-700 for accurate readings. This involves setting the battery capacity and optimizing synchronization parameters. The BMV-700 can be configured directly via its buttons or more conveniently using the VictronConnect app with an optional VE.Direct Bluetooth Smart dongle.
Video 2: How to set up BMV Battery Monitor for lead and lithium batteries.
Key synchronization parameters include:
- Charged Voltage: Set approximately 0.3V below the charger's float voltage for non-solar systems, or 0.3V below absorption voltage for solar systems.
- Tail Current: This is the charge current percentage below which the battery is considered fully charged. Default 4% is suitable for most systems.
- Charged Detection Time: The duration for which both charged voltage and tail current conditions must be met. Default 3 minutes is generally sufficient.
- Peukert Exponent: Adjusts capacity calculation based on discharge rate. Use 1.25 for lead-acid and 1.05 for lithium-ion batteries.
Video 3: How to optimize the BMV-700 series sync parameters.

Figure 4: BMV-700 display showing various battery parameters.
4. Operating the BMV-700
Once configured, the BMV-700 provides real-time data on your battery's status. The display cycles through various parameters, or you can manually select them using the 'Select' button.
4.1. VictronConnect App Monitoring
For enhanced monitoring and configuration, connect your BMV-700 to the VictronConnect app via a VE.Direct Bluetooth Smart dongle (sold separately). The app allows you to view battery status, historical data, and trends wirelessly on your smartphone or tablet.
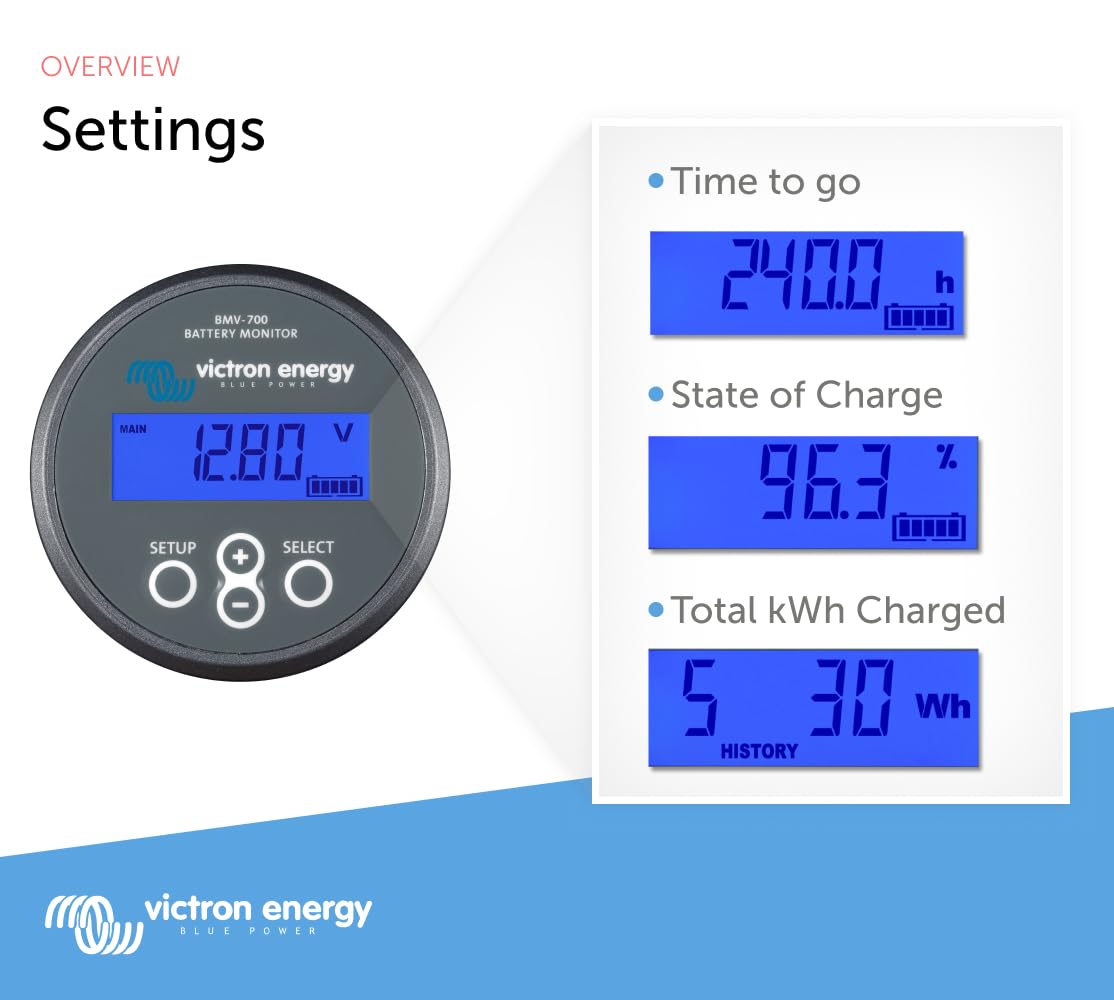
Figure 5: VictronConnect app displaying BMV-700 data on a smartphone.
5. Maintenance
Regular maintenance ensures the accuracy and longevity of your battery monitor and battery bank.
- Regular Full Charges: Ensure your battery is fully charged at least twice a month. This allows the BMV to synchronize and maintain accurate State of Charge (SOC) readings.
- Battery Health: Monitoring the battery with a battery monitor provides important feedback to the user so that remedial measures can be taken when necessary. Doing this will extend battery life.
- Connections: Periodically check all wiring connections to the shunt and battery for tightness and corrosion.
6. Troubleshooting
If you encounter issues with your BMV-700, consider the following:
- Inaccurate SOC: If the SOC reading appears incorrect, ensure your battery is regularly fully charged to allow for synchronization. Review the synchronization parameters (Charged Voltage, Tail Current, Charged Detection Time) in the setup section.
- Connectivity Issues: Ensure the VE.Direct Bluetooth Smart dongle is properly connected and Bluetooth is enabled on your smart device.
- No Display: Check all power connections to the shunt and the positive supply cable to the BMV head unit.
7. Specifications
| Feature | Specification |
|---|---|
| Product Dimensions | 7.87 x 7.87 x 2.36 inches |
| Item Weight | 2.2 Pounds (1 Kilograms) |
| Item Model Number | BAM010700000 |
| Voltage Range | 6.5-95 VDC |
| Shunt Rating | 500A/50mV |
8. Warranty & Support
The Victron Energy BMV-700 Battery Monitor is manufactured by Victron Energy. For warranty information, technical support, or additional resources, please visit the official Victron Energy website or contact their customer service. Ensure to register your product if required to activate your warranty.