Introduction
This manual provides detailed instructions for the safe and efficient operation of your Stanley W38428 Countdown Timer. Please read this manual thoroughly before using the device and retain it for future reference.

Image: Angled view of the Stanley W38428 Countdown Timer, displaying the brand name and the array of time setting and control buttons.
Important Safety Information
Always follow basic safety precautions when using electrical appliances to reduce the risk of fire, electric shock, and personal injury.
- Do not immerse the timer in water or any other liquid.
- Do not operate the timer with a damaged cord or plug.
- Ensure the timer is securely plugged into a grounded outlet.
- Do not overload the electrical outlet.
- Keep out of reach of children.
- Unplug the timer from the outlet when not in use or before cleaning.
Setup
- Unpacking: Carefully remove the Stanley W38428 Countdown Timer from its packaging. Inspect the device for any signs of damage.
- Placement: Select a suitable indoor electrical outlet. Ensure the area is dry and free from obstructions.
- Plug-in: Insert the timer's plug firmly into a standard wall outlet.
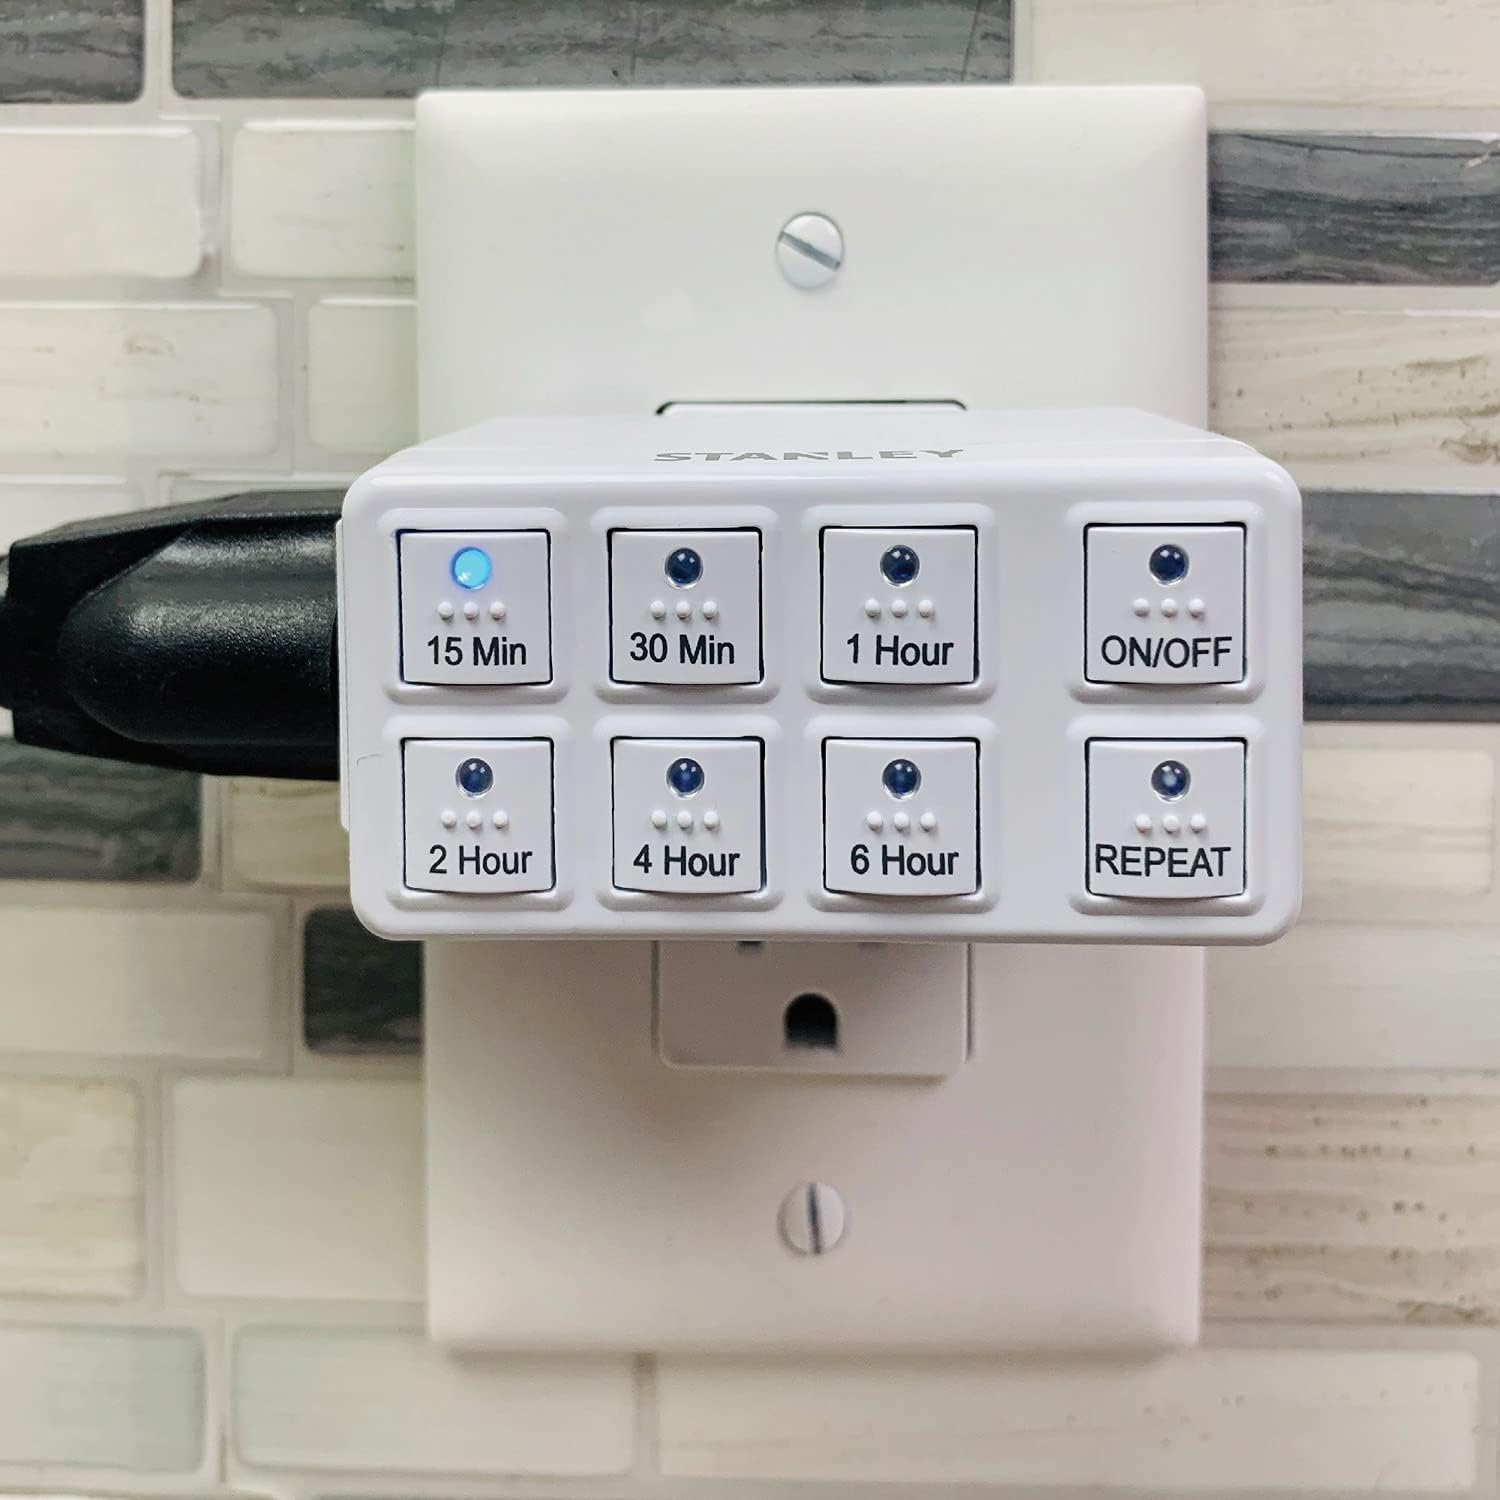
Image: The Stanley W38428 Countdown Timer shown plugged into a standard wall outlet, ready for use.
Operating Instructions
The Stanley W38428 Countdown Timer features multiple preset countdown options and a repeat function for convenience.
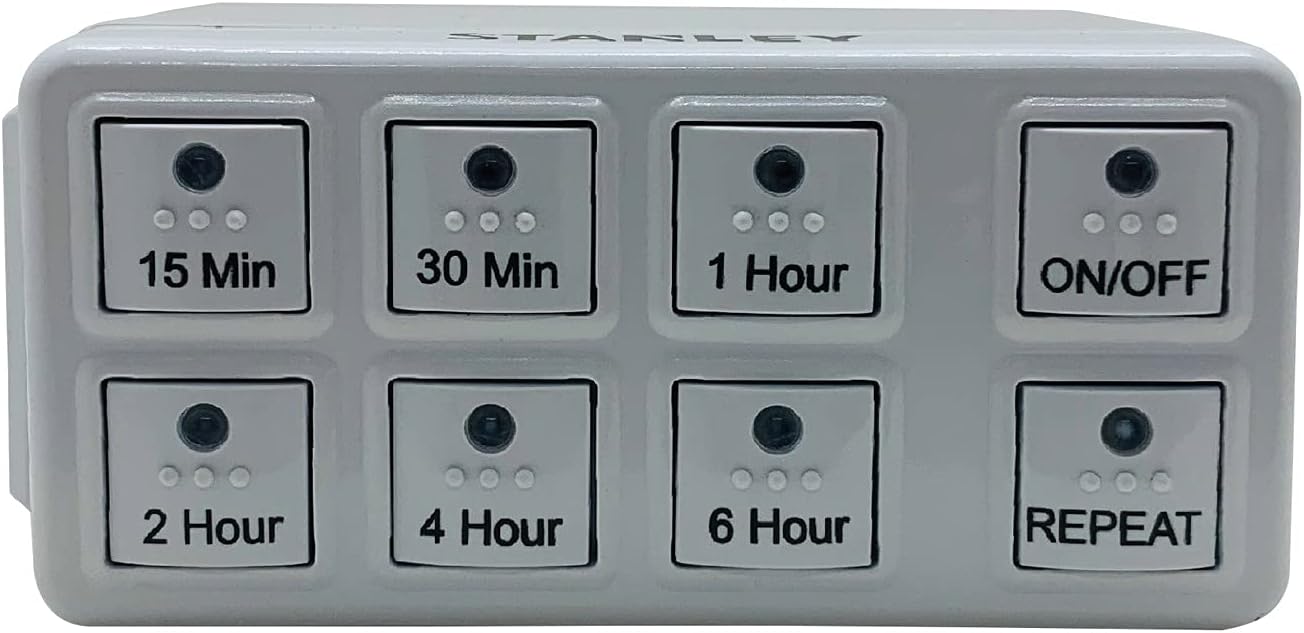
Image: Front view of the Stanley W38428 Countdown Timer, clearly displaying all eight control buttons and their labels.
Setting a Countdown
- Connect Device: Plug the appliance you wish to control into the outlet on the side of the timer.
- Select Time: Press one of the six countdown buttons (15 Min, 30 Min, 1 Hour, 2 Hour, 4 Hour, 6 Hour) corresponding to your desired operating duration. The selected button's indicator light will illuminate.
- Start Timer: The timer will immediately begin counting down. The connected appliance will receive power for the set duration.
- Automatic Shut-off: Once the countdown is complete, the timer will automatically cut power to the connected appliance.
Using the ON/OFF Button
- Press the ON/OFF button to manually turn power to the connected appliance on or off, overriding any active countdown or repeat setting.
- When the timer is off, pressing a countdown button will activate the timer for that duration.
Using the REPEAT Function
The repeat function allows the timer to automatically activate and deactivate the connected appliance at the same time each day, based on the last set countdown duration.
- Set Initial Countdown: First, set your desired countdown duration (e.g., 2 Hours) by pressing the corresponding button.
- Activate Repeat: While the countdown is active or immediately after it finishes, press the REPEAT button. The REPEAT indicator light will illuminate.
- Daily Cycle: The timer will now automatically turn on the connected appliance for the previously set duration at the same time each day.
- Deactivate Repeat: To stop the daily repeat cycle, press the REPEAT button again. The indicator light will turn off.
Maintenance
- Cleaning: Disconnect the timer from the power outlet before cleaning. Wipe the exterior with a soft, dry cloth. Do not use abrasive cleaners or solvents.
- Storage: Store the timer in a cool, dry place when not in use.
Troubleshooting
| Problem | Possible Cause | Solution |
|---|---|---|
| Timer does not turn on. | Not properly plugged in; no power to outlet. | Ensure the timer is fully inserted into a functional outlet. Check the circuit breaker. |
| Connected appliance does not turn on. | Appliance is not plugged into the timer; timer is not active; appliance is faulty. | Ensure the appliance is plugged into the timer. Press a countdown button or the ON/OFF button. Test the appliance directly in a wall outlet. |
| Timer does not turn off after countdown. | Temporary electrical glitch. | Unplug the timer from the wall outlet for a few seconds, then plug it back in. If the issue persists, contact customer support. |
| Repeat function not working. | Repeat not activated; previous countdown not set. | Ensure a countdown duration was set before pressing REPEAT, and that the REPEAT indicator light is on. |
Specifications
- Brand: Stanley
- Model Number: W38428
- Material: Plastic
- Dimensions (L x W x H): 5.08 x 7.62 x 7.62 cm (2 x 3 x 3 inches)
- Weight: 90.7 g (3.2 oz)
- Number of Settings: 6 preset countdown durations
- UPC: 686140384288
Warranty Information
This product may come with a manufacturer's warranty. Please refer to the packaging or contact Stanley customer support for specific warranty terms and conditions.
Customer Support
For further assistance, technical support, or to inquire about replacement parts, please contact Stanley customer service. Contact information can typically be found on the product packaging or the official Stanley website.


