
1. Introduction
This manual provides detailed instructions for the installation, operation, and maintenance of your Isenberg 196.2100CP 2 Output Tub/Shower Trim with Pressure Balance Valve and Integrated 2-Way Diverter. Please read these instructions thoroughly before beginning installation or operation to ensure proper function and longevity of your product. Retain this manual for future reference.
2. Safety Information
- Professional Installation Recommended: Installation should be performed by a qualified plumber in accordance with all local plumbing and building codes.
- Water Supply: Ensure the main water supply is turned off before beginning any installation or maintenance to prevent water damage.
- Hot Water Safety: Always test water temperature before use to prevent scalding. The pressure balance valve helps maintain consistent water temperature.
- Handle with Care: Protect finished surfaces from scratches and damage during installation.
- Tools: Use appropriate tools for installation. Do not overtighten connections, as this may cause damage.
3. Package Contents
Verify that all components are present before beginning installation:
- Tub/Shower Trim Kit (escutcheon, handle, diverter knob)
- Pressure Balance Valve with Service Stops
- Faucet components
- Hose (if applicable for hand shower)
- Fixing Kit (screws, gaskets, mounting hardware)
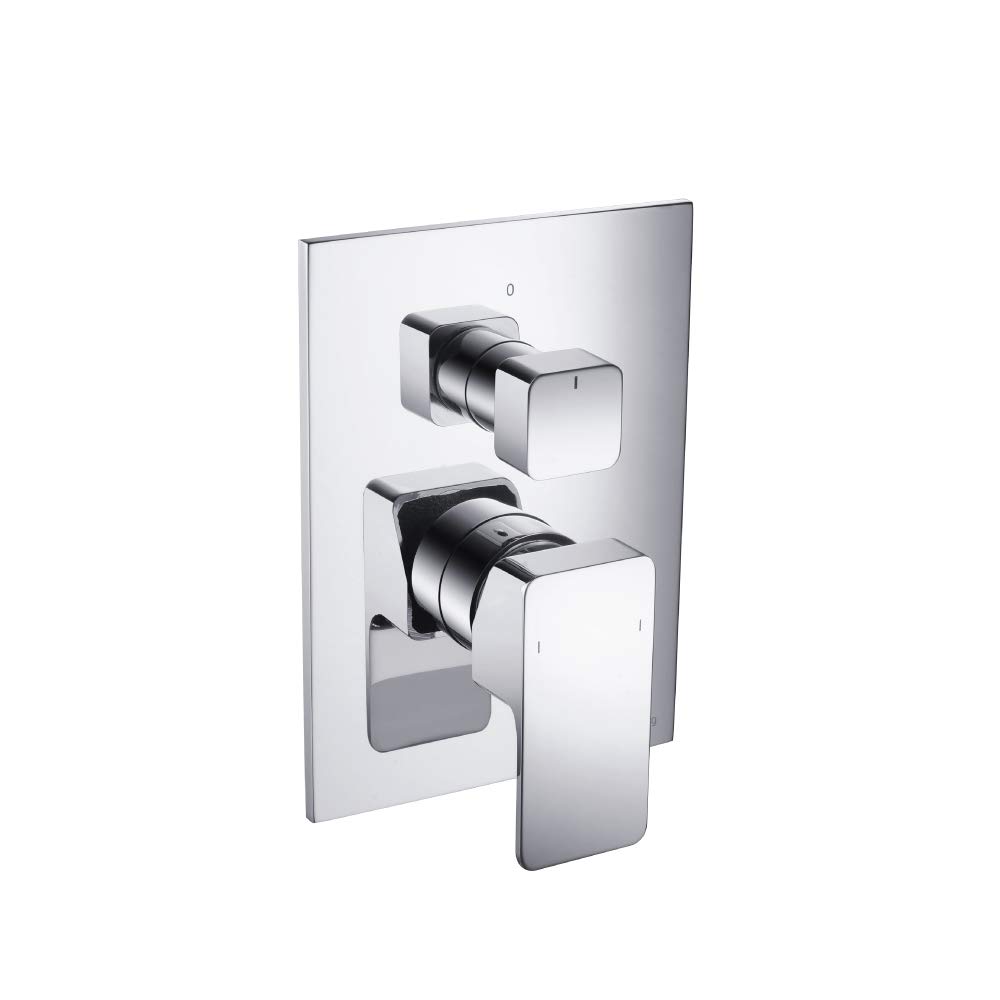
Image 1: Isenberg 196.2100CP Tub/Shower Trim components. This image displays the various parts included in the trim kit, such as the handle, escutcheon, and diverter, along with the main valve body.
4. Setup and Installation
This section outlines the general steps for installing the Isenberg 196.2100CP tub/shower trim. For detailed plumbing diagrams and specific rough-in dimensions, refer to the separate rough-in valve installation guide provided with the pressure balance valve.
- Prepare Installation Area: Ensure the wall opening is correctly sized for the pressure balance valve and that all necessary plumbing lines (hot, cold, shower, tub spout) are in place and capped.
- Install Pressure Balance Valve: Mount the pressure balance valve securely within the wall cavity according to the manufacturer's instructions. Connect hot and cold water supply lines to the designated inlets. Connect the shower outlet and tub spout outlet lines. Ensure service stops are accessible.
- Install Trim Plate (Escutcheon): Once the valve is installed and tested for leaks, position the trim plate over the valve body, aligning it with the mounting holes. Secure the trim plate to the wall using the provided screws.
- Install Handle and Diverter: Attach the main control handle to the valve stem. Secure the diverter knob to its stem. Ensure both operate smoothly.
- Install Showerhead and Tub Spout: Connect the showerhead to the shower arm and the tub spout to its pipe. Ensure all connections are watertight.
- Test Operation: Turn on the main water supply. Check for leaks at all connections. Test the function of the handle for temperature and volume control, and the diverter for switching between shower and tub spout.
5. Operating Instructions
Your Isenberg 196.2100CP tub/shower trim features a single handle for volume and temperature control, and an integrated 2-way diverter.
- Volume Control: Lift the main handle to control the water volume. Lifting it higher increases the flow.
- Temperature Control: Rotate the main handle to adjust water temperature. Turning the handle to the left will increase the hot water flow, resulting in warmer water. Turning it to the right will increase the cold water flow, resulting in cooler water.
- Diverter Operation: The integrated 2-way diverter allows you to switch water flow between the tub spout and the showerhead. Rotate the diverter knob to select the desired output.
- Pressure Balance Valve: The integrated pressure balance valve automatically adjusts water pressure to maintain a consistent temperature, even if there are sudden pressure changes in your hot or cold water supply.
6. Maintenance
Proper care and maintenance will ensure the lasting beauty and performance of your Isenberg tub/shower trim.
- Cleaning: Clean the trim regularly with a soft, damp cloth. Avoid abrasive cleaners, harsh chemicals, or scouring pads, as these can damage the finish.
- Spot Cleaning: For stubborn spots, use a mild soap and water solution, then rinse thoroughly and dry with a soft cloth.
- Avoid Damage: Do not use cleaners containing ammonia, bleach, acids, or abrasive agents on any part of the fixture.
- Cartridge Access: In case of persistent drips or leaks, the valve cartridge may need inspection or replacement. This should be performed by a qualified professional. The service stops on the pressure balance valve allow for water shut-off to the fixture without affecting the entire household supply.
7. Troubleshooting
Refer to the following table for common issues and their potential solutions. If the problem persists, contact a qualified plumber or Isenberg customer support.
| Problem | Possible Cause | Solution |
|---|---|---|
| Low Water Flow | Partially closed service stops; debris in aerator/showerhead; low household water pressure. | Ensure service stops are fully open. Clean aerator/showerhead. Check main water supply pressure. |
| Inconsistent Water Temperature | Pressure balance valve malfunction; hot/cold water supply issues. | Verify hot and cold water supply. Contact a plumber to inspect the pressure balance cartridge. |
| Leaking from Handle/Spout | Loose connections; worn O-rings or cartridge. | Check and tighten connections (do not overtighten). A qualified plumber should inspect or replace the cartridge/O-rings. |
| Diverter Not Switching Properly | Debris in diverter mechanism; worn diverter cartridge. | Flush the system. If problem persists, a plumber may need to inspect or replace the diverter cartridge. |
8. Specifications
| Feature | Detail |
|---|---|
| Model Number | 196.2100CP |
| Brand | Isenberg |
| Material | Solid Brass Valve & Trim |
| Dimensions (L x W x H) | 10 x 10 x 10 inches (approximate trim plate dimensions) |
| Valve Type | Pressure Balance Valve with Service Stops |
| Diverter Type | Integrated 2-Way Diverter |
| Included Components | Faucet, Hose (if applicable), Valve, Fixing Kit |
| UPC/GTIN | 634392347223 |
9. Warranty and Support
Isenberg products are manufactured to high-quality standards and are backed by a manufacturer's warranty. For specific warranty terms and conditions, please refer to the warranty card included with your product or visit the official Isenberg website. For technical support, replacement parts, or any inquiries, please contact Isenberg customer service directly.
Note: Proof of purchase may be required for warranty claims.


