Introduction
This manual provides detailed instructions for the safe and effective use of your CowboyStudio Mcoplus MCO-430 Auto Focus Dedicated Flash Speedlite. Designed for Nikon DSLR cameras, this speedlite offers advanced features for various photographic needs. Please read this manual thoroughly before operating the device.
Package Contents
- One (1) Flash unit
- One (1) Mini flash stand
- One (1) Carrying Bag
- One (1) User Manual
Setup
1. Battery Installation
The Mcoplus MCO-430 Speedlite requires four (4) AA batteries (not included). Ensure correct polarity when inserting batteries.
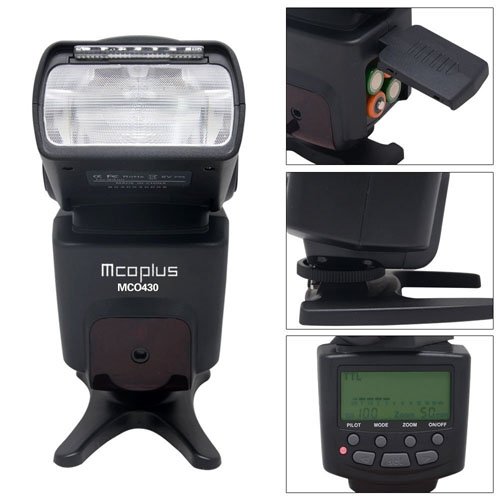
Figure 1: Open the battery compartment cover and insert four AA batteries, observing the polarity markings.
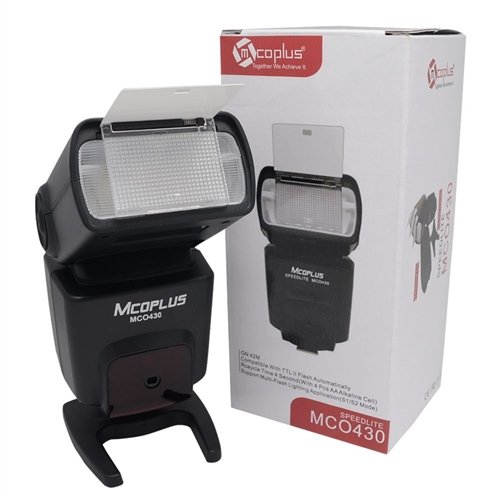
Figure 2: Ensure the battery compartment cover is securely closed after installation.
2. Mounting to Camera
- Slide the flash unit onto your Nikon DSLR camera's hot shoe.
- Tighten the locking ring or lever on the flash unit to secure it firmly to the camera.
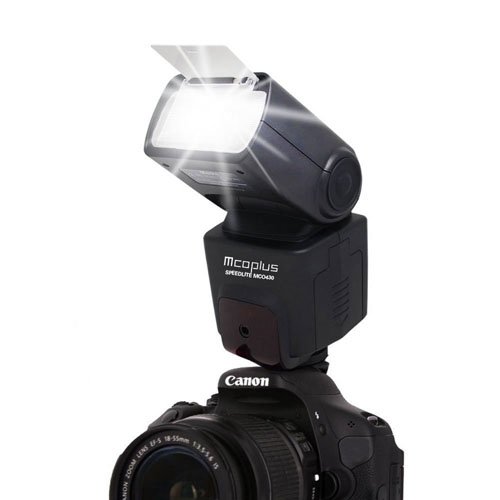
Figure 3: The flash unit securely mounted on a camera's hot shoe.

Figure 4: Different orientations of the flash head when mounted on a camera.
3. Powering On/Off
Press and hold the power button (usually labeled "ON/OFF") on the flash unit to turn it on or off. The LCD screen will illuminate upon power-on.
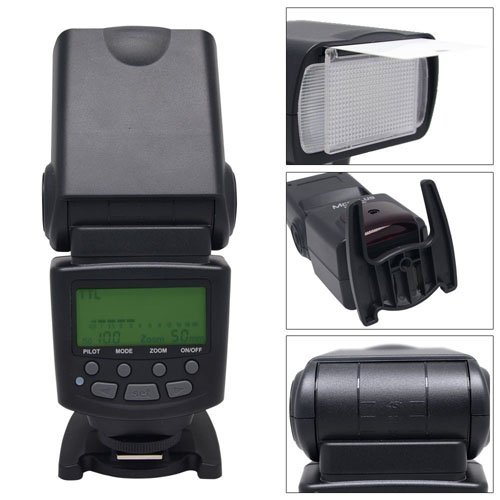
Figure 5: The control panel with the power button and LCD display.
Operating Instructions
Flash Modes
The MCO-430 supports various flash modes to suit different shooting conditions:
- I-TTL (Through The Lens): Automatic flash exposure control, where the camera measures the light through the lens and adjusts flash output accordingly.
- M (Manual): Allows manual adjustment of flash output from 1/128 to 1/1 power.
- Multi (Stroboscopic): Fires a series of rapid flashes during a single exposure to capture multiple movements of a subject.
- S1 (Optical Slave Mode 1): Triggers the flash when it detects another flash firing. Ignores pre-flashes.
- S2 (Optical Slave Mode 2): Triggers the flash when it detects another flash firing, specifically designed to ignore the camera's pre-flash.
Use the "MODE" button on the control panel to cycle through these modes.
Flash Control and Output
The flash control offers 8 levels of output control, ranging from 1/128 to 1/1 (full power). In Manual mode, use the arrow buttons to adjust the power output.
The guide number for this flash is 42 meters (ISO 100, 105mm).
Wireless Triggering
The flash supports wireless triggering with an indoor range of 20-25 meters and an outdoor range of 10-15 meters. This functionality is typically used with the S1 or S2 slave modes.
Zoom Functions
The MCO-430 features both manual and auto zoom capabilities. The zoom function adjusts the flash coverage to match the focal length of your lens, ensuring optimal light distribution.
Use the "ZOOM" button to switch between auto and manual zoom, and then use arrow buttons to adjust manually.
Additional Features (FEC, AEB)
- FEC (Flash Exposure Compensation): Allows you to fine-tune the flash output in TTL mode, making the flash brighter or darker than the camera's automatic setting.
- AEB (Auto Exposure Bracketing): While primarily a camera feature, the flash can integrate with AEB to provide varied flash exposures across a series of shots.
Maintenance
- Cleaning: Use a soft, dry cloth to clean the flash unit. For stubborn dirt, a slightly damp cloth can be used, followed by a dry cloth. Do not use solvents or abrasive cleaners.
- Storage: When not in use for extended periods, remove the batteries to prevent leakage. Store the flash in a cool, dry place, preferably in its carrying bag.
- Handling: Avoid dropping the flash unit or subjecting it to strong impacts. Protect it from moisture and extreme temperatures.
Troubleshooting
| Problem | Possible Cause | Solution |
|---|---|---|
| Flash does not fire. |
|
|
| Flash output is too weak/strong. |
|
|
| Flash does not sync with camera. |
|
|
Specifications
| Feature | Detail |
|---|---|
| Model Number | MCO-430N |
| Guide Number | 42 meters (ISO 100, 105mm) |
| Flash Modes | I-TTL/M/Multi/S1/S2 |
| Flash Control | 8 levels of output control (1/128-1/1) |
| Flash Time | 1/200s - 1/20000s |
| Wireless Triggering Distance | 20-25m indoor, 10-15m outdoor |
| External Interface | Hotshoe |
| Additional Features | FEC, AEB, Manual Zoom, Auto Zoom |
| Power Source | 4x AA batteries (not included) |
| Product Dimensions | 50.8 x 50.8 x 50.8 cm |
| Item Weight | 875 g |
| Compatible Mountings | Nikon SB 700 (Hotshoe) |
Warranty and Support
For warranty information and technical support, please refer to the documentation included with your purchase or contact CowboyStudio customer service. Keep your proof of purchase for warranty claims.