Introduction
The Melnor 2-Zone Digital Water Timer is designed to automate watering for two distinct areas of your lawn or garden. This device simplifies your watering tasks with its straightforward two-step programming process. Once configured, the timer will manage your watering schedule automatically, ensuring consistent hydration for your plants.
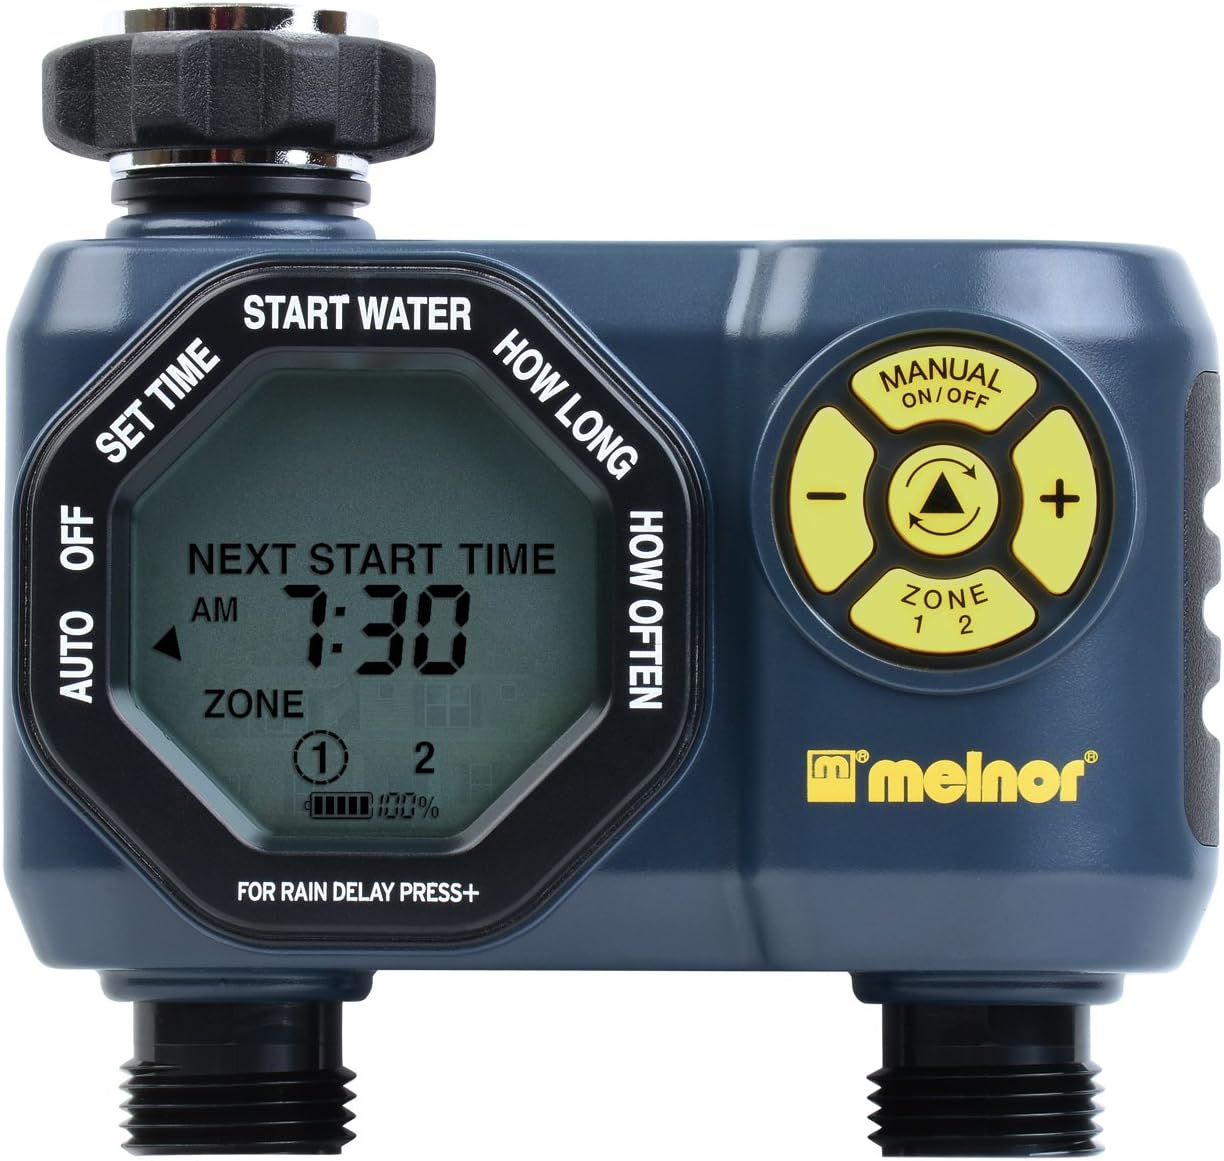
Front view of the Melnor 2-Zone Digital Water Timer, showing the digital display and control buttons.
Setup
1. Battery Installation
The water timer requires two (2) AA batteries for operation. Ensure the batteries are inserted with the correct polarity.
- Locate the battery compartment on the back of the timer unit.
- Slide the battery cover open.
- Insert two fresh AA alkaline batteries, matching the positive (+) and negative (-) terminals as indicated inside the compartment.
- Close the battery cover securely.

Back view of the timer, highlighting the battery compartment for two AA batteries.
2. Connecting to Faucet
Attach the timer securely to your outdoor faucet.
- Ensure the faucet is turned off.
- Thread the timer's inlet connector onto the faucet. Hand-tighten only to prevent damage.
- Verify that the rubber washer is properly seated within the timer's inlet to prevent leaks.
3. Connecting Hoses
Connect your garden hoses to the two outlets on the timer.
- Thread your garden hoses onto the threaded outlets at the bottom of the timer.
- Hand-tighten each hose connection.
- Ensure any attached watering devices (sprinklers, drip systems) are properly connected to the hoses.

Bottom view of the timer, showing the two hose outlets and integrated filter screen.
Operating Instructions
The Melnor 2-Zone Digital Water Timer features simple two-step programming for each zone.
1. Setting Current Time
Before programming, set the current time on the timer.
- Press the TIME button.
- Use the +/- buttons to adjust the hour and minute.
- Press OK to confirm.
2. Programming Watering Schedule (Each Zone)
Each zone can be programmed independently.
- Select the desired zone (Zone 1 or Zone 2) using the ZONE button.
- Press the PROGRAM button.
- Set Watering Frequency: Use the +/- buttons to select how often you wish to water (e.g., every 6 hours, 12 hours, or specific days of the week). Press OK.
- Set Watering Duration: Use the +/- buttons to set how long you wish to water (e.g., 10 minutes, 30 minutes). Press OK.
- Repeat for the second zone if desired.
3. Manual Watering
To water manually outside of the programmed schedule:
- Press the MANUAL button.
- Select the zone you wish to water manually.
- Use the +/- buttons to set the desired manual watering duration.
- Press OK to start manual watering. The timer will automatically shut off after the set duration.
4. Rain Delay Feature
The rain delay feature allows you to pause your watering schedule for a set period, preventing overwatering after rainfall.
- Press the DELAY button.
- Use the +/- buttons to select the desired delay duration (e.g., 24, 48, 72 hours).
- Press OK to activate the rain delay. The timer will resume its programmed schedule after the delay period.
Maintenance
Battery Replacement
Replace batteries annually or when the low battery indicator appears on the display to ensure continuous operation. Refer to the "Battery Installation" section under Setup for instructions.
Cleaning the Filter Screen
Periodically check and clean the filter screen located at the timer's inlet to prevent debris from clogging the unit and affecting water flow.
- Turn off the water supply at the faucet.
- Unscrew the timer from the faucet.
- Remove the small filter screen from the inlet.
- Rinse the screen under running water to remove any accumulated debris.
- Reinsert the clean filter screen and reattach the timer to the faucet.
Winterization
To prevent damage from freezing temperatures, remove the water timer from the faucet before the first frost. Store the timer indoors in a dry, protected location. Remove batteries before storage.
Troubleshooting
| Problem | Possible Cause | Solution |
|---|---|---|
| Timer does not turn on/display is blank. | Dead or incorrectly installed batteries. | Replace batteries with fresh AA alkaline batteries, ensuring correct polarity. |
| Water does not flow or flow is weak. | Faucet is off; clogged filter screen; low water pressure; incorrect programming. | Ensure faucet is fully open. Clean the filter screen. Check household water pressure. Verify programming for correct start times and durations. |
| Timer continuously waters or does not shut off. | Valve malfunction; electronic failure. | Turn off water at the faucet immediately. Remove batteries and reinsert after a few minutes. If the problem persists, contact customer support. |
| Timer makes unusual noises during operation. | Water pressure fluctuations; vibration in pipes. | Ensure the timer is securely attached. Adjust water flow at the faucet slightly to reduce pressure if necessary. |
| Screen locks up or programming is erratic. | Low batteries; electronic glitch. | Replace batteries. Remove batteries for 5 minutes to reset the unit, then re-program. |
Specifications
- Model Number: 33100
- Brand: Melnor
- Color: Gray
- Material: Plastic
- Item Weight: 0.84 Pounds
- Number of Zones: 2
- Screen Size: 3 Inches
- Power Source: 2 x AA Batteries (not included)
- Included Components: Timer unit
Safety Information
WARNING: This product can expose you to chemicals including styrene, which is known to the State of California to cause cancer. For more information go to www.P65Warnings.ca.gov.
For outdoor use only. Do not use this product with indoor plumbing or for purposes other than watering.
Warranty and Support
Melnor stands behind the quality of its products. If you experience any issues with your 2-Zone Digital Water Timer, please contact Melnor customer support for assistance. In many cases, Melnor may offer replacement units for defective products. Keep your purchase receipt for warranty claims.
For further assistance, visit the official Melnor website or contact their customer service department.