Introduction
This manual provides comprehensive instructions for the safe operation, adjustment, maintenance, and parts identification of your CRAFTSMAN 4 3/8-inch Jointer, Model 103.23340. Please read this manual thoroughly before operating the jointer to ensure proper use and to prevent injury or damage to the machine. Keep this manual accessible for future reference.
The model number 103.23340 is typically located on a plate on the right side of the front table of your jointer. Always refer to this model number when communicating about your jointer or ordering parts.

Image: Front cover of the CRAFTSMAN 4 3/8-inch Jointer Model 103.23340 Instruction and Parts Manual. The cover displays the title "OPERATING INSTRUCTIONS AND PARTS LIST FOR JOINTER 4 3/8 INCH" and the model number, along with "SEARS, ROEBUCK and CO." at the bottom.
Safety Instructions
Always prioritize safety when operating any power tool. Failure to follow safety guidelines can result in serious injury.
- Read the Entire Manual: Understand all instructions and warnings before operating the jointer.
- Wear Eye Protection: Always wear safety glasses or a face shield.
- Use Hearing Protection: Prolonged exposure to noise can cause hearing damage.
- Wear Appropriate Clothing: Avoid loose clothing, gloves, neckties, or jewelry that can get caught in moving parts. Tie back long hair.
- Maintain a Clean Work Area: Keep the work area free of clutter, debris, and other obstructions.
- Ensure Proper Lighting: Operate the jointer in a well-lit area.
- Keep Guards in Place: Never operate the jointer without all safety guards properly installed and functioning.
- Use Push Sticks: Always use push sticks for feeding small or narrow workpieces.
- Disconnect Power: Always disconnect the power supply before making adjustments, changing blades, or performing maintenance.
- Secure Workpiece: Ensure the workpiece is properly supported and stable before jointing.
- Avoid Kickback: Understand and implement techniques to prevent kickback.
- Never Reach Over Blades: Keep hands clear of the cutter head at all times.
Setup
Proper setup is crucial for safe and accurate operation of your jointer.
- Unpacking and Inspection: Carefully remove the jointer from its packaging. Inspect all components for any shipping damage. Report any damage immediately.
- Mounting: Securely mount the jointer to a sturdy workbench or stand. Ensure the mounting surface is level and capable of supporting the jointer's weight and operational forces.
- Electrical Connection: Connect the jointer to a grounded electrical outlet with the correct voltage and amperage as specified on the motor's nameplate. Do not use extension cords unless absolutely necessary, and ensure they are rated for the tool's power requirements.
- Table Adjustment: Familiarize yourself with the infeed and outfeed table adjustment mechanisms. Ensure they move smoothly and lock securely.
- Fence Adjustment: Check that the fence is square to the table and can be securely locked at various angles.
- Blade Installation/Inspection: Verify that the jointer blades are correctly installed, sharp, and free from nicks or damage. Refer to the "Adjustments" section for blade resetting instructions if needed.
Operating Instructions
Follow these steps for general operation of your CRAFTSMAN jointer.
- Preparation:
- Ensure all safety precautions are observed.
- Inspect the workpiece for knots, nails, or other defects.
- Adjust the infeed table to the desired depth of cut. A shallow cut (1/16 inch or less) is generally recommended for most operations.
- Adjust the fence to the desired angle (typically 90 degrees for squaring edges).
- Starting the Jointer:
- Turn on the jointer. Allow the cutter head to reach full speed before feeding the workpiece.
- Feeding the Workpiece:
- Place the workpiece flat on the infeed table with the edge to be jointed against the fence.
- Apply firm, even pressure to the workpiece, pushing it smoothly over the cutter head. Use push sticks for safety, especially with shorter or narrower pieces.
- Maintain contact with the fence throughout the cut.
- As the workpiece passes over the cutter head, shift pressure from the infeed table to the outfeed table.
- Do not force the workpiece. Let the blades do the work.
- Stopping the Jointer:
- Once the cut is complete, turn off the jointer.
- Wait for the cutter head to come to a complete stop before removing the workpiece or making any adjustments.
Adjustments
Blade Resetting
Proper blade height is critical for achieving a smooth, accurate cut and for safe operation. Always disconnect power before performing blade adjustments.
- Disconnect Power: Ensure the jointer is unplugged from the power source.
- Remove Blade Guard: Carefully remove any blade guards or covers to access the cutter head.
- Loosen Blade Clamps: Loosen the screws or clamps that secure the blades in the cutter head. Do not remove them completely.
- Set Blade Height:
- Place a straightedge across the outfeed table.
- Rotate the cutter head by hand so that one blade is at its highest point, just past the center of the cutter head's rotation.
- Adjust the blade so that its cutting edge is precisely level with the outfeed table. The straightedge should just barely touch the blade as it passes.
- Some jointers may have spring-loaded blades or specific setting jigs. Refer to your jointer's original documentation if available for precise methods.
- Tighten Blade Clamps: Once the blade is correctly set, carefully tighten the blade clamping screws. Tighten them evenly to prevent blade distortion.
- Repeat for All Blades: Repeat the process for all blades in the cutter head.
- Check Alignment: After all blades are tightened, rotate the cutter head by hand and re-check the alignment of each blade with the outfeed table using the straightedge. All blades should be set to the same height.
- Reinstall Guards: Reinstall all blade guards and covers before restoring power.
Fence Adjustment
The fence must be square to the table for accurate jointing.
- Loosen Fence Lock: Loosen the locking mechanism for the fence.
- Adjust to 90 Degrees: Use a reliable square to set the fence exactly 90 degrees to the jointer table.
- Tighten Fence Lock: Securely tighten the fence locking mechanism.
- Check for Squareness: Double-check the squareness after tightening to ensure it has not shifted.
Maintenance and Lubrication
Regular maintenance ensures the longevity and optimal performance of your jointer. Always disconnect power before performing any maintenance.
Maintenance
- Cleaning:
- After each use, clear wood chips and dust from the cutter head area, tables, and fence. A brush or vacuum is recommended.
- Periodically clean the tables and fence with a non-abrasive cleaner to remove pitch and resin buildup. This helps maintain smooth workpiece movement.
- Blade Inspection:
- Regularly inspect blades for sharpness, nicks, or damage. Dull or damaged blades can cause poor cuts and increase the risk of kickback.
- Replace or sharpen blades as needed.
- Table and Fence Alignment:
- Periodically check the alignment of the infeed and outfeed tables, and the squareness of the fence. Adjust as necessary.
- Fasteners:
- Check all nuts, bolts, and screws for tightness. Tighten any loose fasteners.
Lubrication
Lubricate moving parts as specified to ensure smooth operation and prevent wear.
- Table Adjustment Mechanisms: Apply a light coat of dry lubricant (e.g., silicone spray or paste wax) to the table adjustment screws and slides to ensure smooth movement.
- Fence Mechanism: Lubricate the fence adjustment and locking mechanisms as needed.
- Bearings: The motor and cutter head bearings are typically sealed and do not require lubrication. If your model has grease fittings, consult the original manufacturer's specifications for the type and frequency of lubrication.
- Rust Prevention: Apply a thin coat of paste wax or rust preventative to the cast iron tables and fence to protect against rust, especially in humid environments.
Parts List and Diagrams
This section provides exploded view diagrams and a corresponding parts list to assist with identification and ordering of replacement parts. When ordering parts, always provide the following information:
- The Part Number
- The Part Name and Price (if available)
- The Model Number 103.23340
All parts listed herein must be ordered through a Sears retail store or mail order house. Parts are shipped pre-paid.
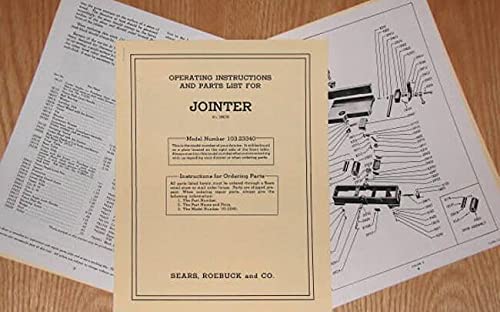
Image: An open instruction manual for the CRAFTSMAN 4 3/8-inch Jointer Model 103.23340, displaying detailed exploded view diagrams of the jointer's components on the right page and a corresponding parts list on the left page. This visual aid helps in identifying specific parts for replacement or repair.
(Note: Specific exploded diagrams and parts lists are contained within the physical manual. This section serves as a guide for their use.)
Troubleshooting
This section addresses common issues that may arise during the operation of your jointer. Always disconnect power before inspecting or attempting to resolve any issues.
| Problem | Possible Cause | Solution |
|---|---|---|
| Rough or uneven cut | Dull or nicked blades; incorrect blade height; uneven feed pressure; pitch buildup on tables. | Sharpen or replace blades; reset blade height (refer to Adjustments); apply even pressure; clean tables. |
| Jointer not turning on | No power to outlet; tripped circuit breaker; faulty switch; motor issue. | Check power supply and circuit breaker; inspect power cord; consult a qualified technician if switch or motor is suspected. |
| Excessive vibration | Loose mounting; unbalanced blades; worn bearings. | Tighten mounting bolts; ensure blades are correctly installed and balanced; consult a technician for bearing issues. |
| Workpiece "snipes" at ends | Outfeed table too low; insufficient pressure on outfeed table. | Adjust outfeed table to be level with the highest point of the blades; maintain firm pressure on the outfeed table as the workpiece exits. |
Specifications
The following are general specifications for the CRAFTSMAN 4 3/8-inch Jointer Model 103.23340. Specific details may vary slightly based on manufacturing variations.
- Model Number: 103.23340
- Jointer Size: 4 3/8 inches
- Brand: CRAFTSMAN
- Power Source: Electric (specific voltage/amperage typically found on motor nameplate)
- Cutter Head: Multi-blade (number of blades varies by design)
- Table Material: Cast Iron (typical for this model type)
- Fence: Adjustable for angle and position
Warranty and Support
This manual is a reproduction of the original instructions for the CRAFTSMAN 4 3/8-inch Jointer Model 103.23340. For information regarding original product warranties, please refer to the documentation provided at the time of the jointer's initial purchase or contact CRAFTSMAN directly.
For technical support or to inquire about parts availability for older models, it is recommended to contact CRAFTSMAN customer service or an authorized service center. When contacting support, always have your jointer's model number (103.23340) readily available.
Contact Information:
- CRAFTSMAN Official Website: www.craftsman.com
- Sears Customer Service: For parts ordering as originally specified, refer to Sears customer service channels or historical documentation.