1. Introduction
This instruction manual provides essential information for the proper handling, installation, and maintenance of your Balay Dryer Poly V Belt. This genuine replacement part is designed to restore optimal performance to compatible Balay dryer models. Please read this manual thoroughly before attempting any installation or maintenance procedures.
2. Safety Information
- Always disconnect the dryer from the power supply before attempting any installation, maintenance, or repair work. Failure to do so can result in electric shock or serious injury.
- Wear appropriate personal protective equipment, such as gloves, to prevent injury from sharp edges or moving parts.
- If you are unsure about any step of the installation process, it is recommended to seek assistance from a qualified appliance technician.
- Keep children and pets away from the work area during installation.
- Ensure all tools are in good condition and used correctly.
3. Product Overview
The Balay Dryer Poly V Belt is a crucial component responsible for transferring power from the motor to the dryer drum, enabling it to tumble. This specific belt features a Poly V (multi-ribbed) design, measuring approximately 1965 mm in length and having 8 ribs (8PH) for efficient power transmission and durability. It is a genuine Balay replacement part, ensuring compatibility and performance with specified models.

Image 1: The Balay Dryer Poly V Belt, illustrating its approximate length of 1965 mm.
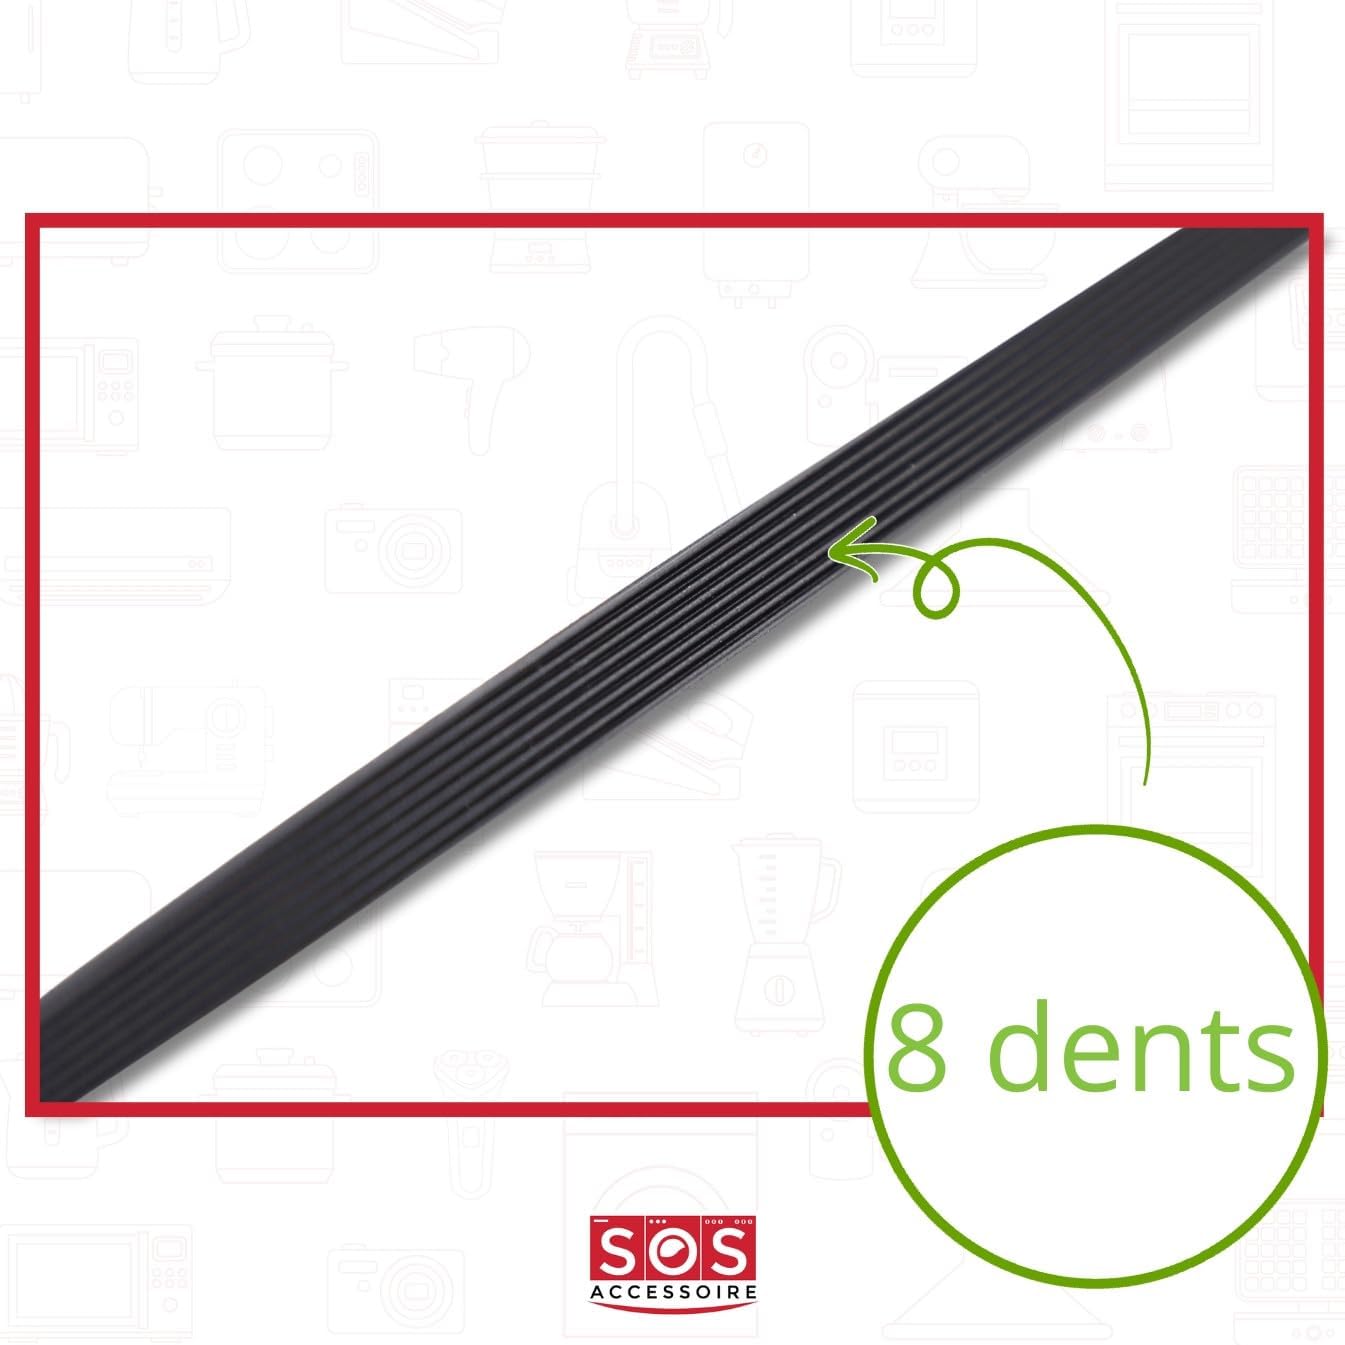
Image 2: A detailed view of the Poly V Belt, highlighting its 8 distinct ribs (dents).
4. Specifications
| Feature | Detail |
|---|---|
| Brand | Balay |
| Model Number | part_B01B67H7YC |
| Belt Type | Poly V (Multi-ribbed) |
| Length | 1965 mm (Characteristic length: 1967 mm) |
| Ribs (PH) | 8 |
| Item Weight | 68 g |
| Package Dimensions | 20 x 14 x 7 cm |
| ASIN | B01B67H7YC |
5. Compatible Models
This Balay Dryer Poly V Belt is compatible with the following Balay dryer models. Please verify your dryer's model number before installation to ensure compatibility:
- 3sc81400 a
- 3sc81600 x
- 3sc81601 a
- 3sc81601 x
- 3sc83600 a
- 3sc83600 x
- 3sc83601 a
- 3sc83601 x
- 3sc908ce
- 3sc918ce
- 3sc928 a
- 3sc928ce
- 3sc930 a
- 3sc938ce
- 3se71600 a
- 3se939ce
- 3se949ce
6. Installation Instructions
Replacing a dryer belt typically involves disassembling parts of the dryer. Due to the complexity and potential safety risks, professional installation is highly recommended. The following steps are a general guide and may vary depending on your specific dryer model. Always refer to your dryer's service manual for detailed, model-specific instructions.
General Steps:
- Disconnect Power: Unplug the dryer from the electrical outlet.
- Access the Drum: Depending on your dryer model, you may need to remove the top panel, front panel, or rear panel to gain access to the dryer drum and motor assembly. This often involves unscrewing fasteners and carefully detaching wiring harnesses.
- Remove Old Belt: Locate the old belt. It typically wraps around the dryer drum and a motor pulley, often with an idler pulley providing tension. Carefully remove the old belt from the pulleys and the drum.
- Install New Belt: Position the new Balay Poly V Belt around the dryer drum. Ensure the ribbed side of the belt faces the drum.
- Route the Belt: Carefully route the belt around the motor pulley and the idler pulley. The idler pulley should apply tension to the belt. Ensure the ribs of the belt align correctly with the grooves on the pulleys.
- Verify Tension and Alignment: Rotate the drum manually to ensure the belt is properly seated on all pulleys and has adequate tension. The belt should not slip or rub against other components.
- Reassemble Dryer: Reattach all panels and secure any wiring harnesses that were disconnected. Ensure all fasteners are tightened.
- Test Dryer: Plug the dryer back into the electrical outlet and run a short cycle to confirm proper operation. Listen for unusual noises and observe the drum's rotation.
Note: If you encounter any difficulties or are unsure about any step, consult a professional technician to avoid damage to the appliance or personal injury.
7. Maintenance
The Balay Dryer Poly V Belt is designed for durability. Regular maintenance of your dryer can help prolong the life of the belt and other components:
- Inspect Periodically: During any routine dryer maintenance (e.g., cleaning lint ducts), visually inspect the belt for signs of wear, cracks, fraying, or glazing.
- Keep Clean: Ensure the area around the motor and drum is free from lint and debris, which can cause friction and premature belt wear.
- Avoid Overloading: Overloading the dryer can put excessive strain on the belt, leading to premature failure. Follow your dryer's capacity guidelines.
8. Troubleshooting
If your dryer is experiencing issues related to the drive belt, consider the following common problems and potential solutions:
- Dryer Drum Not Tumbling: If the motor runs but the drum does not turn, the drive belt is likely broken or has slipped off its pulleys. This requires inspection and replacement of the belt.
- Squealing or Squeaking Noise: A worn, glazed, or misaligned belt can cause squealing noises. Inspect the belt for wear and proper tension. The idler pulley might also be a source of noise.
- Burning Smell: A burning smell can indicate a slipping belt, often due to excessive friction or a seized motor/idler pulley. Immediately disconnect power and inspect the belt and pulleys.
Warning: Always disconnect power before inspecting internal components. If you cannot identify or safely resolve the issue, contact a qualified technician.
9. Warranty and Support
Specific warranty information for this replacement part may vary depending on the retailer or manufacturer. Please refer to your purchase documentation or contact the seller directly for details regarding warranty coverage and support. For technical assistance or further inquiries, it is recommended to contact Balay customer service or a certified appliance repair professional.