1. Introduction
This manual provides essential information for the proper setup, operation, and maintenance of your SparkFun Micro OLED Breakout Board. Please read these instructions carefully before using the product to ensure optimal performance and longevity. This board is designed for integration into microcontroller projects, offering a compact display solution.
2. Product Overview
The SparkFun Micro OLED Breakout Board features a small, monochrome blue-on-black OLED display. It is designed for use with microcontrollers, providing a crisp 64x48 pixel display for various applications, from diagnostic information to small graphical interfaces. The board supports both SPI and I2C communication interfaces, offering flexibility in integration.
- Screen Size: 64x48 pixels (0.66" Across)
- Display Type: Monochrome Blue-on-Black
- Interface Options: SPI or I2C
- Operating Voltage: 3.3V

Figure 2.1: Front view of the SparkFun Micro OLED Breakout Board, showing the display and pin headers. This image illustrates the compact size and layout of the board.
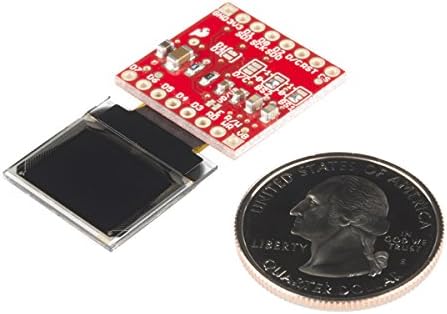
Figure 2.2: Size comparison of the Micro OLED Breakout Board with a US quarter coin, highlighting its small form factor suitable for compact projects.
3. Setup
This section details the steps required to connect and prepare your Micro OLED Breakout Board for operation.
3.1 Power Requirements
The board operates at 3.3V. Ensure your power supply or microcontroller provides a stable 3.3V to the VCC pin. Connecting a higher voltage may damage the device.
3.2 Pin Connections
The Micro OLED Breakout provides access to 16 pins. For most applications, you will use the top row of pins (GND-CS) for either SPI or I2C communication. The pins on the bottom (D7-vB) are primarily for parallel interface control, which is less commonly used.

Figure 3.1: Back view of the SparkFun Micro OLED Breakout Board, showing the pin labels and component layout. This view is helpful for identifying connection points.
3.2.1 I2C Interface Connection
For I2C communication, connect the following pins to your microcontroller:
- GND: Ground
- 3V3: 3.3V Power Supply
- SDA: I2C Data Line
- SCL: I2C Clock Line
Ensure appropriate pull-up resistors are used on the SDA and SCL lines if not already present on your microcontroller board.
3.2.2 SPI Interface Connection
For SPI communication, connect the following pins to your microcontroller:
- GND: Ground
- 3V3: 3.3V Power Supply
- SDI (MOSI): SPI Data Input
- SCK (CLK): SPI Clock
- SDO (MISO): SPI Data Output (optional, depending on library)
- CS: Chip Select
- D/C: Data/Command Select
- RST: Reset (optional, can be tied to VCC or controlled by GPIO)
4. Operating Instructions
Once the hardware connections are established, you can begin programming your microcontroller to control the Micro OLED display.
4.1 Software Libraries
It is highly recommended to use existing software libraries for controlling OLED displays based on the SSD1306 driver chip (which this display uses). Popular libraries include:
- Adafruit GFX Library: A core graphics library.
- Adafruit SSD1306 Library: Specific driver for SSD1306-based OLEDs, compatible with both SPI and I2C.
These libraries simplify drawing text, shapes, and bitmaps on the display.
4.2 Basic Display Operations
After initializing the display object in your code (specifying I2C address or SPI pins), you can perform operations such as:
- `display.clearDisplay()`: Clears the entire screen.
- `display.setTextSize(1)`: Sets the font size.
- `display.setTextColor(SSD1306_WHITE)`: Sets text color (for monochrome, this is typically white/blue).
- `display.setCursor(0,0)`: Sets the cursor position for text.
- `display.println("Hello World!")` or `display.print("Hello World!")`: Prints text to the display.
- `display.display()`: Updates the physical display with the content from the buffer. This command is crucial as changes are not visible until `display()` is called.
5. Maintenance
The SparkFun Micro OLED Breakout Board is a robust electronic component, but proper handling and care will ensure its longevity.
- Handling: Avoid touching the display surface directly to prevent smudges or scratches. Handle the board by its edges.
- Cleaning: If necessary, gently wipe the display surface with a soft, lint-free cloth. Do not use harsh chemicals or abrasive materials.
- Storage: Store the board in an anti-static bag when not in use to protect it from electrostatic discharge (ESD) and dust.
- Environmental Conditions: Operate and store the board within typical indoor temperature and humidity ranges. Avoid extreme temperatures or high moisture environments.
6. Troubleshooting
If you encounter issues with your Micro OLED Breakout Board, consider the following troubleshooting steps:
6.1 Display Not Lighting Up
- Power Check: Verify that the board is receiving a stable 3.3V power supply and that GND is correctly connected.
- Connections: Double-check all data and clock lines (SDA/SCL for I2C, MOSI/SCK/CS/D_C/RST for SPI) for proper connection to your microcontroller. Ensure no pins are shorted.
- Code Execution: Confirm that your microcontroller code is running and that the display initialization function is being called. Ensure `display.display()` is called after drawing commands.
- I2C Address: For I2C, verify the correct I2C address is used in your code (common addresses are 0x3C or 0x3D).
6.2 Incorrect or Garbled Display
- Library Compatibility: Ensure you are using a library compatible with the SSD1306 driver and that it's correctly configured for your chosen interface (SPI/I2C).
- Buffer Updates: Remember to call `display.display()` to push the buffer content to the physical screen.
- Data Rate: For SPI, ensure your clock speed is not excessively high for the display.
6.3 Communication Errors
- I2C Scanner: Use an I2C scanner sketch (available online) to confirm your microcontroller can detect the OLED's I2C address.
- SPI Pinout: Verify the correct MOSI, MISO, SCK, CS, D/C, and RST pins are used and configured in your software.
7. Specifications
| Feature | Specification |
|---|---|
| Brand | SparkFun |
| Model Number | LYSB01B26XUA2-ELECTRNCS |
| Screen Size | 64x48 pixels (0.66" Across) |
| Display Type | Monochrome Blue-on-Black OLED |
| Interface | SPI or I2C |
| Operating Voltage | 3.3V |
| Manufacturer | Sparkfun |
| GTIN / UPC | 757347352711, 717520028086 |
8. Warranty and Support
For warranty information, technical support, or further assistance with your SparkFun Micro OLED Breakout Board, please refer to the official SparkFun Electronics website or contact their customer support directly. Details regarding product returns or replacements are typically handled through the original point of purchase.
SparkFun Electronics Website: www.sparkfun.com