
1. Introduction
Thank you for purchasing the ADESSO SN-01 Alarm Clock. This device combines a precise alarm clock with radio wave time synchronization, temperature display, and date functionality. This manual provides detailed instructions for setting up, operating, and maintaining your new alarm clock to ensure optimal performance and longevity.
2. Important Safety Information
- Do not expose the unit to extreme temperatures, direct sunlight, or high humidity.
- Avoid dropping the unit or subjecting it to strong impacts.
- Do not mix old and new batteries, or different types of batteries.
- Remove batteries if the unit will not be used for an extended period to prevent leakage.
- Keep the unit away from strong magnetic fields.
- Clean the unit only with a soft, dry cloth. Do not use liquid cleaners or aerosols.
3. Package Contents
Please check that all items are present in your package:
- ADESSO SN-01 Alarm Clock Unit
- User Manual (this document)
4. Product Overview
Familiarize yourself with the components of your ADESSO SN-01 Alarm Clock.

Figure 4.1: Front view of the ADESSO SN-01 Alarm Clock, showing the digital display with time, date, day of the week, and temperature. The casing is white with light blue accents.
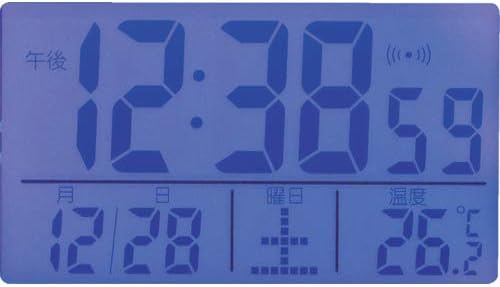
Figure 4.2: Close-up of the ADESSO SN-01 Alarm Clock's digital display, showing the time (12:38), seconds (59), radio wave reception indicator, date (12/28), day of the week, and temperature (26.7°C).
4.1. Display Elements
- Time Display: Shows current time in HH:MM:SS format.
- Radio Wave Indicator: Appears when the clock is successfully receiving time signals.
- Date Display: Shows month and day.
- Day of the Week: Indicates the current day.
- Temperature Display: Shows ambient temperature in Celsius or Fahrenheit.
- Alarm Indicator: Appears when the alarm is active.
4.2. Control Buttons (Typical Layout)
While specific button labels may vary, most alarm clocks of this type feature:
- SET/MODE Button: Used to enter and confirm settings.
- UP/+/HOUR Button: Used to increase values or navigate menus.
- DOWN/-/MINUTE Button: Used to decrease values or navigate menus.
- ALARM Button: Used to set or activate/deactivate the alarm.
- SNOOZE/LIGHT Button: Activates snooze during an alarm or temporarily illuminates the display.
- RESET Button: (Often a small recessed button on the back) Resets the unit to factory defaults.
5. Setup
5.1. Battery Installation
- Locate the battery compartment on the back of the alarm clock.
- Open the battery compartment cover.
- Insert the required batteries (e.g., 2 x AAA or AA, not included) according to the polarity indicators (+ and -) inside the compartment.
- Close the battery compartment cover securely.
5.2. Initial Power-On and Radio Wave Reception
Upon inserting batteries, the clock will typically power on and attempt to synchronize with the radio wave time signal. This process may take several minutes to several hours, depending on your location and environmental conditions.
- Place the clock near a window and away from electronic devices that may cause interference.
- The radio wave indicator on the display will flash during synchronization and become solid once a signal is successfully received and the time is set.
- If the clock does not synchronize automatically within 24 hours, you may need to manually set the time (see Section 6.1).
6. Operating Instructions
6.1. Manual Time and Date Setting
If radio wave synchronization is unavailable or you prefer to set the time manually:
- Press and hold the SET/MODE button until the hour digits begin to flash.
- Use the UP/+ or DOWN/- buttons to adjust the hour.
- Press SET/MODE again to move to the minute digits, then adjust with UP/+ or DOWN/-.
- Continue pressing SET/MODE to cycle through and set the year, month, and day using the UP/+ or DOWN/- buttons.
- Press SET/MODE one last time to exit the setting mode.
6.2. Setting the Alarm
- Press and hold the ALARM button until the alarm hour digits flash.
- Use the UP/+ or DOWN/- buttons to set the desired alarm hour.
- Press ALARM again to move to the alarm minute digits, then adjust with UP/+ or DOWN/-.
- Press ALARM one last time to confirm and exit alarm setting mode.
6.3. Activating/Deactivating the Alarm
Briefly press the ALARM button to toggle the alarm on or off. An alarm indicator icon will appear on the display when the alarm is active.
6.4. Snooze Function and Backlight
- When the alarm sounds, press the SNOOZE/LIGHT button to temporarily silence the alarm for a few minutes (typically 5-10 minutes). The alarm will sound again after the snooze period.
- To turn off the alarm completely, press any other button (e.g., ALARM, SET/MODE) or let it ring until it automatically stops.
- Press the SNOOZE/LIGHT button at any time to briefly illuminate the display for better visibility in low light conditions.
6.5. Temperature Display
The clock automatically displays the ambient temperature. The unit typically defaults to Celsius (°C). If your model supports switching to Fahrenheit (°F), there may be a dedicated button or a setting option within the SET/MODE menu to toggle between the two.
7. Maintenance
7.1. Cleaning
Wipe the clock's surface with a soft, dry, lint-free cloth. Do not use abrasive cleaners, solvents, or spray directly onto the unit.
7.2. Battery Replacement
When the display becomes dim or the clock functions erratically, it is time to replace the batteries. Follow the battery installation steps in Section 5.1. Ensure proper disposal of old batteries according to local regulations.
7.3. Storage
If you plan not to use the clock for an extended period, remove the batteries to prevent potential leakage and damage to the unit. Store the clock in a cool, dry place.
8. Troubleshooting
| Problem | Possible Cause | Solution |
|---|---|---|
| Display is blank or dim. | Batteries are dead or incorrectly inserted. | Replace batteries with new ones, ensuring correct polarity. |
| Clock not synchronizing with radio wave. | Poor signal reception due to location or interference. | Move the clock to a different location, preferably near a window and away from other electronics. Allow up to 24 hours for synchronization. Manually set the time if necessary. |
| Alarm does not sound. | Alarm is not activated or set incorrectly. | Ensure the alarm indicator is visible on the display. Recheck alarm time settings. |
| Incorrect temperature reading. | Clock is placed near a heat source or vent. | Relocate the clock to an area with stable ambient temperature. |
| Buttons are unresponsive. | Temporary software glitch or low battery. | Remove and reinsert batteries. If available, press the RESET button (often a small hole requiring a pin). |
9. Specifications
- Model: SN-01
- Brand: Adesso
- Display Type: Digital
- Power Source: Battery Powered (Batteries not included)
- Dimensions (Approx.): 2.4 x 3.7 x 1.4 inches (6 x 9.5 x 3.5 cm)
- Material: Plastic
- Color: White
- Special Features: Radio Wave Time Synchronization, Temperature Display, Date Display, Alarm, Backlight
10. Warranty and Support
For warranty information or technical support, please refer to the warranty card included with your purchase or visit the official Adesso website. Please have your model number (SN-01) and purchase details ready when contacting support.