Della 048-GM-48183
Della Portable Ice Maker User Manual
Model: 048-GM-48183
1. Important Safety Instructions
Please read all instructions carefully before operating your new ice maker. Retain this manual for future reference.
- Ensure the appliance is connected to a grounded power outlet (120 Volts, 60 Hz).
- Do not immerse the power cord, plug, or any part of the unit in water or other liquids.
- Supervise children when the appliance is in use.
- Unplug the ice maker from the outlet when not in use, before cleaning, or during maintenance.
- Do not operate any appliance with a damaged cord or plug, or after the appliance malfunctions or has been damaged in any manner.
- Use only potable water in the water reservoir.
- Do not block ventilation openings. Ensure adequate air circulation around the unit.
- This appliance is certified ETL, CSA, and UL Listed for safety.
2. Product Overview
The Della Portable Ice Maker is designed for convenience, producing bullet-shaped ice cubes quickly. It features an easy-to-use control panel and a transparent viewing window.

Figure 2.1: Overall view of the Della Portable Ice Maker.

Figure 2.2: Interior view with the lid open, revealing the ice basket and ice-making mechanism.
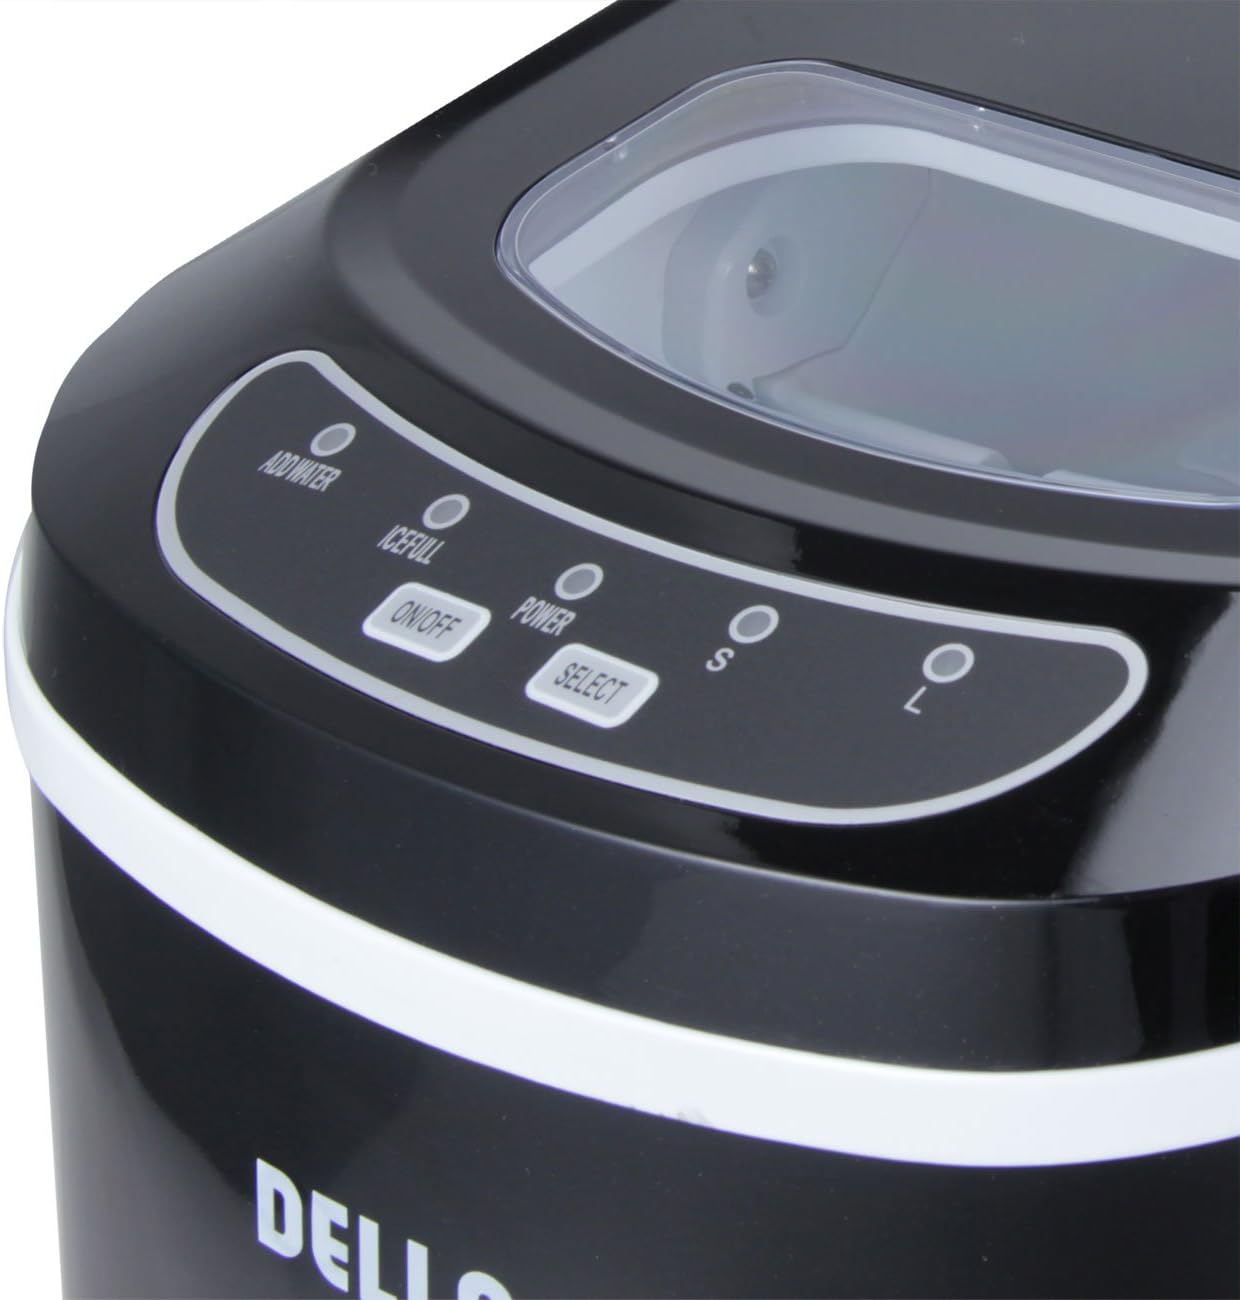
Figure 2.3: Detailed view of the intuitive control panel with indicator lights and buttons.

Figure 2.4: The ice basket containing freshly made bullet ice cubes and the included scoop.

Figure 2.5: The ice making prongs where ice cubes are formed.

Figure 2.6: The drain plug for easy water removal from the reservoir.

Figure 2.7: The removable ice basket and scoop for convenient ice transfer.
3. Setup
- Unpacking: Carefully remove all packaging materials. Check for any damage during transit.
- Placement: Place the ice maker on a flat, stable surface away from direct sunlight and heat sources. Ensure there is at least 4 inches of clearance around the unit for proper ventilation.
- Initial Cleaning: Before first use, clean the interior of the unit, including the water reservoir and ice basket, with a soft cloth and mild detergent. Rinse thoroughly with clean water.
- Allow to Rest: After transport, allow the ice maker to stand upright for at least 1 hour before plugging it in. This allows the refrigerant to settle.
- Power Connection: Plug the unit into a grounded electrical outlet.
4. Operation
- Add Water: Open the lid and pour potable water into the water reservoir up to the MAX fill line. Do not overfill.
- Power On: Press the "ON/OFF" button to start the ice making cycle. The "POWER" indicator light will illuminate.
- Select Ice Size: Press the "SELECT" button to choose between small (S) or large (L) ice cubes. The corresponding indicator light will illuminate.
- Ice Production: The ice maker will begin producing ice in as little as 6 minutes. The ice will drop into the ice basket.
- Indicators:
- The "ADD WATER" indicator will light up when the water level in the reservoir is low. Add more water to continue ice production.
- The "ICE FULL" indicator will light up when the ice basket is full. Remove ice to allow the machine to continue making ice.
- Storing Ice: For best results, transfer ice from the ice basket to a freezer for long-term storage, as the ice maker is not a freezer and will not keep ice frozen indefinitely.
- Power Off: Press the "ON/OFF" button to stop the ice making process.
5. Maintenance
Regular cleaning and maintenance will ensure the longevity and optimal performance of your ice maker.
5.1 Cleaning
- Daily Cleaning: Wipe the exterior with a soft, damp cloth.
- Internal Cleaning (Weekly/Bi-weekly):
- Unplug the unit.
- Remove the ice basket.
- Drain any remaining water from the reservoir by removing the drain plug located at the bottom of the unit.
- Clean the interior with a solution of warm water and mild detergent. Use a soft cloth or sponge.
- Rinse the interior thoroughly with clean water, ensuring no detergent residue remains. Drain all rinse water.
- Dry the interior with a clean, soft cloth.
5.2 Storage
If the ice maker will not be used for an extended period, drain all water, clean the unit thoroughly, and allow it to dry completely before storing in a cool, dry place.
6. Troubleshooting
| Problem | Possible Cause | Solution |
|---|---|---|
| "ADD WATER" indicator is on. | Water reservoir is empty or water level is too low. | Add potable water to the reservoir up to the MAX fill line. |
| "ICE FULL" indicator is on. | Ice basket is full. | Remove ice from the basket. |
| Ice cubes are too small or clumping. | Water temperature is too high, or ambient temperature is too high. | Use colder water. Place the unit in a cooler environment. |
| Ice maker is not producing ice. | No power, low water, or internal malfunction. | Check power connection. Add water. If problem persists, contact customer support. |
| Unit is noisy. | Normal operation sounds (compressor, water pump, ice dropping). | This is normal. Ensure unit is on a stable, level surface. |
7. Specifications
| Brand | Della |
| Model Name | Portable Ice Maker |
| Product Dimensions (L x W x H) | 14.5"D x 9.75"W x 12.75"H |
| Capacity (Ice Basket) | 1.5 lbs |
| Daily Ice Making Capacity | Up to 26 lbs |
| Wattage | 230 watts |
| Voltage | 120 Volts |
| Refrigerant | R134a |
| Item Weight | 21 pounds |
| Color | Black |
| Installation Method | Countertop |
| Water Reservoir Capacity | 2.3 quart |
8. Warranty and Support
This Della Portable Ice Maker comes with a 30 Day Money Back warranty. For any issues or support inquiries, please refer to the official user manual or contact the manufacturer directly.
You can also download the official User Manual (PDF) for this product: Download User Manual (PDF)
Ask a question about this manual
Ask about setup, troubleshooting, compatibility, parts, safety, or missing instructions. Manuals+ will review the question and use this page’s manual context to help answer it.