Introduction
This manual provides detailed instructions for the safe and effective use of your Rollei Compact Traveler No. 1 Carbon tripod. Designed for photographers requiring a lightweight and compact solution, this tripod offers stability and versatility for various photographic needs. Please read this manual thoroughly before operating the product.
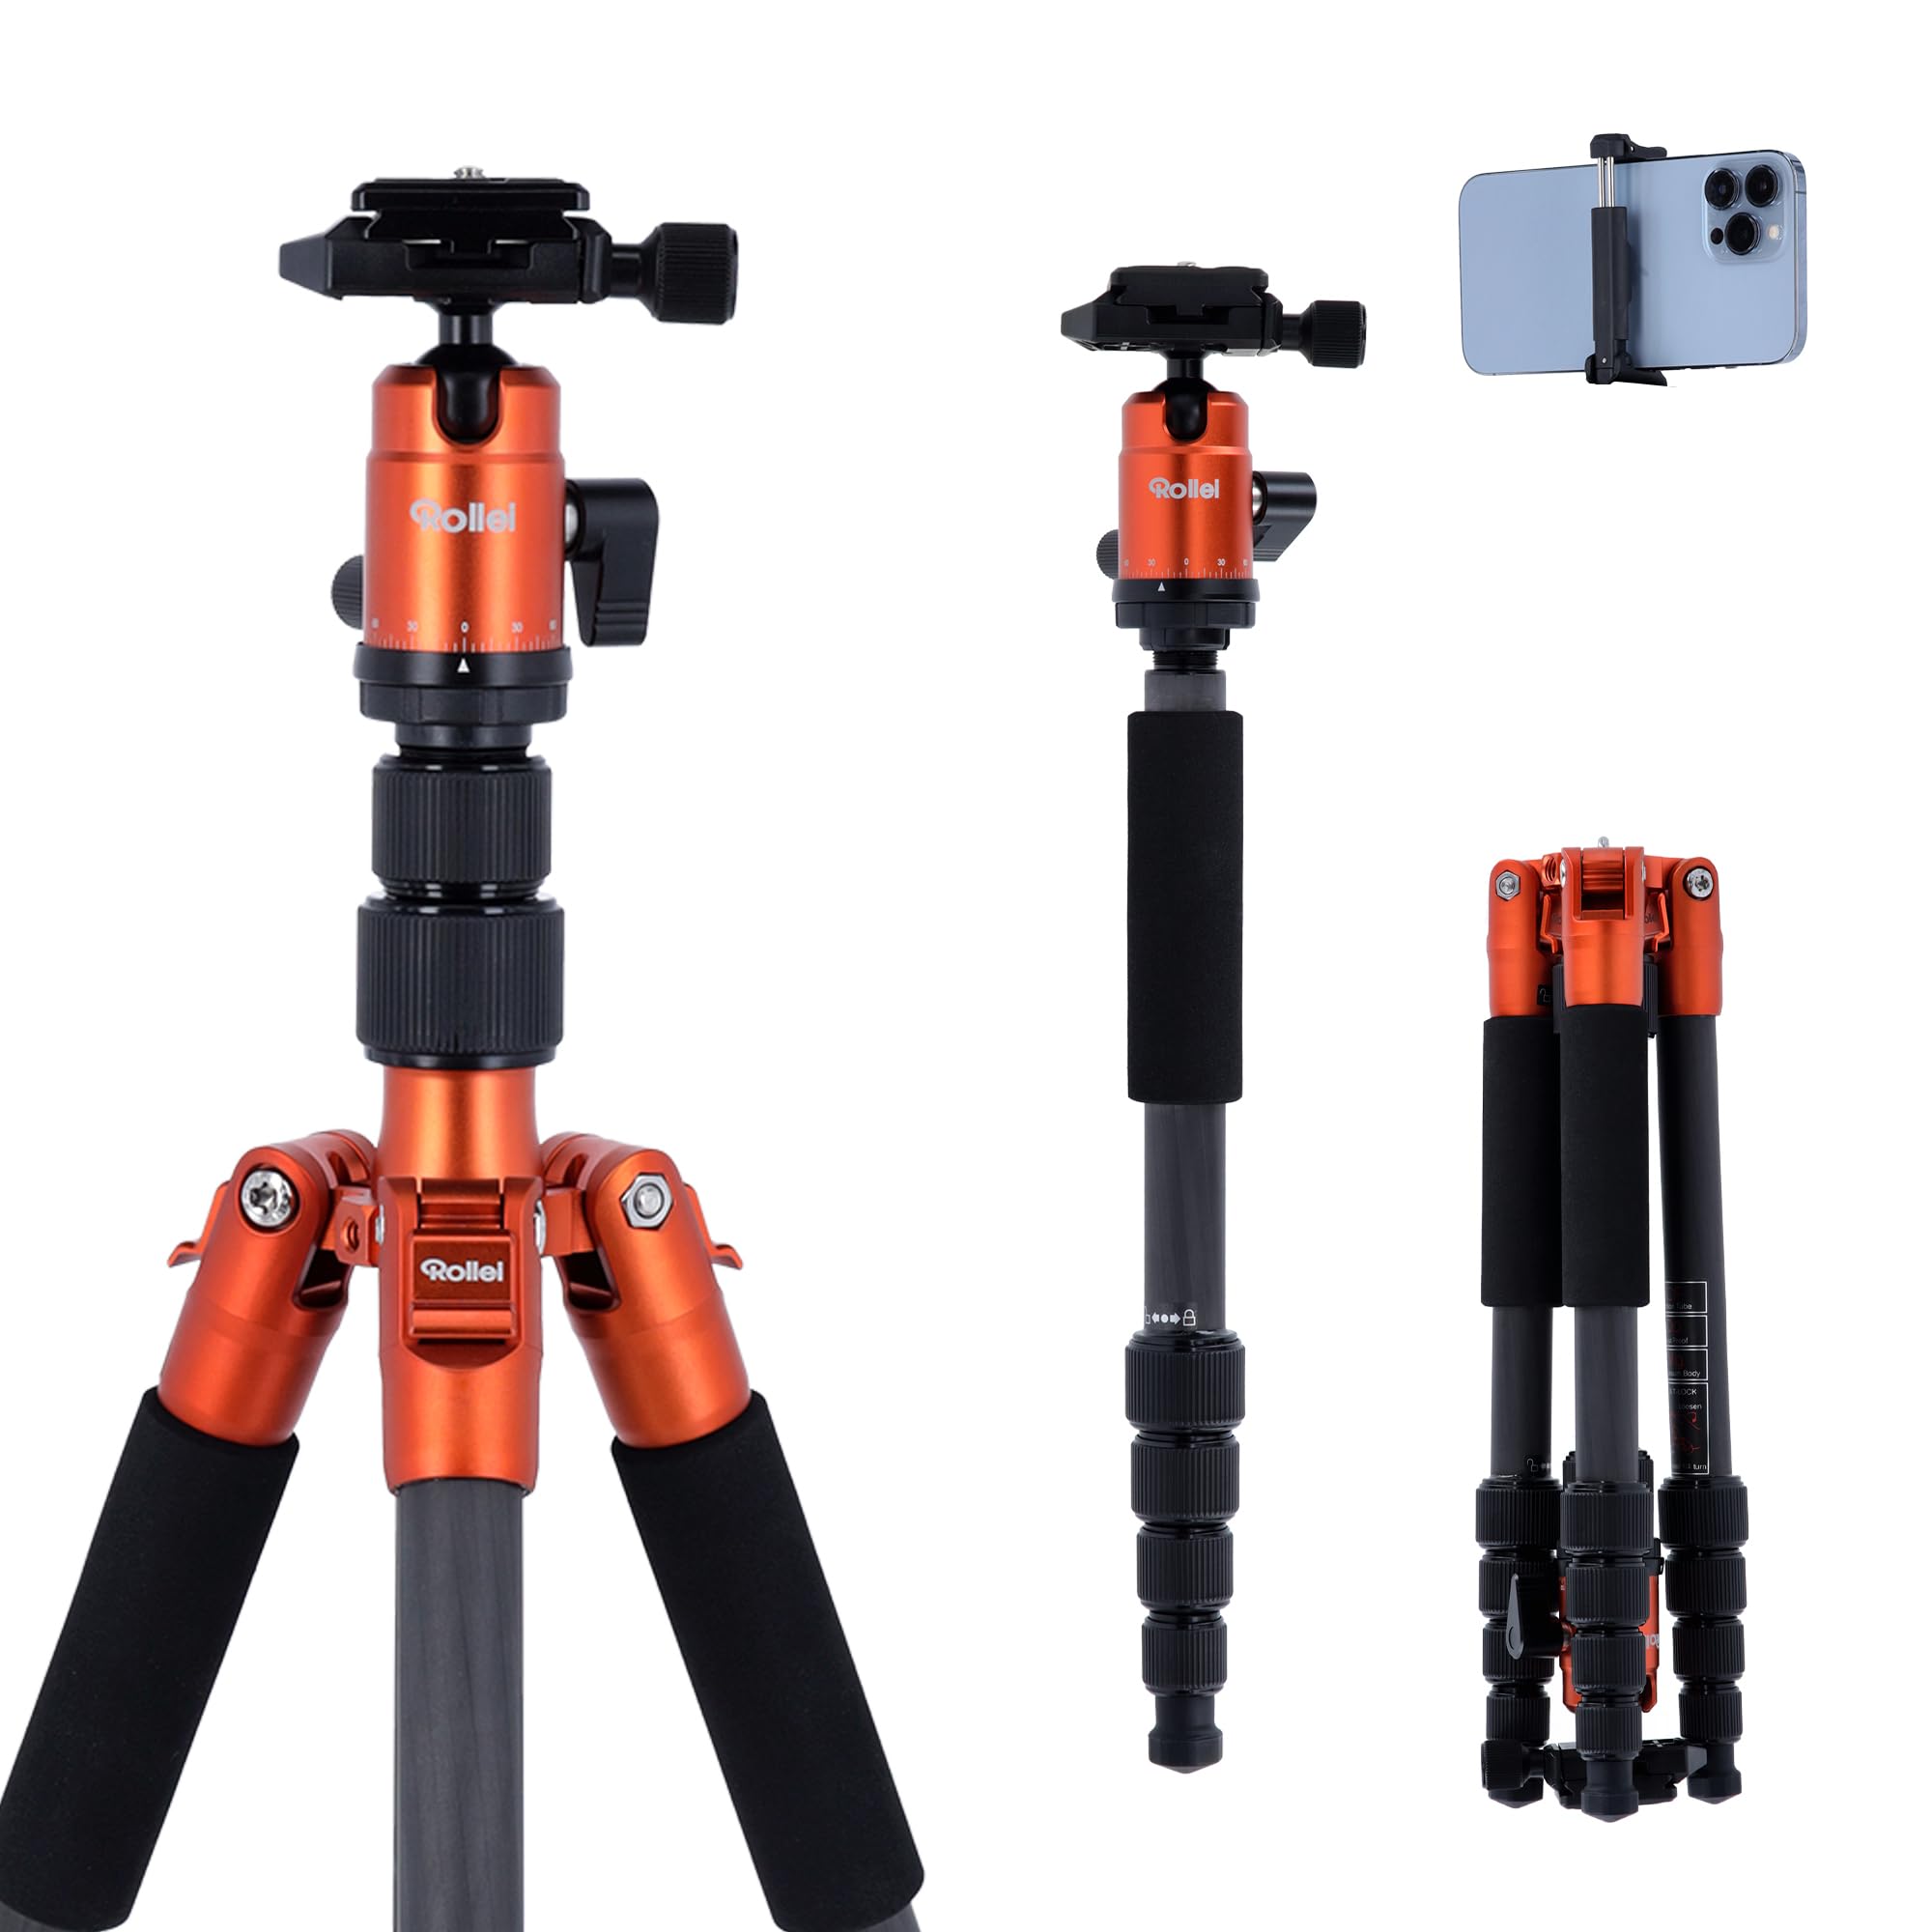
Image: The Rollei Compact Traveler No. 1 Carbon Tripod, showcasing its compact design and ball head.
Safety Information
To prevent damage to the product or injury to yourself, observe the following safety precautions:
- Do not exceed the maximum load capacity of 17.64 lb (8 kg).
- Ensure all locking mechanisms are securely fastened before mounting equipment.
- Avoid placing the tripod on unstable or slippery surfaces.
- Keep hands and fingers clear of moving parts when adjusting the tripod.
- Do not leave the tripod unattended with heavy equipment, especially in windy conditions.
- Clean the tripod with a soft, dry cloth. Avoid harsh chemicals.
Package Contents
Verify that all items are present in the package:
- Rollei Compact Traveler No. 1 Carbon Tripod
- 360° Panorama Ball Head (integrated)
- Multifunctional Wrench
- 2 Allen Keys
- Quick Release Plate (Arca Swiss compatible)
- Pouch for Monopod
- Shoulder Belt
- Removable Rubber Pads (3 pcs.)
- Tripod Bag
Setup
1. Unfolding the Tripod
- Release the leg angle locks.
- Pivot the legs 180° outwards from their folded position until they are fully extended.
- Adjust each leg to the desired angle and secure the leg angle locks.
- Extend the leg sections by twisting the quick clamping screws counter-clockwise to loosen, pull out the sections, and twist clockwise to tighten.
2. Attaching the Camera
- Ensure the quick release plate is detached from the ball head.
- Attach the quick release plate to the bottom of your camera using the screw. Use an Allen key or coin to tighten securely.
- Open the quick release clamp on the ball head.
- Slide the camera with the attached quick release plate into the clamp until it clicks into place.
- Securely tighten the quick release clamp.
Operating Instructions
Adjusting Height and Angle
- Leg Sections: Loosen the quick clamping screws on each leg, extend to the desired height, and tighten firmly.
- Leg Angles: Press the leg angle locks near the top of each leg to adjust the spread of the legs. There are multiple angle stops for varied stability and height.
- Center Column: The center column can be extended for additional height. Loosen the center column lock, raise the column, and tighten the lock.
Using the Ball Head
- Ball Lock Knob: Loosen this knob to allow free movement of the camera in all directions. Tighten to lock the camera in position.
- Panning Lock Knob: Loosen this knob to rotate the camera horizontally (360° panorama). Tighten to lock the panning movement.
Enhancing Stability
The tripod features a 360° rotating hook at the bottom of the center column. You can hang a camera bag or other weight from this hook to increase the tripod's stability, especially in windy conditions or when using heavy lenses.
Folding for Transport
- Remove the camera from the quick release plate.
- Retract all leg sections and tighten the quick clamping screws.
- Retract the center column fully and tighten its lock.
- Release the leg angle locks and pivot the legs 180° inwards, folding them upwards around the ball head until they are compact.
- Secure the leg angle locks.
Monopod Function
One of the tripod legs can be detached and used as a monopod.
- Identify the leg with the rubber grip.
- Unscrew this leg from the tripod's main body.
- Unscrew the center column from the tripod's main body.
- Screw the detached leg onto the bottom of the center column.
- The ball head can then be attached to the top of this assembly, creating a monopod.
- To reassemble the tripod, reverse these steps.
Maintenance
- Cleaning: Wipe down the tripod with a soft, dry cloth after each use, especially if exposed to dust, sand, or moisture. For stubborn dirt, a slightly damp cloth can be used, followed by thorough drying.
- Lubrication: Moving parts are generally self-lubricating. Do not apply oil or grease unless specifically instructed by Rollei support, as this can attract dirt.
- Storage: Store the tripod in its protective bag in a cool, dry place away from direct sunlight and extreme temperatures.
- Inspection: Periodically check all screws, bolts, and locking mechanisms for tightness. Use the provided Allen keys and multifunctional wrench for adjustments.
Troubleshooting
- Problem: Tripod is unstable.
- Solution: Ensure all leg sections are fully extended and their quick clamping screws are tightened. Verify leg angle locks are engaged. Use the center column hook to add weight for increased stability. Ensure the tripod is on a level surface.
- Problem: Camera movement after locking ball head.
- Solution: Tighten the ball lock knob more firmly. Ensure the quick release plate is securely attached to both the camera and the ball head clamp.
- Problem: Leg sections are difficult to extend or retract.
- Solution: Check for sand or debris inside the leg sections. Clean thoroughly. Do not force movement; if the issue persists, contact customer support.
Specifications
| Feature | Value |
|---|---|
| Brand | Rollei |
| Model Name | Compact Traveler No. 1 Carbon |
| Model Number | 22579 |
| Material | Carbon Fiber |
| Item Weight (incl. Ball Head) | 2.16 lb (0.98 kg) |
| Maximum Load Capacity | 17.64 lb (8 kg) |
| Maximum Height | 55.91 inches (142 cm) |
| Minimum Height | 13.39 inches |
| Folded Size | 12.99 inches (33 cm) |
| Tripod Head Type | Ball Head (360° Panorama) |
| Quick Release Plate | Arca Swiss Compatible |
Warranty and Support
The Rollei Compact Traveler No. 1 Carbon tripod comes with a 24-month warranty from the date of purchase. This warranty covers manufacturing defects and material faults under normal use.
For warranty claims, technical support, or spare parts, please contact Rollei customer service. Keep your proof of purchase for warranty validation.
For further assistance, visit the official Rollei website or contact your local distributor.