1. Introduction
This manual provides essential information for the safe and efficient use of your Philips Performer Active FC8575/09 Cylinder Vacuum Cleaner. Please read these instructions carefully before using the appliance and retain them for future reference.
The Philips Performer Active FC8575/09 is designed for effective dry cleaning of various surfaces, including carpets and hard floors. It features AirflowMax technology for strong suction, a 900 W motor, and a 4-liter dust bag capacity. The integrated allergy filter captures pollen, pet hair, and dust mites, making it suitable for allergy sufferers.
2. Product Overview
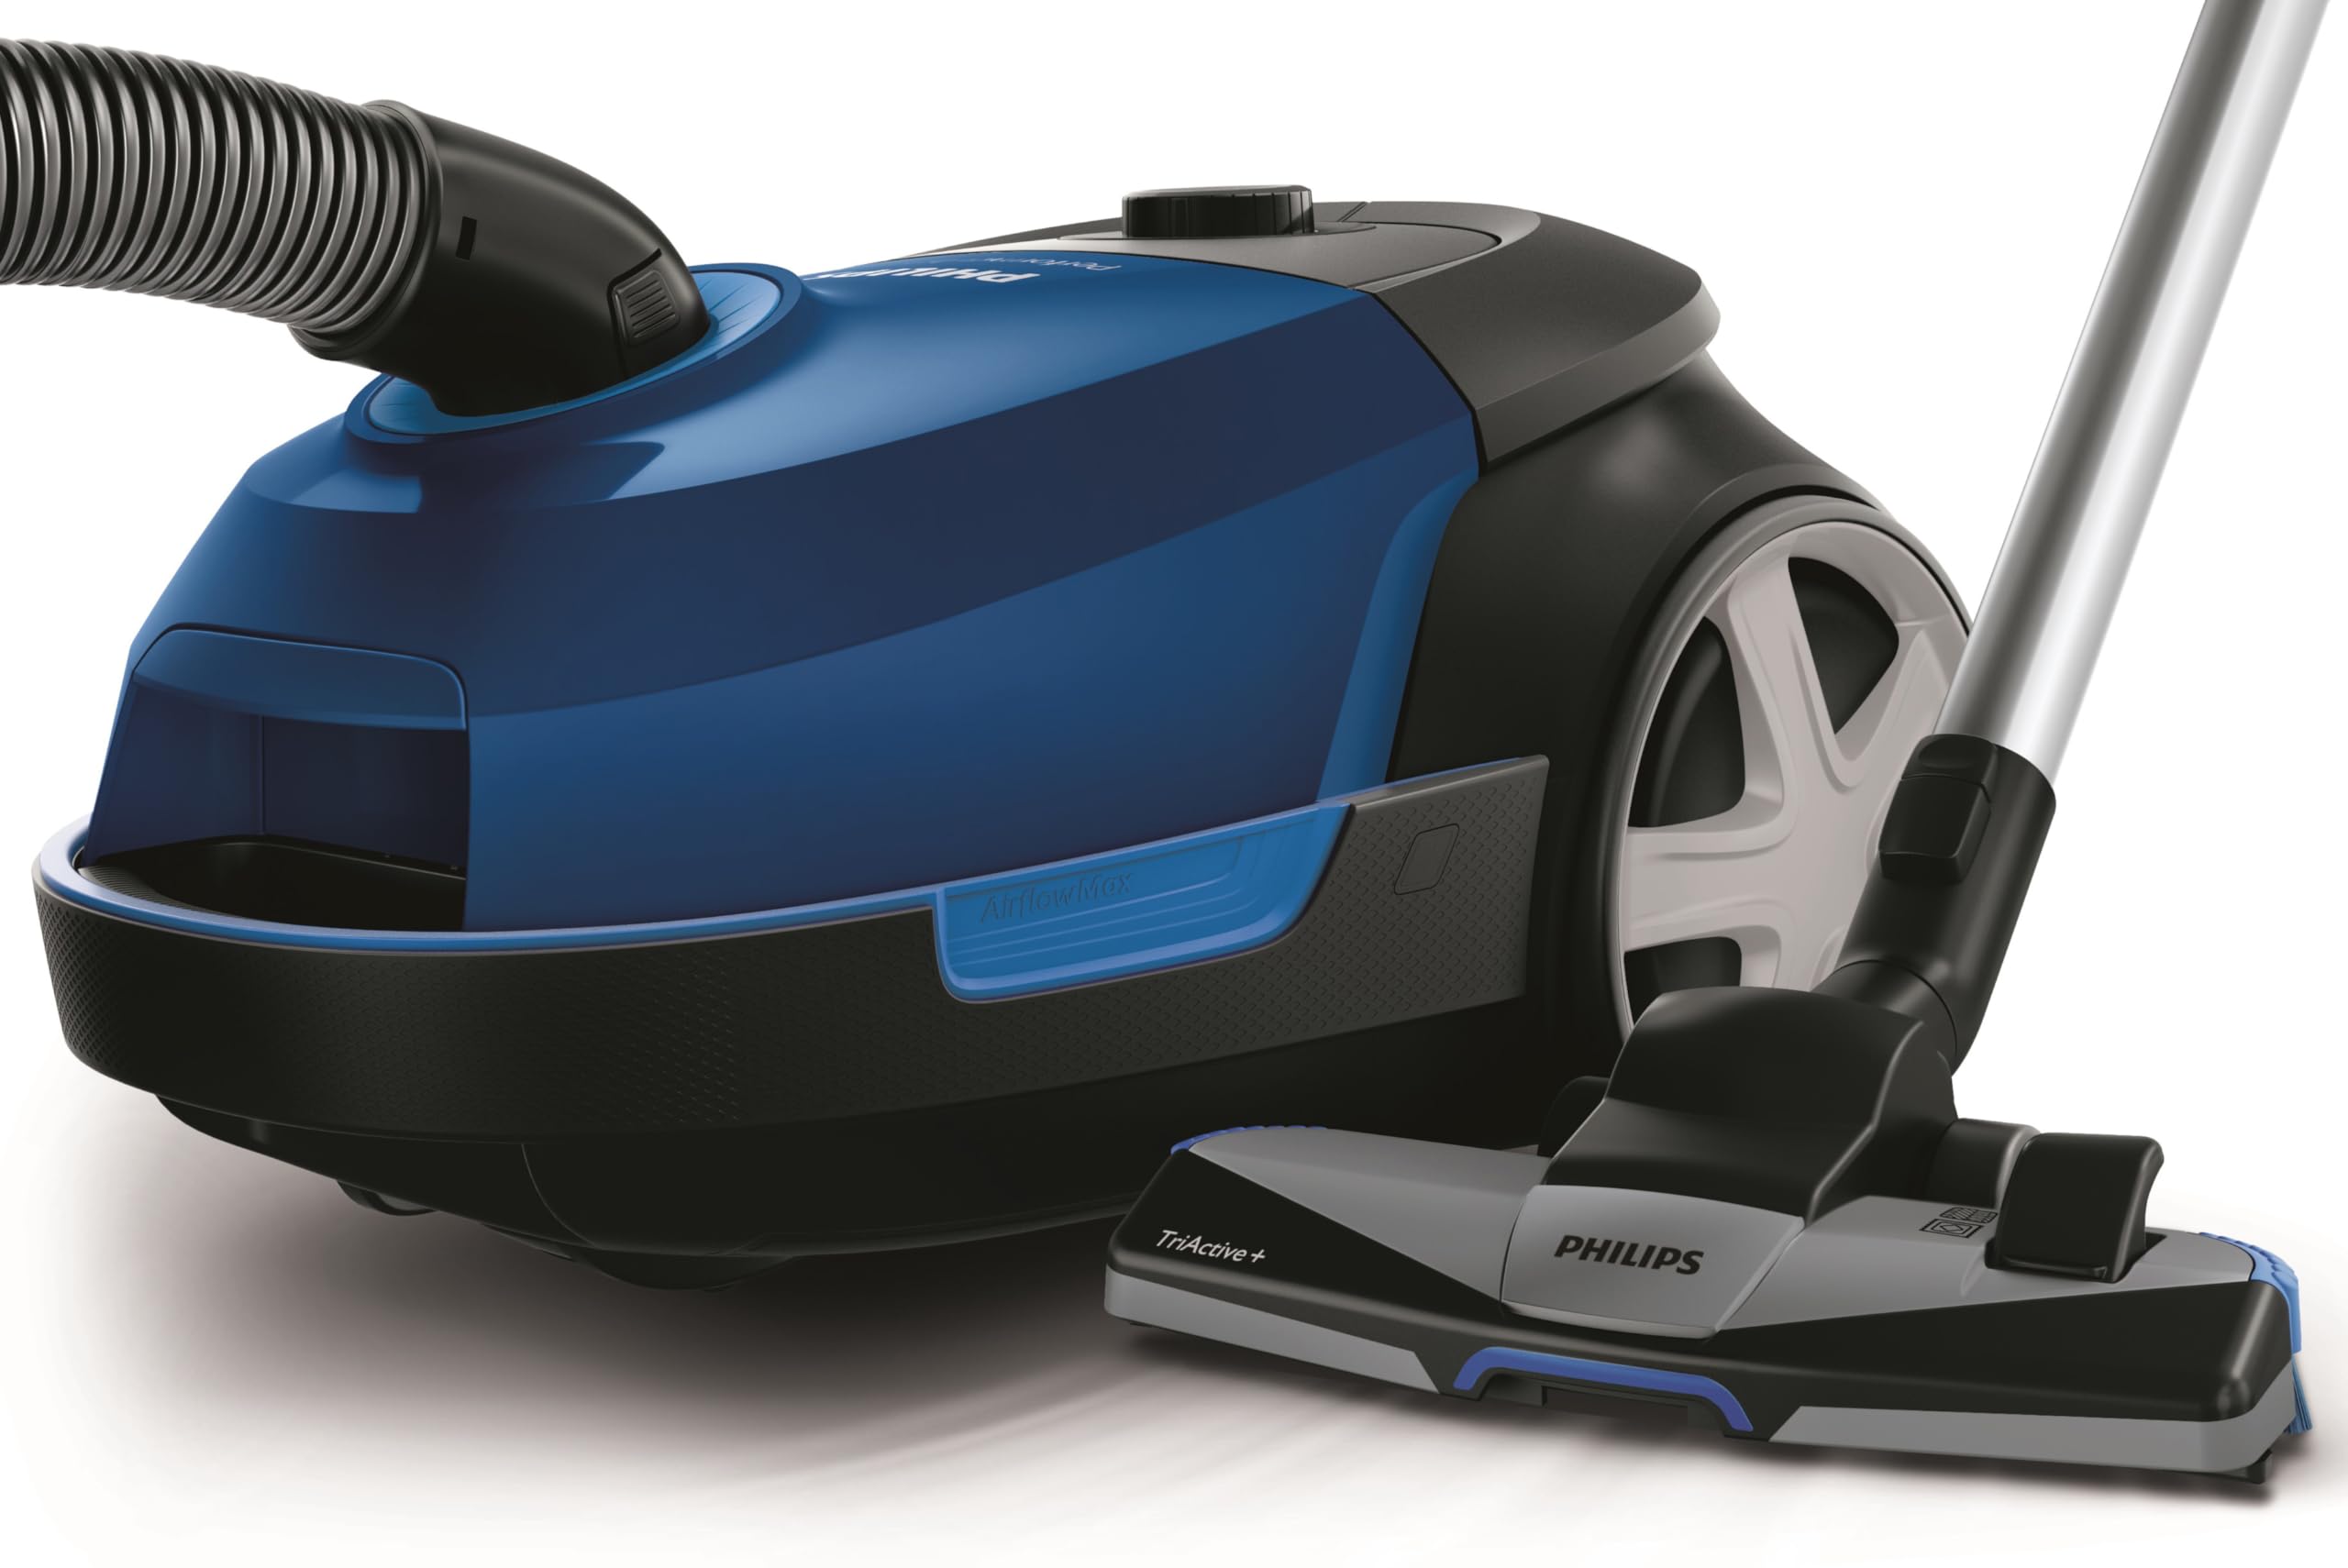
Figure 1: Philips Performer Active FC8575/09 Vacuum Cleaner, fully assembled.
The Philips Performer Active FC8575/09 is a bag-type cylinder vacuum cleaner. It consists of a main unit with wheels, a flexible hose, a telescopic tube, and various nozzles for different cleaning tasks. The main unit houses the motor, dust bag compartment, and filters.
3. Safety Information
- Always check that the voltage indicated on the appliance corresponds to the local mains voltage before you connect the appliance.
- Do not use the appliance if the mains cord, the plug, or the appliance itself is damaged.
- Do not use the appliance to vacuum water or other liquids, flammable substances, or hot ashes.
- Never immerse the appliance in water or any other liquid.
- Keep the appliance out of reach of children.
- Unplug the appliance from the mains socket before cleaning or performing maintenance.
4. Package Contents
Ensure all components are present in the packaging:
- Main vacuum cleaner unit
- Flexible hose
- Telescopic tube
- TriActive+ nozzle
- Hard floor nozzle
- Crevice nozzle
- Integrated brush
- Allergy filter (pre-installed or separate)
- Classic Long Performance s-bag (pre-installed or separate)
5. Setup
Follow these steps to assemble your vacuum cleaner:
- Attach the Flexible Hose: Insert the hose end into the suction opening on the main unit until it clicks into place. To detach, press the release buttons on the side of the hose connection.
- Connect the Telescopic Tube: Slide the telescopic tube onto the handle of the flexible hose until it locks. Adjust the tube length by pressing the release button and extending or retracting the tube.
- Attach a Nozzle: Select the desired nozzle (e.g., TriActive+ nozzle for general cleaning or hard floor nozzle for delicate surfaces) and push it onto the end of the telescopic tube until it fits securely. The crevice nozzle and integrated brush can be attached directly to the hose handle or telescopic tube for specific tasks.
- Check Dust Bag and Filters: Ensure a Classic Long Performance s-bag is correctly inserted into the dust bag compartment and that the allergy filter is in place. Refer to the 'Maintenance' section for detailed instructions on checking and replacing these components.
- Power Connection: Extend the power cord from the main unit and plug it into a suitable mains power outlet.
6. Operating the Vacuum Cleaner
6.1 Powering On/Off
- To turn on the vacuum cleaner, press the On/Off foot pedal located on the main unit.
- To turn off the vacuum cleaner, press the On/Off foot pedal again.
6.2 Using the Nozzles
- TriActive+ Nozzle: This multi-surface nozzle is suitable for both carpets and hard floors. It is designed to pick up fine dust and larger particles.
- Hard Floor Nozzle: Use this nozzle for optimal cleaning performance on delicate hard floors, such as parquet or laminate, to prevent scratches.
- Crevice Nozzle: Ideal for cleaning narrow and hard-to-reach areas, such as corners, edges, and between cushions.
- Integrated Brush: The brush is integrated into the hose handle. Slide it down for quick cleaning of furniture, lampshades, or other delicate surfaces.
6.3 Cord Rewind
To rewind the power cord, gently pull the cord until it starts to retract automatically, or press the cord rewind foot pedal on the main unit.
7. Maintenance
Regular maintenance ensures optimal performance and extends the lifespan of your vacuum cleaner.
7.1 Dust Bag Replacement
Replace the Classic Long Performance s-bag when the dust bag full indicator on the main unit illuminates, or when suction power noticeably decreases.
- Switch off and unplug the vacuum cleaner.
- Open the dust bag compartment cover.
- Carefully remove the full s-bag from its holder. The s-bag features a hygienic sealing system to minimize dust exposure.
- Insert a new Classic Long Performance s-bag into the holder, ensuring it is fully unfolded inside the compartment.
- Close the dust bag compartment cover until it clicks.
7.2 Filter Maintenance
The vacuum cleaner is equipped with an allergy filter (HEPA filter) that requires regular cleaning or replacement.
- Motor Protection Filter: This filter is located behind the dust bag. Check it every 4-6 dust bag changes. If it is heavily soiled, rinse it under running water and let it dry completely before reinserting.
- Exhaust Filter (Allergy Filter): This filter is typically located at the rear of the appliance. Replace it once a year or when it appears heavily soiled. Do not wash this filter.
7.3 Nozzle and Hose Cleaning
- Regularly check nozzles and the hose for blockages. Remove any hair, threads, or debris that may have accumulated.
- Clean the nozzles with a damp cloth. Do not use abrasive cleaning agents.
8. Troubleshooting
If you encounter problems with your vacuum cleaner, consult the following table before contacting customer support.
| Problem | Possible Cause | Solution |
|---|---|---|
| No suction power or reduced suction | Dust bag is full. | Replace the dust bag. |
| Filters are clogged. | Clean or replace the motor protection filter and/or exhaust filter. | |
| Hose, tube, or nozzle is blocked. | Remove the blockage. | |
| Vacuum cleaner does not switch on | Appliance is not plugged in. | Plug the appliance into the mains socket. |
| Mains socket is not live. | Check the mains socket with another appliance. | |
| Unusual noise during operation | Blockage in the hose or nozzle. | Check and remove any blockages. |
| Dust bag or filter not correctly inserted. | Ensure all components are correctly seated. |
9. Specifications
| Feature | Specification |
|---|---|
| Model | FC8575/09 |
| Brand | Philips |
| Form Factor | Cylinder (Cannister) |
| Capacity | 4 Liters |
| Filter Type | HEPA Filter (Allergy Filter) |
| Surface Recommendation | Carpet, Hard Floor |
| Power Source | Corded Electric |
| Voltage | 220 Volts |
| Item Weight | 6.49 Kilograms |
| Cordless | No |
| Included Components | Brush, Hard Floor Nozzle, TriActive+ Nozzle, Crevice Nozzle |
10. Warranty and Support
This Philips appliance is covered by a warranty valid from the date of purchase. For detailed warranty terms and conditions, please refer to the warranty card included with your product or visit the official Philips website.
For technical assistance, product information, or to locate a service center, please visit the Philips support website or contact your local Philips customer service. Ensure you have your product model number (FC8575/09) and proof of purchase available when seeking support.


