Introduction
This manual provides essential information for the safe and efficient installation, operation, and maintenance of your Hatco HBGB-6018 Built-In Heated Black Glass Shelf. This unit is designed to maintain pre-heated food at serving temperatures in commercial food service environments. Please read all instructions carefully before installation and use.
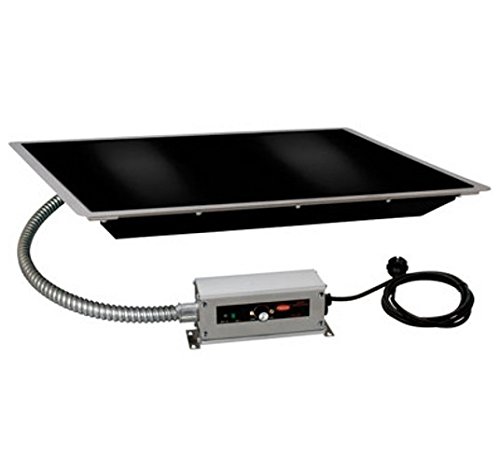
An image showing the Hatco HBGB-6018 built-in heated black glass shelf, designed for commercial food warming applications.
Safety Information
Always observe basic safety precautions when using electrical appliances to reduce the risk of fire, electric shock, or injury.
- Electrical Hazard: Ensure the unit is properly grounded. Disconnect power before cleaning or servicing. Do not operate with a damaged cord or plug.
- Hot Surface: The glass surface and surrounding areas become hot during operation. Use caution to avoid burns. Allow the unit to cool completely before cleaning or handling.
- Installation: Installation must be performed by qualified personnel in accordance with all local electrical and plumbing codes.
- Intended Use: This unit is designed for holding pre-heated food at serving temperatures. Do not use for cooking or reheating cold food.
- Cleaning: Do not immerse the unit in water. Use only mild, non-abrasive cleaners.
Setup
- Unpacking: Carefully remove the unit from its packaging. Inspect for any shipping damage. Report any damage to the carrier immediately. Retain packaging materials for future transport if needed.
- Placement and Installation: This is a built-in unit. Ensure the countertop cutout dimensions match the unit's specifications for a proper fit. Installation should be performed by a qualified technician to ensure correct electrical connection and secure mounting. Provide adequate ventilation around the installed unit as per local codes.
- Electrical Connection: Connect the unit to a dedicated, properly grounded electrical circuit as specified on the product label. Ensure the voltage and amperage match your facility's electrical supply.
- Initial Cleaning: Before first use, wipe down the glass surface and frame with a soft cloth dampened with a mild, food-safe cleaner. Rinse and dry thoroughly.
Operating Instructions
- Power On: Locate the lighted on/off rocker switch, typically found on the control panel. Flip the switch to the 'ON' position. The light will illuminate, indicating the unit is receiving power.
- Temperature Setting: Use the thermostatic control knob to set the desired holding temperature. The temperature range is typically between 100°F and 200°F (38°C - 93°C). Start with a medium setting and adjust as needed to maintain optimal food temperature.
- Preheating: Allow the unit to preheat for approximately 20-30 minutes to reach the set temperature before placing food on the surface.
- Food Placement: Place pre-heated food in appropriate heat-resistant containers directly onto the glass surface. Distribute food evenly to ensure uniform heating. Do not overload the surface.
- Monitoring: Periodically check food temperatures with a food thermometer to ensure they are held at safe serving temperatures.
- Power Off: When finished, remove all food and containers. Flip the on/off rocker switch to the 'OFF' position. Allow the unit to cool before cleaning.
Maintenance
Regular cleaning and maintenance will ensure the longevity and optimal performance of your heated glass shelf.
- Daily Cleaning: After each use, ensure the unit is turned off and completely cool. Disconnect power. Wipe the ceramic glass surface with a soft cloth or sponge using a mild, non-abrasive detergent. Rinse with a clean, damp cloth and dry thoroughly to prevent water spots.
- Frame Cleaning: Clean the frame and surrounding areas with a damp cloth and mild detergent. Avoid harsh chemicals or abrasive pads that could scratch the finish.
- Spills: Clean spills immediately to prevent them from baking onto the surface, which can make removal difficult.
- Inspection: Periodically inspect the power cord for any signs of damage. If damage is found, discontinue use and contact a qualified service technician.
- Professional Servicing: For any internal repairs or electrical issues, contact a Hatco authorized service agent. Do not attempt to service the unit yourself.
Troubleshooting
| Problem | Possible Cause | Solution |
|---|---|---|
| Unit does not heat | No power; On/Off switch off; Thermostat set too low; Circuit breaker tripped | Check power cord connection; Turn On/Off switch to 'ON'; Adjust thermostat to a higher setting; Reset circuit breaker |
| Uneven heating | Food unevenly distributed; Ambient temperature too low; Unit not preheated sufficiently | Distribute food evenly; Ensure unit is in a suitable environment; Allow adequate preheating time |
| Indicator light not working | Light bulb failure; Electrical issue | If unit is heating, light bulb may need replacement (contact service); If no heat, check power supply |
| Food drying out | Temperature too high; Food uncovered | Lower temperature setting; Use covers for food containers |
If troubleshooting steps do not resolve the issue, contact Hatco customer service or an authorized service technician for assistance.
Specifications
- Model: HBGB-6018
- Type: Built-In Heated Black Glass Shelf
- Length: 61.63 inches
- Surface Material: Ceramic Glass
- Temperature Range: 100°F - 200°F (38°C - 93°C)
- Control: Thermostatic with Lighted On/Off Rocker Switch
- Manufacturer: Hatco
- ASIN: B01AOIA04S
- Item Weight: 2.2 pounds
- Product Dimensions: 0.04 x 60 x 0.04 inches (L x W x H)
- Date First Available: March 20, 2016
Note: Specifications are subject to change without notice. Please refer to the product label for the most accurate information.
Warranty and Support
For warranty information, technical support, or to locate an authorized service agent, please contact Hatco Corporation directly. Keep your purchase receipt and model number readily available when contacting support.
Hatco Corporation Contact Information: Please refer to the official Hatco website or product documentation for current contact details.