
1. Introduction
Thank you for choosing the Advocate Digital Automatic Upper Arm Blood Pressure Monitor. This device is designed for accurate and convenient measurement of systolic and diastolic blood pressure, as well as pulse rate, for home use. Regular monitoring can provide valuable information for managing your health.

Image 1.1: Advocate Digital Automatic Upper Arm Blood Pressure Monitor with Large Cuff. This image displays the main unit with its large digital display showing blood pressure readings (120/80 mmHg) and pulse (75 bpm), along with a red tag indicating 'LARGE' cuff size.
2. Important Safety Information
- Consult your physician before using this device if you have any medical conditions.
- Do not self-diagnose or self-medicate based on measurements from this device. Always consult a healthcare professional.
- This device is intended for adult use only.
- Keep the device out of reach of children and pets.
- Do not use this device in conjunction with other medical electrical equipment.
- Avoid taking measurements in a moving vehicle or during physical activity.
3. Package Contents
Please check the package contents to ensure all items are present:
- Advocate Digital Automatic Upper Arm Blood Pressure Monitor
- Upper Arm Cuff (Large size)
- Instruction Manual
- Carrying Case
- 2 AA Batteries
4. Product Overview
The Advocate Blood Pressure Monitor features an extra-large LCD display for clear readings and simple one-touch operation.

Image 4.1: Hassle-Free BP Monitoring. This image shows a hand pressing the start button on the Advocate Blood Pressure Monitor, highlighting its extra-large LCD display, one-touch operation, and auto shut-off feature. It also indicates two power options: 4 AA batteries or a Micro USB A/C adapter (not included).
4.1 Monitor Components
- Display: Shows Systolic, Diastolic, Pulse, Date, Time, User ID, and WHO classification indicator.
- SET Button: Used for setting date/time and accessing memory.
- User Selection Button (! / "): Toggles between User 1 and User 2 memory.
- Power Button (!): Turns the device on/off and starts/stops measurement.
- Cuff Connector Port: Where the air tube from the cuff connects to the monitor.
- Battery Compartment: Located on the bottom or back of the unit.
5. Setup
5.1 Battery Installation
- Open the battery compartment cover on the back of the monitor.
- Insert the 2 AA batteries, ensuring the correct polarity (+/-) as indicated inside the compartment.
- Close the battery compartment cover securely.
The monitor can also be powered by a Micro USB A/C adapter (not included).
5.2 Setting Date and Time
Upon first use or after battery replacement, you may need to set the date and time:
- With the monitor off, press and hold the SET button for a few seconds until the year starts flashing.
- Press the Power button to adjust the year. Press SET to confirm and move to the next setting (month, day, hour, minute).
- Repeat the process for all settings. Press SET one last time to save and exit.
5.3 Attaching the Arm Cuff
- Insert the air plug of the cuff firmly into the cuff connector port on the side of the monitor.
- Ensure the cuff is securely connected.
6. Operating Instructions
6.1 Before Taking a Measurement
- Avoid eating, drinking alcohol, smoking, exercising, and bathing for 30 minutes before measurement.
- Rest for at least 5 minutes before taking a measurement.
- Sit upright with your back supported, feet flat on the floor, and your arm resting on a table so the cuff is at heart level.
- Ensure the cuff is placed directly on your bare skin, not over clothing.
6.2 Applying the Arm Cuff

Image 6.1: Better Fit. Better Readings. This image shows a woman with a blood pressure cuff correctly placed on her upper arm, giving a thumbs-up, emphasizing the importance of a comfortable and snug fit for accurate readings. It also lists cuff size ranges: Small-Medium (8.7in - 14.2in), Large (9.45in - 18.5in), and X-Large (12.6in - 20.5in).
- Slide your arm through the cuff loop. The bottom edge of the cuff should be approximately 1-2 cm (0.4-0.8 inches) above your elbow joint.
- Position the air tube over the center of your inner arm.
- Wrap the cuff snugly around your upper arm. It should be tight enough so that you can barely slide two fingers under the edge.
6.3 Taking a Measurement
- Select the desired user (User 1 or User 2) by pressing the User Selection button.
- Press the Power button to start the measurement. The cuff will automatically inflate.
- Remain still and silent during the measurement.
- Once the measurement is complete, the cuff will deflate, and your systolic pressure, diastolic pressure, and pulse rate will be displayed on the screen.
- The reading will automatically be stored in the selected user's memory.
6.4 Understanding Your Readings
The monitor displays three key values:
- SYS (Systolic Pressure): The pressure when your heart beats.
- DIA (Diastolic Pressure): The pressure when your heart rests between beats.
- PUL (Pulse Rate): Your heart rate per minute.
The monitor also includes a WHO (World Health Organization) classification indicator on the left side of the display, which visually categorizes your blood pressure reading.
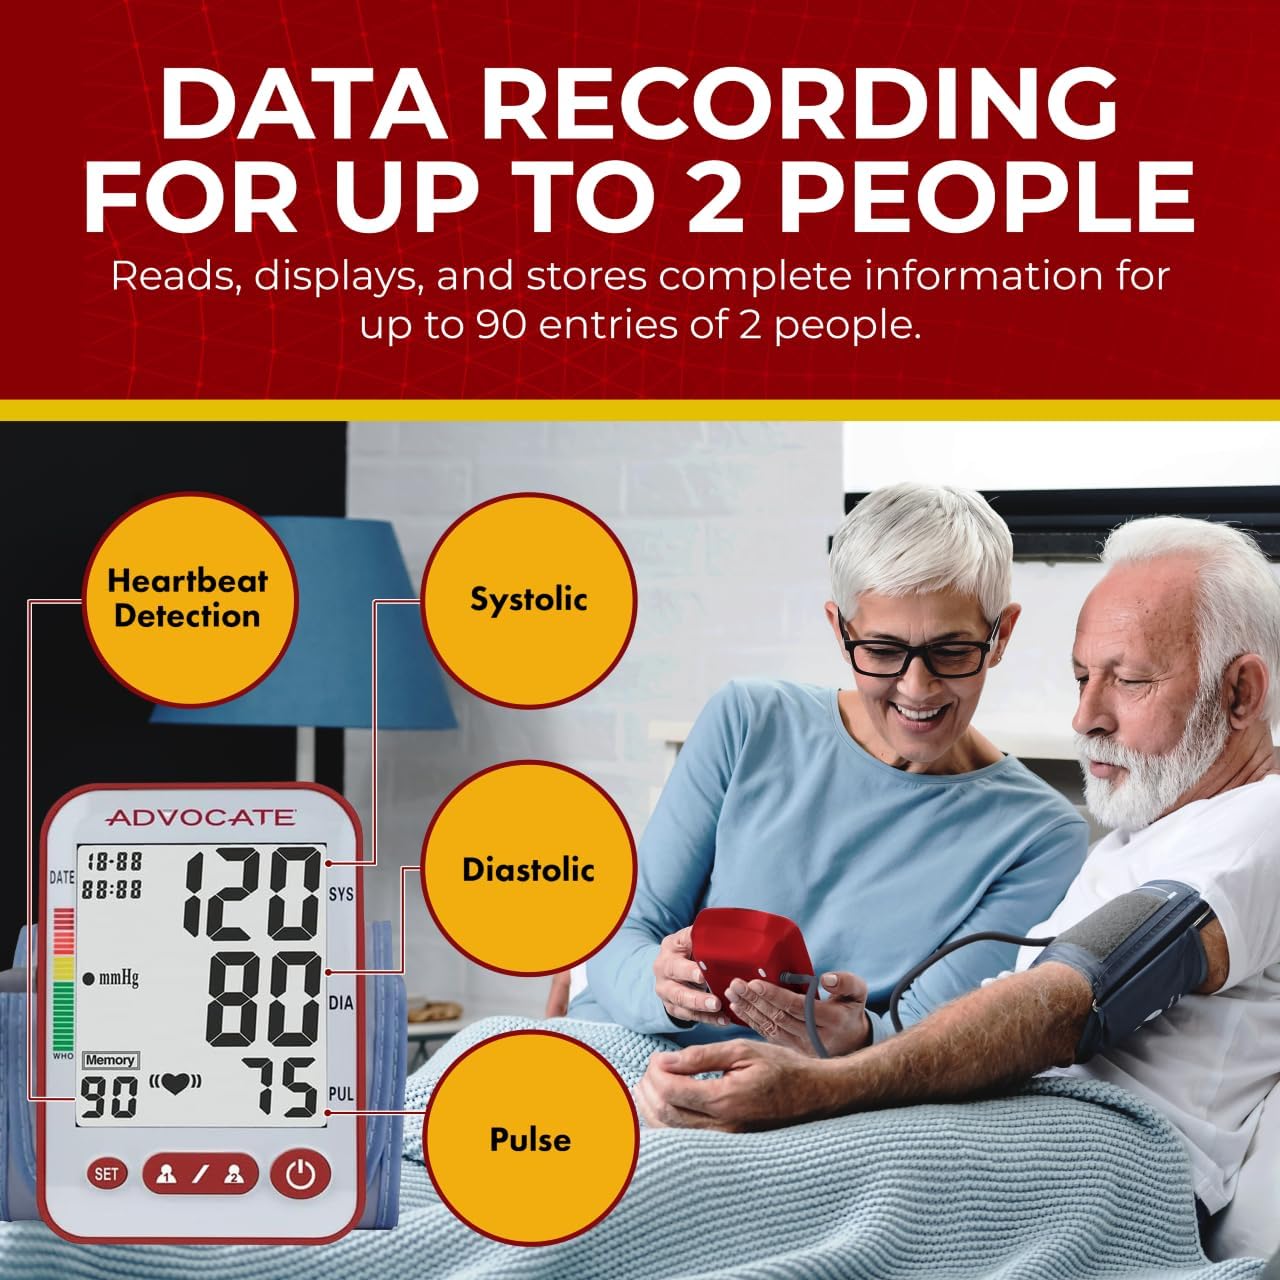
Image 6.2: Data Recording for Up to 2 People. This image illustrates the Advocate Blood Pressure Monitor's capability to record and display data for two users, showing the monitor in use by a couple. It highlights the detection of Heartbeat, Systolic, Diastolic, and Pulse readings.
6.5 Memory Function
The monitor can store up to 80 readings for each of the two users. To review past readings:
- With the monitor off, press the SET button briefly.
- The most recent reading will be displayed. Press SET again to scroll through older readings.
- To switch between User 1 and User 2 memory, press the User Selection button while in memory review mode.
7. Maintenance and Care
7.1 Cleaning
- Wipe the monitor and cuff with a soft, dry cloth.
- If necessary, use a slightly damp cloth with mild soap, then wipe dry.
- Do not use abrasive cleaners, solvents, or immerse the device in water.
7.2 Storage
- Store the device in its carrying case in a cool, dry place.
- Avoid extreme temperatures, direct sunlight, and high humidity.
7.3 Battery Replacement
When the low battery indicator appears on the display, replace all 2 AA batteries with new ones. Follow the battery installation steps in Section 5.1.
8. Troubleshooting
| Problem | Possible Cause | Solution |
|---|---|---|
| Monitor does not turn on | Batteries are dead or incorrectly inserted. | Replace batteries or check polarity. |
| Error message (e.g., 'E1', 'E2') | Cuff not applied correctly, movement during measurement, or air leakage. | Reapply cuff, remain still, check cuff connection. Retake measurement after 5 minutes. |
| Inconsistent readings | Improper posture, talking during measurement, or incorrect cuff size. | Ensure proper posture and silence. Verify cuff size is appropriate for your arm circumference. Take multiple readings at different times of day. |
| No display after measurement | Auto shut-off activated. | Press the Power button to turn the monitor back on. Readings are saved in memory. |
9. Specifications
- Model: FT-C11B (SPBP-04) Ref# 406L
- Measurement Method: Oscillometric
- Measurement Range: Blood Pressure: 0-299 mmHg; Pulse: 40-199 beats/minute
- Accuracy: Pressure: ±3 mmHg; Pulse: ±5% of reading
- Memory: 80 readings for 2 users
- Power Source: 2 x AA batteries (included) or Micro USB A/C adapter (not included)
- Cuff Size: Large (fits arm circumference 9.45in - 18.5in)
- Product Dimensions: Approximately 6 x 7 x 5 inches
- Item Weight: 1 Pound
- Manufacturer: Advocate
- UPC: 894046001417

Image 9.1: Double-Checked Accuracy. This image features the Advocate Blood Pressure Monitor against a background of medical-related icons, emphasizing that the device is tested and approved in-house and by a third party under strict quality control standards.
10. Warranty and Support
The Advocate Digital Automatic Upper Arm Blood Pressure Monitor comes with a 12-month warranty from the date of purchase, covering manufacturing defects. Please refer to the warranty booklet included in your package for detailed terms and conditions.
For technical support, troubleshooting assistance, or warranty claims, please contact Advocate customer service. Contact information can typically be found on the Advocate website or within the warranty booklet.
