1. Introduction
The Intercomp E-Z Weigh Scale System SW500 is designed for precise weight measurement, particularly in applications requiring accurate chassis setup. This system includes four billet scale pads, a cabled indicator with a protective case, and a dedicated scale pad case. It offers a capacity of 1,500 lbs (700 kg) per pad, totaling a system capacity of 6,000 lbs (2,800 kg), with user-selectable display modes for kilograms or pounds. The system is certified to 0.1% accuracy and can store up to 100 chassis setups.
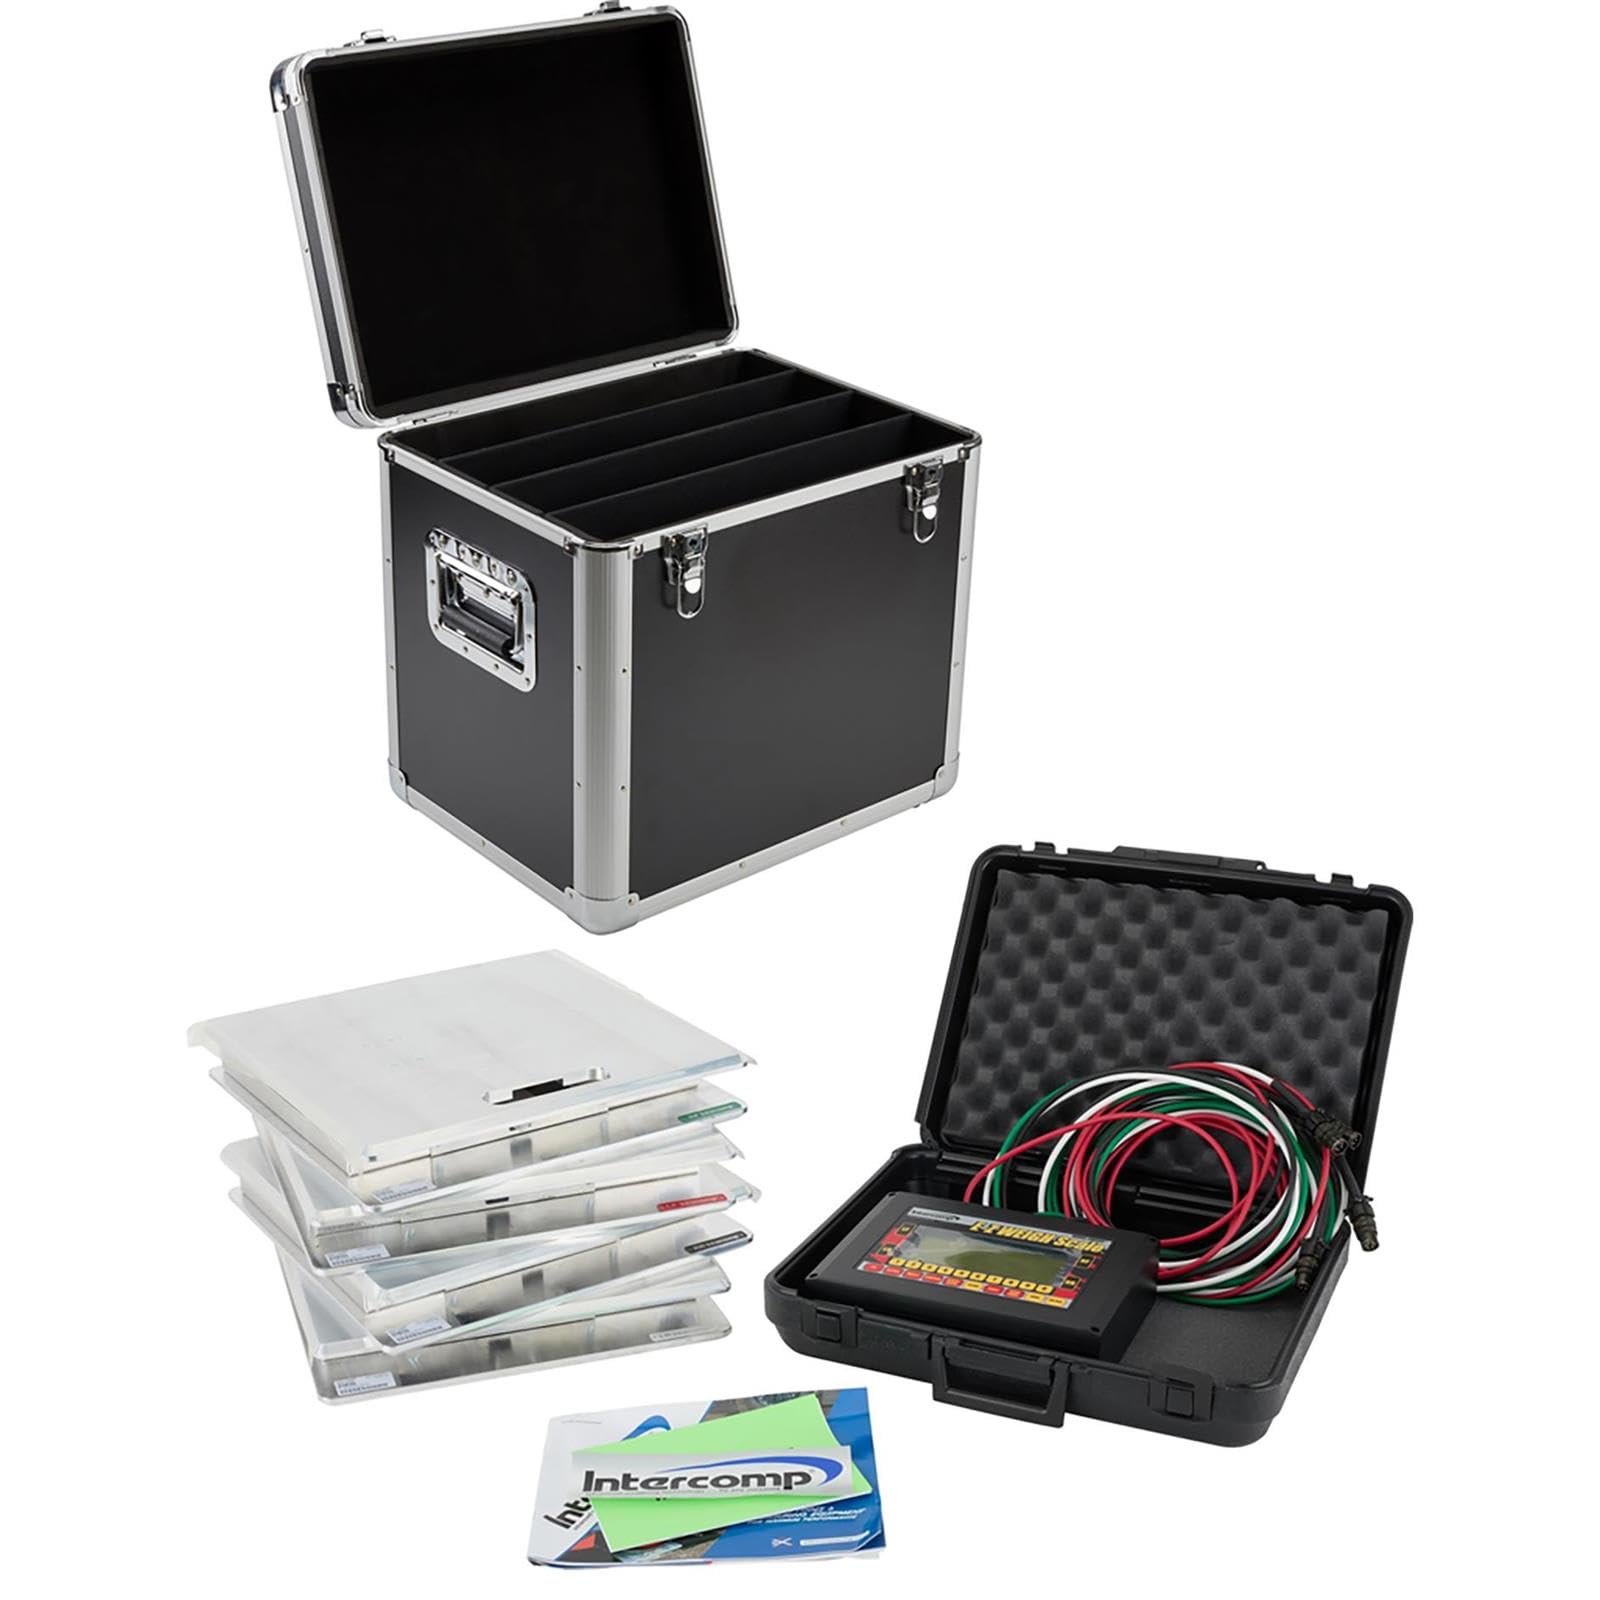
Figure 1.1: Overview of the Intercomp E-Z Weigh Scale System SW500, showing the indicator, cables, and four scale pads.
2. Setup
2.1 Unpacking and Inspection
Carefully unpack all components from their packaging. Verify that the following items are present:
- Four (4) Billet Scale Pads
- One (1) Cabled Indicator with Protective Case
- One (1) Scale Pad Case
- Connecting Cables
Inspect all components for any signs of damage during transit. If any damage is found, contact your supplier immediately.

Figure 2.1: A single billet scale pad, made of aluminum, ready for placement.
2.2 Powering the Indicator
The indicator unit operates on a standard 9-volt battery. Open the battery compartment, typically located on the rear or side of the indicator, and insert a fresh 9-volt battery, observing correct polarity. Close the compartment securely.
2.3 Connecting Scale Pads
Connect each of the four billet scale pads to the indicator unit using the provided cables. Ensure that each cable is securely fastened to both the scale pad and the corresponding port on the indicator. The cables are color-coded for easy identification and connection to specific corners (e.g., front left, front right, rear left, rear right).

Figure 2.2: The cabled indicator unit with its connecting cables, ready to be attached to the scale pads.
2.4 Placement of Scale Pads
Place the four scale pads on a flat, level, and stable surface where the weighing will take place. Ensure that each pad is positioned correctly to support a wheel or corner of the item being weighed. For vehicle weighing, ensure the pads are aligned to accommodate the vehicle's wheelbase and track width.
3. Operating Instructions
3.1 Power On/Off
To power on the system, press the designated power button on the indicator unit. The display will illuminate and perform a self-test. To power off, press and hold the power button until the display shuts down.
3.2 Selecting Display Modes
The system allows for user-selectable display modes between kilograms (kg) and pounds (lb). Refer to the indicator's interface for the specific button or menu option to toggle between these units. This setting ensures measurements are displayed in your preferred unit.
3.3 Taking Measurements
Once the system is powered on and the desired unit is selected, carefully place the item to be weighed onto the scale pads. Ensure the weight is distributed evenly across the pads. The indicator will display the individual weight for each pad and the total system weight. The system is certified to 0.1% accuracy for precise readings.
3.4 Storing Chassis Setups
The SW500 system has the capability to store up to 100 chassis setups. Consult the indicator's user interface for instructions on how to save current weight readings as a setup. This feature is useful for comparing different configurations or tracking changes over time.
3.5 Viewing Weight and Percentage Combinations
The indicator allows you to view any combination of scale pad weight and percentage. This includes individual wheel weights, cross weights, and total percentages, which are crucial for detailed chassis analysis. Use the navigation buttons on the indicator to cycle through the available display options.
4. Maintenance
4.1 Cleaning Instructions
To maintain the accuracy and longevity of your scale system, keep the scale pads and indicator clean. Use a soft, damp cloth to wipe down surfaces. Avoid using abrasive cleaners or solvents that could damage the finish or electronic components. Ensure no moisture enters the indicator unit or the connections of the scale pads.
4.2 Battery Replacement
When the indicator's battery low warning appears, replace the 9-volt battery promptly to ensure continuous operation and accurate readings. Follow the steps outlined in Section 2.2 for battery replacement.
4.3 Storage
When not in use, store the scale pads in the provided scale pad case and the indicator in its protective case. This protects the components from dust, moisture, and physical damage. Store the system in a dry, temperature-controlled environment.

Figure 4.1: The closed protective case, designed for secure storage and transport of the scale system components.
4.4 Calibration
While the system is factory-calibrated to 0.1% accuracy, periodic calibration checks with certified weights are recommended to ensure continued precision, especially after significant impacts or prolonged use. For professional calibration services, contact Intercomp or an authorized service center.
5. Troubleshooting
5.1 Inaccurate Readings
- Check Surface: Ensure scale pads are on a flat, level, and stable surface. Uneven surfaces can lead to inaccurate measurements.
- Verify Connections: Confirm all cables are securely connected between the pads and the indicator.
- Recalibrate: If issues persist, consider performing a calibration check as described in Section 4.4.
5.2 Display Not Working
- Check Battery: Ensure the 9-volt battery is correctly installed and has sufficient charge. Replace if necessary.
- Power Button: Confirm the power button is pressed firmly.
5.3 Connection Issues
- Cable Integrity: Inspect cables for any visible damage, kinks, or frayed wires. Damaged cables may need replacement.
- Port Cleanliness: Ensure connection ports on both pads and indicator are free from dirt or debris.
6. Specifications
| Feature | Specification |
|---|---|
| Model | SW500 |
| Part Number | 170124 |
| Brand | Intercomp |
| Capacity per Pad | 1,500 lbs (700 kg) |
| System Capacity | 6,000 lbs (2,800 kg) |
| Readout Accuracy | 0.1% of full scale capacity |
| Display Type | Analog |
| Measurement Type | Dual (kg or lb selectable) |
| Power Source | 9-volt battery |
| Material Type | Aluminum (pads) |
| Item Weight (System) | 126 Pounds |
| Chassis Setup Storage | Up to 100 setups |
| Included Components | 4 Billet Pads, Cabled Indicator with Case, Scale Pad Case |
| UPC | 012939000761 |
7. Warranty Information
The Intercomp E-Z Weigh Scale System SW500 is subject to the manufacturer's warranty. For detailed information regarding warranty coverage, terms, and conditions, please refer to the 'See Return Policy' statement provided at the point of purchase or contact the seller directly. It is recommended to retain your proof of purchase for any warranty claims.
8. Support
For technical assistance, troubleshooting beyond the scope of this manual, or inquiries regarding parts and service, please contact:
- Manufacturer: Intercomp
- Seller: Speedway Motors (as indicated by product specifications)
Please have your model number (SW500) and part number (170124) available when contacting support.