IWISS SN-01BM
IWISS SN-01BM Ratchet Crimper User Manual
Model: SN-01BM
1. Introduction
This manual provides instructions for the safe and effective use of the IWISS SN-01BM Ratchet Crimper. This tool is designed for crimping various terminals, including XH2.54/3.96, PH2.0, PX, JST, and Molex, within the AWG 28-20 (0.08-0.5mm²) range. Please read this manual thoroughly before operation and retain it for future reference.
2. Safety Instructions
- Always wear appropriate personal protective equipment, such as safety glasses, when operating the crimper.
- Ensure the tool is clean and free from debris before each use.
- Do not use the crimper for purposes other than its intended design.
- Keep hands and fingers clear of the crimping jaws during operation to prevent injury.
- Store the tool in a dry, secure location away from children and unauthorized users.
- Inspect the tool for any damage before use. Do not use a damaged tool.
3. Product Overview
3.1 Features
- Crimping Range: 0.08-0.5mm² (AWG 28-20).
- Material: Components are constructed from special steel for durability.
- Jaws: Features Wire Electrical Discharge Machining (EDM) cutting jaws with precise polishing for accurate crimps.
- Compatibility: Designed for XH2.54/3.96, PH2.0, PX, KK254, JST, Molex, Dupont, and D-SUB terminals.
- Mechanism: Equipped with precise crimping die sets and an integral lock with a self-releasing mechanism to ensure consistent, high-quality crimping.
- Handle: Ergonomically designed handle for comfortable and effortless operation.
3.2 Product Images

Figure 1: IWISS SN-01BM Ratchet Crimper highlighting its parameters including application, capacity, AWG, weight, handle material, and length.

Figure 2: Detailed view of the crimper's Wire EDM Cutting Jaws, designed for precise and accurate crimps, along with jaw specifications in millimeters.

Figure 3: Key features of the crimper, including adjustable crimping force, a smooth ratcheting mechanism, and an anti-stuck trigger for enhanced usability.
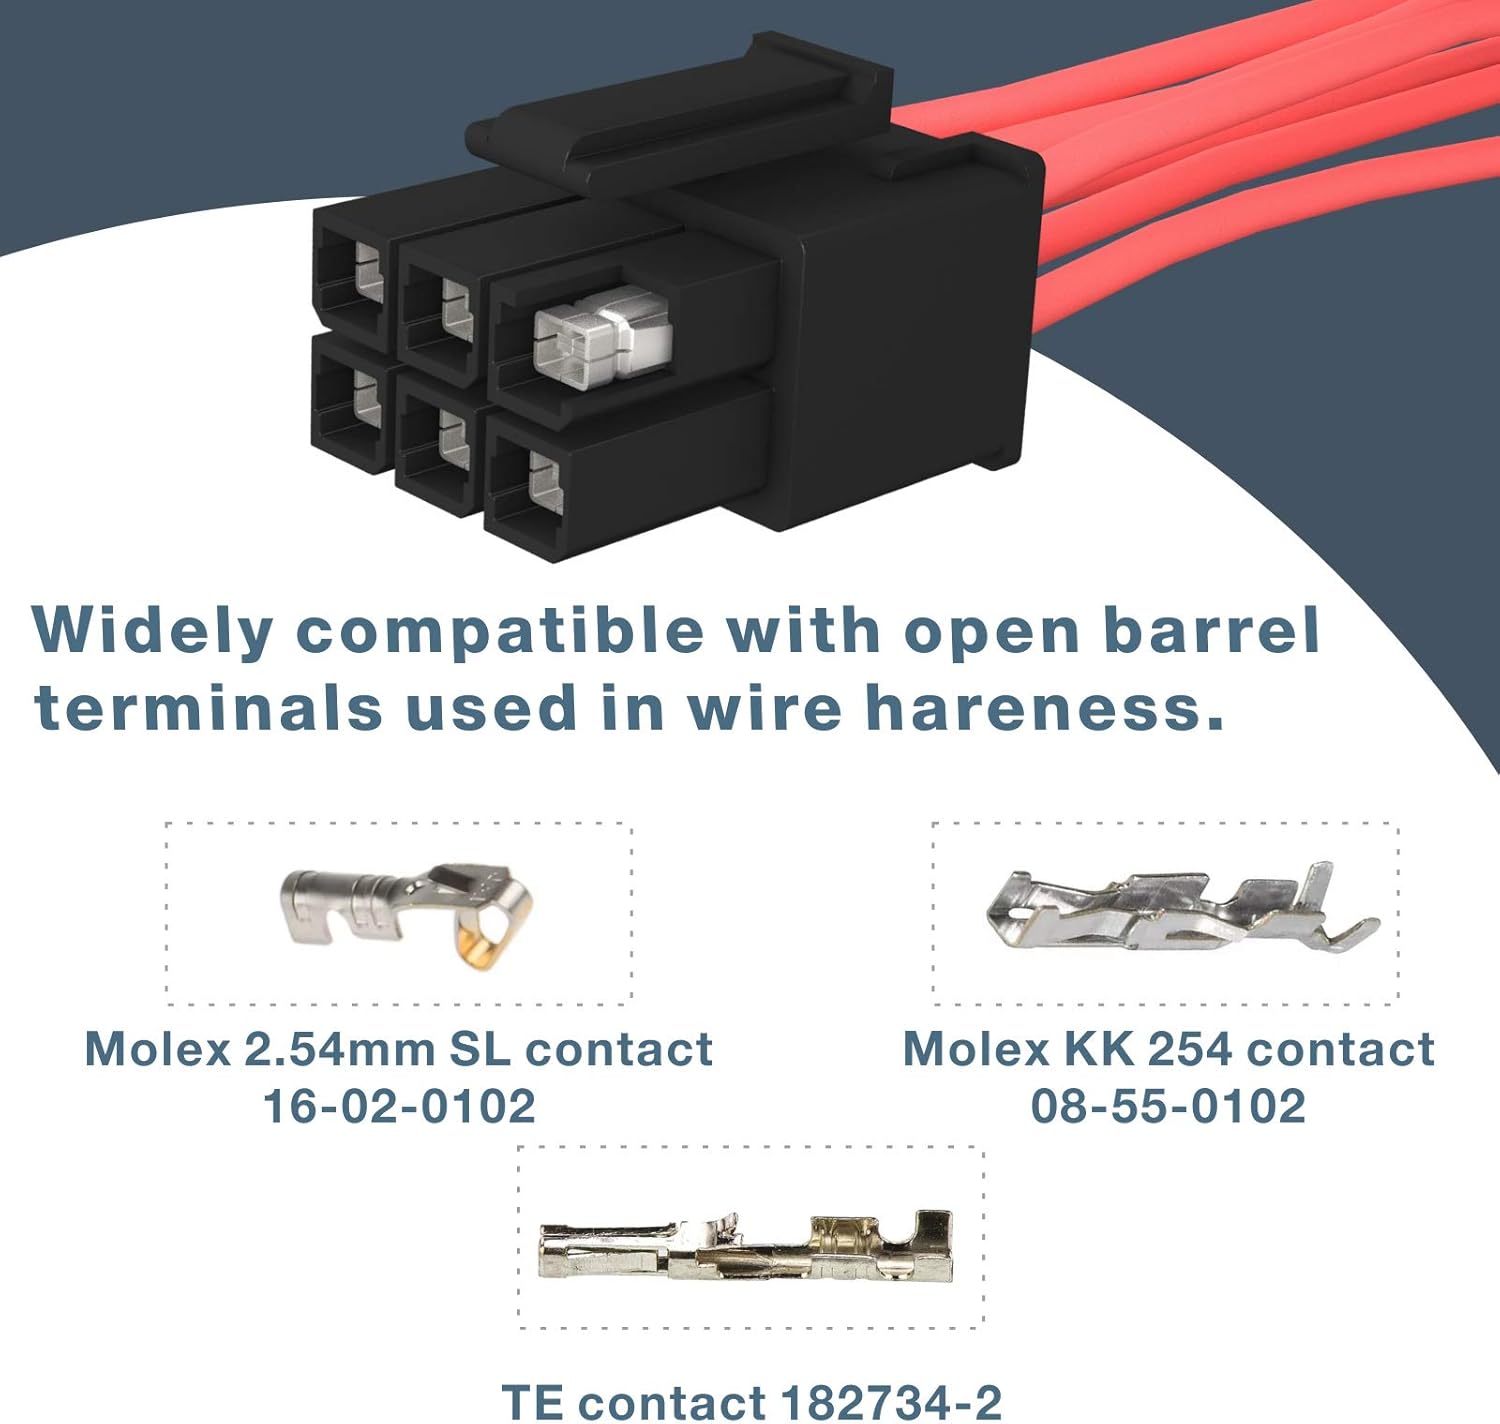
Figure 4: Illustration of various open barrel terminals compatible with the crimper, such as Molex 2.54mm SL, Molex KK 254, and TE contact 182734-2.

Figure 5: The ergonomic handle design of the crimper, ensuring comfortable and effortless operation during use.
4. Specifications
| Attribute | Detail |
|---|---|
| Model Number | SN-01BM |
| Crimping Range | 0.08-0.5mm² (AWG 28-20) |
| Compatible Terminals | XH2.54/3.96, PH2.0, PX, KK254, JST, Molex, Dupont, D-SUB |
| Material | Carbon Steel (Jaws), Alloy Steel (Handle) |
| Color | Orange |
| Product Dimensions | 22 x 15 x 4 cm |
| Item Weight | 0.28 g |
| Number of Handles | 2 |
| Manufacturer | IWISS TOOLS |
| Country of Origin | China |
5. Setup
The IWISS SN-01BM Ratchet Crimper is ready for use out of the box. No assembly is required. Before first use, inspect the tool for any shipping damage and ensure the jaws operate smoothly.
5.1 Adjusting Crimping Force
The crimper features an adjustable crimping force mechanism. If crimps are too loose or too tight, locate the adjustment dial near the pivot point of the handles. Rotate the dial to increase or decrease the crimping force as needed for optimal results with different wire gauges and terminal types. Test on a scrap wire and terminal before final application.
6. Operating Instructions
Follow these steps for proper crimping:
- Prepare the Wire: Strip the insulation from the end of the wire to the appropriate length for your terminal. Ensure the stripped wire is clean and free of frayed strands.
- Select the Correct Die: Identify the correct crimping slot on the jaws that matches the size of your terminal and wire gauge (AWG 28-20 or 0.08-0.5mm²).
- Insert Terminal: Place the terminal into the selected crimping slot. Ensure the terminal is seated correctly and held firmly by the crimper jaws.
- Insert Wire: Insert the stripped wire into the terminal. Make sure the wire conductor is fully within the terminal's crimp barrel and the insulation is positioned correctly for the insulation crimp.
- Crimp: Squeeze the handles of the crimper firmly until the ratchet mechanism releases automatically. This ensures a complete and secure crimp.
- Inspect Crimp: Remove the crimped terminal and inspect it for proper formation. The wire conductor should be securely crimped, and the insulation should be held firmly without being cut.
6.1 Video Demonstrations
Video 1: A demonstration of the WEKESIGO SN series crimper, including the SN-01BM model, showing its features and general crimping process for various terminals.
Video 2: An overview of the iCrimp SN Series Crimping Tool, demonstrating its application for open barrel terminals and highlighting its precision.
Video 3: An operation demonstration of the IWISS SN-58B crimper, a similar model, illustrating the crimping process for various terminals.
7. Maintenance
- Cleaning: After each use, wipe the crimper jaws and body with a clean, dry cloth to remove any residue or debris. For stubborn grime, use a mild solvent and ensure the tool is completely dry afterward.
- Lubrication: Periodically apply a light machine oil to the pivot points and moving parts to ensure smooth operation and prevent rust.
- Storage: Store the crimper in a dry environment to prevent corrosion. Keep it in its original packaging or a tool box to protect it from damage.
- Inspection: Regularly inspect the crimping jaws for wear or damage. Worn jaws can lead to poor crimps.
8. Troubleshooting
8.1 Common Issues and Solutions
- Poor Crimp Quality (Loose or Damaged):
- Ensure the correct crimping slot is selected for the wire gauge and terminal type.
- Adjust the crimping force using the adjustment dial (refer to Section 5.1).
- Verify the wire is stripped to the correct length and fully inserted into the terminal.
- Inspect the jaws for wear or damage; replace the tool if jaws are significantly worn.
- Ratcheting Mechanism Not Releasing:
- Ensure the handles are squeezed completely until the mechanism clicks and releases.
- Check for debris obstructing the ratchet mechanism; clean and lubricate if necessary.
- Difficulty Inserting Wire/Terminal:
- Confirm the correct die size is chosen.
- Ensure the terminal is properly aligned in the jaws before inserting the wire.
9. Warranty and Support
IWISS Tools products are manufactured to high-quality standards. For specific warranty information, please refer to the warranty card included with your product or visit the official IWISS Tools website. For technical support, troubleshooting assistance, or to inquire about replacement parts, please contact IWISS customer service through their official channels.
Ask a question about this manual
Ask about setup, troubleshooting, compatibility, parts, safety, or missing instructions. Manuals+ will review the question and use this page’s manual context to help answer it.