
1. Introduction
This manual provides essential information for the installation and maintenance of the CUB CADET 731-05083 Boot Kit. This kit is an Original Equipment Manufacturer (OEM) replacement part designed to protect the Constant Velocity (CV) joint of your Cub Cadet utility vehicle from dirt, debris, and moisture, ensuring its proper function and longevity.
2. Safety Information
Always prioritize safety when working with vehicle components. Failure to follow safety precautions can result in injury or damage to the vehicle.
- Wear appropriate personal protective equipment (PPE), including safety glasses and gloves, during installation.
- Ensure the vehicle is securely supported on a level surface using jack stands before beginning any work.
- Allow components to cool if the vehicle has been recently operated.
- Keep hands and clothing clear of moving parts.
- Dispose of old parts and waste materials responsibly.
WARNING: This product can expose you to chemicals which are known to the State of California to cause cancer and birth defects or other reproductive harm. For more information go to www.P65Warnings.ca.gov.
3. Package Contents
The CUB CADET 731-05083 Boot Kit typically includes the following components:
- 1 x CV Boot (Rubber)
- 2 x Clamps (Metal, for securing the boot)
- 1 x Grease Packet (for CV joint lubrication)

Image 1: Overview of the CUB CADET 731-05083 Boot Kit, showing the main rubber boot, two securing clamps, and a packet of grease.
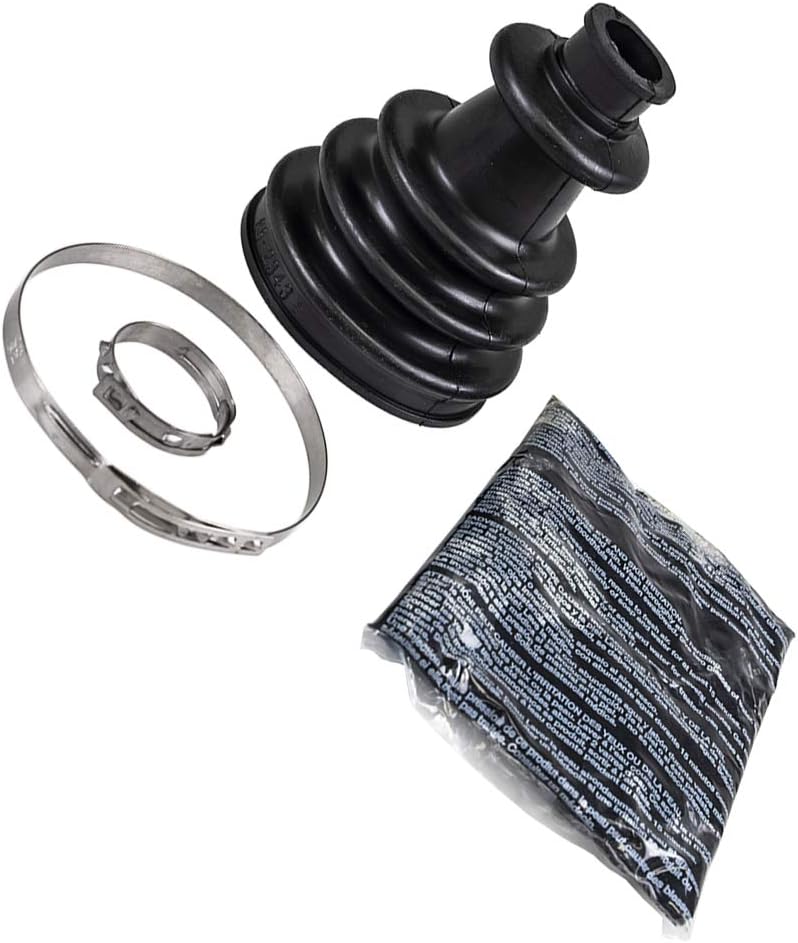
Image 2: Alternate perspective of the boot kit, providing a closer look at the boot's accordion design and the metal clamps.
4. Compatibility
This boot kit (Part Number 731-05083) is compatible with various Cub Cadet Volunteer utility vehicle models. Please refer to your original equipment owner's manual to verify exact compatibility for your specific vehicle before installation.
Known compatible models include, but are not limited to:
- Cub Cadet Volunteer 466 4X4
- Cub Cadet Volunteer 467 Diesel 4X4
- Cub Cadet Volunteer 46F 4X4
- Cub Cadet Volunteer 46G 4X4
- Cub Cadet Volunteer 46G Diesel 4X4
- Cub Cadet Volunteer 46G EFI 4X4
- Cub Cadet Volunteer 475 FIS 4X2
- Cub Cadet Volunteer 47G FIS 4X2
- Cub Cadet Volunteer 485 EFI 4X4
- Cub Cadet Volunteer 486 EFI 4X4
- Cub Cadet Volunteer 487 EFI 4X4
- Cub Cadet Volunteer 48G EFI 4X4
- Cub Cadet Volunteer 747 EFI 4x4
- Cub Cadet Volunteer Tracker 46E EFI 4X4
- Cub Cadet Volunteer WT 747 EFI
- Cub Cadet Volunteer WT CAB 747 EFI
- Cub Cadet 465 Volunteer Tracker
- Cub Cadet 465 EFI Volunteer Tracker
- Cub Cadet 465 Diesel Volunteer
- Cub Cadet 477 FIS 4X2
- Cub Cadet 476 FIS 4X2
- Cub Cadet 475 FIS Sport Edition 4X2
5. Installation Instructions
Replacing a CV boot requires mechanical aptitude and specific tools. If you are not comfortable performing this procedure, it is recommended to seek professional assistance.
- Prepare the Vehicle: Park the vehicle on a level surface, engage the parking brake, and block the wheels. Lift the vehicle using a jack and secure it with jack stands. Remove the wheel and tire assembly from the side requiring boot replacement.
- Access the CV Joint: Depending on your vehicle model, you may need to remove brake components, suspension links, or other parts to gain access to the CV axle and joint. Consult your vehicle's service manual for specific disassembly procedures.
- Remove Old Boot: Carefully cut and remove the old, damaged CV boot and its clamps. Be cautious not to damage the CV joint or axle shaft.
- Clean the Joint: Thoroughly clean the CV joint and axle shaft, removing all old grease and contaminants. Inspect the CV joint for any signs of wear or damage. If the joint is damaged, replacing the entire axle assembly may be necessary.
- Apply New Grease: Open the provided grease packet and apply the entire contents evenly into the CV joint. Ensure all bearings and races are adequately lubricated.
- Install New Boot: Slide the new CV boot onto the axle shaft and over the CV joint. Ensure it is seated correctly on both ends.
- Secure Clamps: Use a specialized CV boot clamp tool to properly crimp and secure the new clamps onto the boot, ensuring a tight, sealed fit. Improper clamping can lead to premature boot failure.
- Reassemble: Reinstall all removed components in reverse order of disassembly. Torque all fasteners to the manufacturer's specifications.
- Final Check: Lower the vehicle and test its operation. Listen for any unusual noises and visually inspect the newly installed boot for proper fitment.
6. Maintenance and Inspection
Regular inspection of your CV boots is crucial for preventing costly CV joint damage. It is recommended to inspect the boots during routine vehicle maintenance, such as oil changes or tire rotations.
- Visual Inspection: Look for any cracks, tears, punctures, or signs of grease leaking from the boot.
- Clamp Security: Ensure the clamps are still tight and securely holding the boot in place.
- Early Detection: Addressing a damaged boot promptly can prevent dirt and moisture from entering the CV joint, which can lead to premature wear and failure of the joint itself.
7. Specifications
| Attribute | Value |
|---|---|
| Part Number | 731-05083 |
| Manufacturer | CUB CADET |
| Product Dimensions | 5.2 x 4.5 x 4.75 inches |
| Item Weight | 9.6 ounces |
8. Warranty and Support
For information regarding warranty coverage for the CUB CADET 731-05083 Boot Kit, please refer to the warranty documentation provided with your original purchase or contact CUB CADET directly through their official website or customer service channels. Return policies typically allow for returns within 30 days of purchase, subject to seller terms.
For technical support or further inquiries, please contact CUB CADET customer service or visit their official support resources.