VINABTY RM-X211
Instruction Manual for Vinabty RM-X211 Replacement Remote Control
Model: RM-X211 | Brand: VINABTY
1. Introduction
This manual provides detailed instructions for the Vinabty RM-X211 Replacement Remote Control, designed to be compatible with various Sony Car Audio System models. This remote offers a direct replacement solution, requiring no complex programming or syncing for most compatible units. It provides essential functions for controlling your car stereo system.
Compatible Sony Car Audio System models include, but are not limited to: CDX-G1002U, CDX-G1003ER, CDX-G1003UR, CDX-G1050U, CDX-G1050UE, CDX-G1051U, CDX-G1053UR, DX-G2000UE, CDX-G2000UI, CDX-G2001UI, CDX-G2050UI, CDX-G2050UP, CDX-G3000UE, CDX-G3000UV, CDX-G3050UP, CDX-G3050UV, CDX-GT565UV, DSX-A35U, DSX-A40UI, CDX-GT710UV, CXS-5216FU, CXS-5269FU, CXS-6169FU, CXS-61FQU, CXS-GT5616F, DSX-A30, WX-GT80UI, CDX-GT470UE, CDX-GT472UE, CDX-GT472UM, CDX-GS500R, CDX-GT40U, CDX-GT40UW, CDX-GT45U, CDX-GT565UP, CDX-GT56UI, CDX-GT56UIW, CDX-GT57UP, CDX-GT610UG, CDX-GT610US, CDX-GT615UV, CDX-GT660UP, CDX-GT66UPW, WXG-T80UI.
2. Product Overview

Figure 1: Front view of the Vinabty RM-X211 remote control, showing all buttons and their labels.
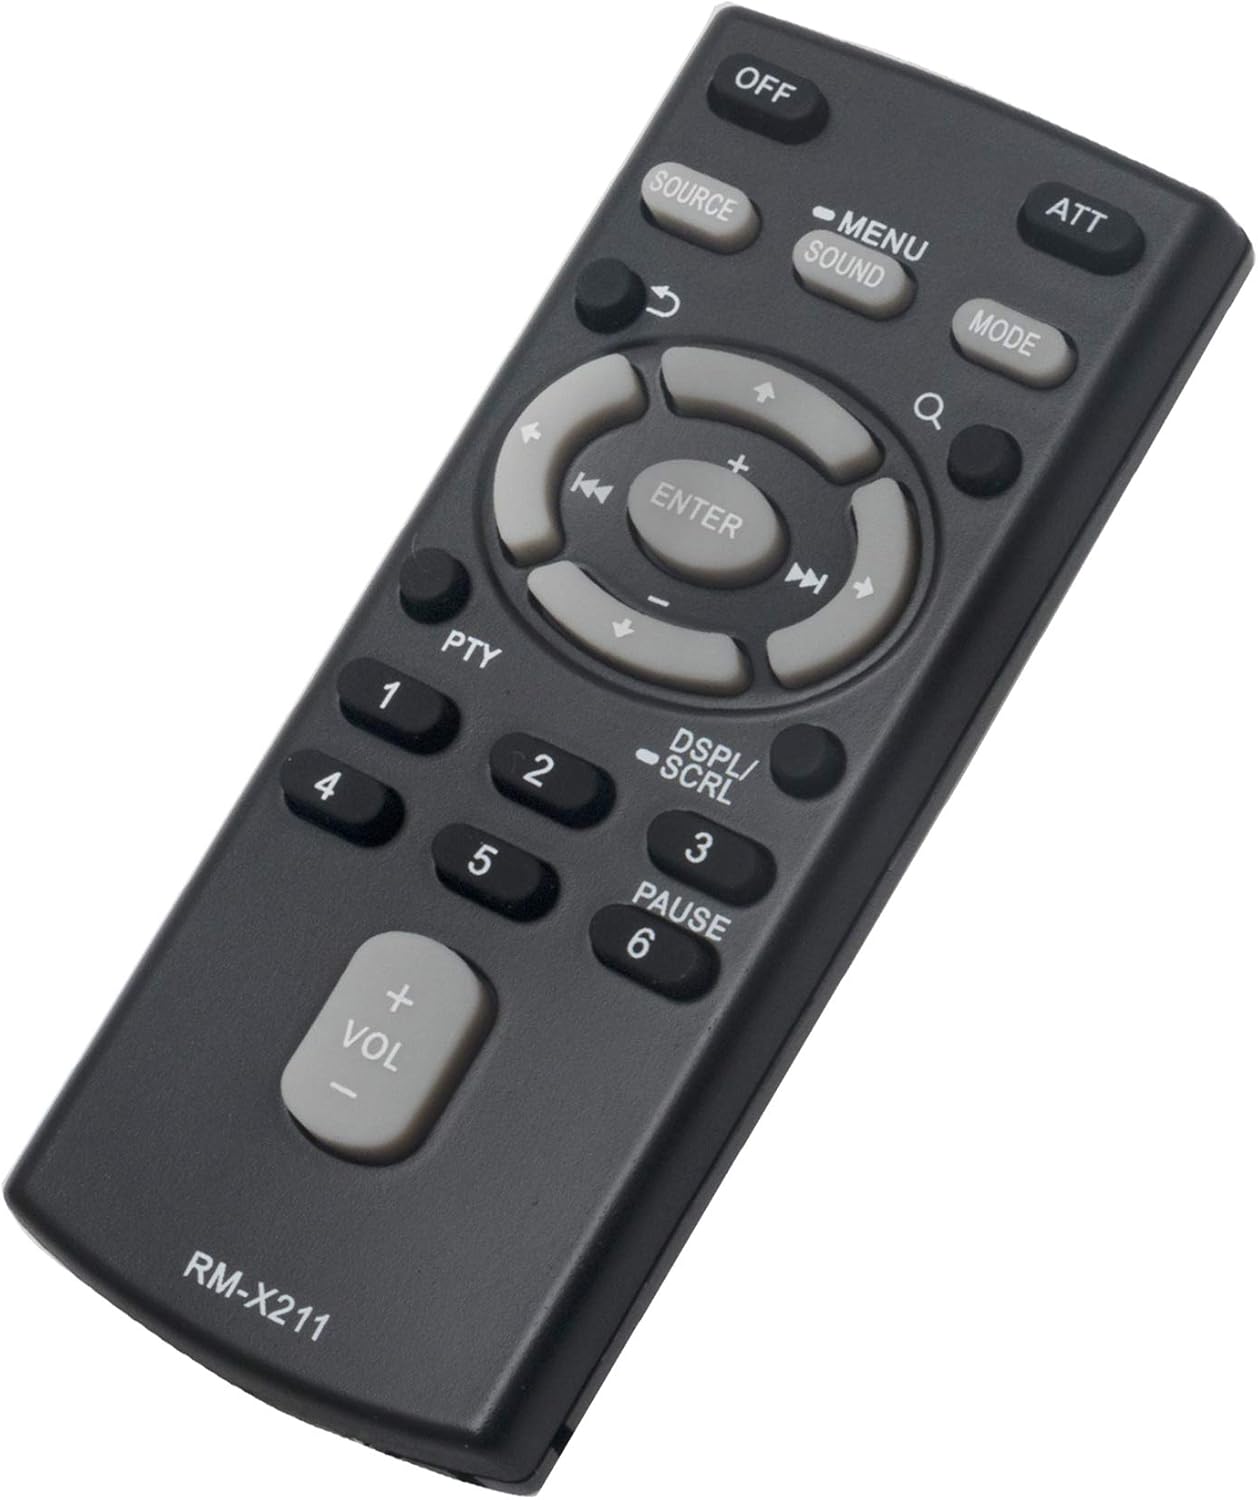
Figure 2: Angled view of the Vinabty RM-X211 remote control, highlighting its ergonomic design.
Button Functions:
- OFF: Powers off the car stereo unit.
- ATT (Attenuate): Mutes or significantly reduces the audio volume.
- SOURCE: Cycles through available audio sources (e.g., Radio, CD, USB, AUX).
- MENU/SOUND: Accesses the main menu or sound settings.
- MODE: Changes the operating mode of the stereo.
- Navigation Buttons (Up, Down, Left, Right): Used for menu navigation and track/station selection.
- ENTER: Confirms selections in menus.
- VOL (+/-): Adjusts the master volume level.
- PTY (Program Type): For radio functions, allows selection by program type.
- DSPL/SCRL (Display/Scroll): Changes display information or scrolls through text.
- Number Buttons (1-6): Used for direct station recall or CD track selection.
3. Setup
3.1 Battery Installation
The Vinabty RM-X211 remote control requires one (1) AAA battery for operation. Follow these steps to install the battery:
- Locate the battery compartment cover on the back of the remote control.
- Slide the cover downwards or in the direction indicated by an arrow to open it.
- Insert one AAA battery, ensuring the positive (+) and negative (-) terminals align correctly with the markings inside the compartment.
- Slide the battery compartment cover back into place until it clicks securely.
Note: The remote control is designed for immediate use upon battery installation. No programming or syncing is typically required for compatible Sony car stereo models.
4. Operating Instructions
To operate your car stereo system using the Vinabty RM-X211 remote control, ensure there is a clear line of sight between the remote's infrared emitter and the stereo's IR receiver. Point the remote directly at the stereo unit.
4.1 Basic Functions
- Power On/Off: Press the OFF button to turn the stereo off. To turn it on, you may need to use the stereo's power button or a specific source button on the remote, depending on the stereo model.
- Volume Control: Use the VOL + button to increase volume and VOL - to decrease volume.
- Mute/Attenuate: Press the ATT button to quickly mute the audio or reduce it to a low level. Press again to restore volume.
- Source Selection: Press the SOURCE button repeatedly to cycle through available audio inputs (e.g., FM, AM, CD, USB, Bluetooth, AUX).
4.2 Navigation and Menu Functions
- Menu Access: Press the MENU/SOUND button to enter the stereo's main menu or sound adjustment settings.
- Navigation: Use the directional arrow buttons (Up, Down, Left, Right) around the ENTER button to navigate through menu options or browse tracks/stations.
- Selection: Press the ENTER button to confirm a selection within a menu or to play a selected track.
- Display Information: Use the DSPL/SCRL button to change the information displayed on the stereo's screen or to scroll through long text.
4.3 Playback and Radio Functions
- Track Skip/Fast Forward/Rewind: Use the left/right arrow buttons (often labeled with skip/fast forward/rewind icons) to change tracks on CD/USB or to fast forward/rewind.
- Radio Presets: Use the number buttons (1-6) for direct access to stored radio station presets.
- Program Type (PTY): For compatible radio tuners, press PTY to search for radio stations by program type (e.g., News, Rock, Pop).
5. Maintenance
5.1 Cleaning
To maintain the remote control's appearance and functionality:
- Wipe the surface with a soft, dry cloth.
- For stubborn dirt, slightly dampen the cloth with water and a mild detergent, then wipe dry immediately.
- Do not use abrasive cleaners, alcohol, or benzene, as these can damage the remote's finish or internal components.
5.2 Battery Replacement
Replace the AAA battery when the remote's response becomes sluggish or stops working. Refer to Section 3.1 for battery installation instructions. Always dispose of used batteries responsibly according to local regulations.
5.3 Storage
When not in use for extended periods, it is recommended to remove the battery to prevent leakage and potential damage to the remote control.
6. Troubleshooting
| Problem | Possible Cause | Solution |
|---|---|---|
| Remote control does not work. |
|
|
| Some buttons do not respond. |
|
|
| Remote works intermittently. |
|
|
7. Specifications
| Feature | Detail |
|---|---|
| Model Number | RM-X211 |
| Brand | VINABTY |
| Product Dimensions | 4 x 2 x 1 inches |
| Item Weight | 1.3 ounces |
| Batteries Required | 1 AAA battery |
| Color | Black |
| Special Feature | Ergonomic |
| Compatible Devices | Sony Car Stereo Systems (various models) |
| Country of Origin | China |
8. Warranty and Support
Specific warranty information for this replacement remote control is not provided in the product details. For any issues or support inquiries, please contact the seller or retailer from whom you purchased the product. They can provide assistance regarding product functionality, returns, or replacements.
Related Documents - RM-X211
 |
Fiches Environnementales des Produits Sony Ce document fournit les caractéristiques environnementales et les informations sur les substances pour une large gamme de produits Sony, y compris des détails sur les métaux précieux et les terres rares, ainsi que sur les substances extrêmement préoccupantes. |
 |
Sony CDX-G1000U Series Service Manual - Specifications and Exploded Views Comprehensive service manual for the Sony CDX-G1000U series car audio players, detailing specifications, regional model variations, and exploded views of internal components for service and repair. |
 |
Blauberg DX Cooling Unit Installation and Operation Manual This document provides installation, operation, and maintenance guidelines for Blauberg DX Cooling Units (CDX series). It covers product designation, compatibility with other Blauberg units, technical dimensions, mounting procedures, condensate drainage systems, maintenance schedules, storage and transport regulations, and manufacturer warranty information. |
 |
BLAUBERG DX Cooler Installation Guide and Specifications Official installation instructions, technical specifications, compatibility charts, and warranty information for the BLAUBERG DX Cooler series. Covers models CDX 500x250-3 through CDX 1200x600-3. |
 |
Blauberg DX Cooler Installation Guide and Technical Specifications Comprehensive installation instructions, technical specifications, compatibility, maintenance, and warranty information for Blauberg DX Coolers. |
 |
CDX Tablet Transceiver User Manual - Go-Kart Track Safety System User manual for the CDX Tablet Transceiver, a device for transmitting speed commands and enhancing safety on go-kart tracks. Includes setup, operation, configuration, and technical specifications. |
Ask a question about this manual
Ask about setup, troubleshooting, compatibility, parts, safety, or missing instructions. Manuals+ will review the question and use this page’s manual context to help answer it.