Inter-Tech 88887203
Inter-Tech 88887203 Case IPC Storage 4U-4410 Instruction Manual
Model: 88887203
Introduction
This manual provides detailed instructions for the installation, operation, and maintenance of the Inter-Tech 88887203 Case IPC Storage 4U-4410. This 4U rack-mountable chassis is designed for building robust storage systems, offering extensive drive capacity and efficient cooling solutions. Please read this manual thoroughly before proceeding with any installation or operation.
Safety Information
- Always disconnect the power supply from the wall outlet before opening the chassis or performing any installation/maintenance.
- Handle components with care to avoid damage from electrostatic discharge (ESD). Use an anti-static wrist strap if available.
- Ensure proper ventilation around the chassis to prevent overheating.
- Do not operate the chassis in environments with excessive dust, humidity, or extreme temperatures.
- Refer to the manuals of other components (motherboard, PSU, drives) for their specific safety guidelines.
Product Overview
The Inter-Tech 88887203 Case IPC Storage 4U-4410 is a versatile 4U rack-mountable chassis engineered for high-capacity storage applications. It features a robust design and ample space for various components.
Key Features:
- Drive Bays: Up to ten 2.5" or 3.5" hot-swap hard drive bays, four internal 2.5" drive bays, and three external 5.25" drive bays.
- Cooling System: Three hot-swap 120mm fans located behind the drive brackets and two 80mm fans at the rear for optimal airflow.
- Motherboard Compatibility: Supports Mini ITX, µATX, ATX, eATX, SSI EEB motherboards.
- Front Panel Connectivity: Includes one USB 2.0 port.
- Form Factor: 4U rack-mountable.

Figure 1: Front view of the Inter-Tech 88887203 Case IPC Storage 4U-4410, showcasing the ten hot-swap drive bays and front panel controls.
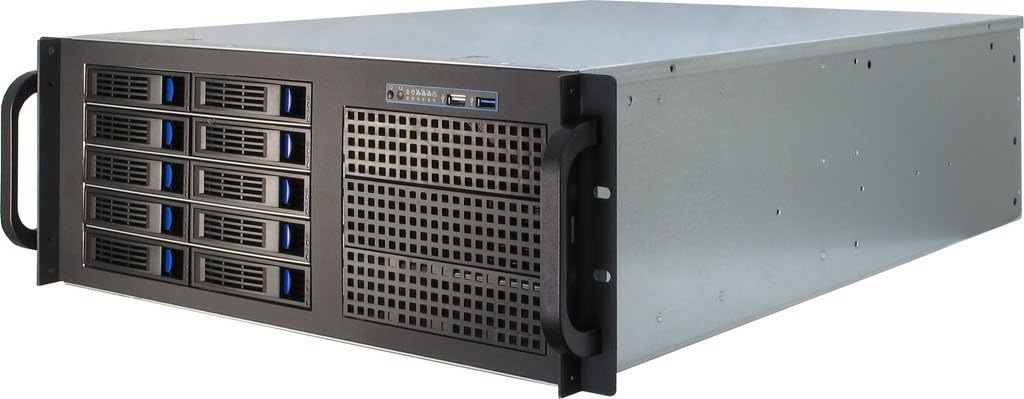
Figure 2: Angled front view of the chassis, highlighting its rack-mount handles and overall structure.
Setup and Installation
1. Unpacking and Inspection
- Carefully remove the chassis from its packaging.
- Inspect the chassis for any signs of damage during transit. Contact your vendor immediately if damage is found.
- Verify that all accessories, such as screws, cables, and adapter brackets, are present.
2. Removing the Top Cover
Locate and remove the screws securing the top cover of the chassis. Carefully slide the cover backward and lift it off to access the internal components.
3. Motherboard Installation
- Install the I/O shield into the rear panel opening.
- Align the motherboard with the standoffs inside the chassis. Ensure the screw holes on the motherboard match the standoffs.
- Secure the motherboard using the provided screws.
4. Power Supply Unit (PSU) Installation
This chassis does not include a power supply unit. Install your ATX power supply into the designated bay at the rear of the chassis. Secure it with screws. Adapter brackets are provided for specific PSU types if needed.
5. Drive Installation
5.1. Hot-Swap 2.5"/3.5" Drives
- Open the latch on the desired hot-swap drive bay.
- Slide the drive tray out of the bay.
- Mount your 2.5" or 3.5" drive onto the tray using the appropriate screws.
- Slide the populated tray back into the bay until it clicks securely into place.
- Connect the necessary Molex power cables to the backplane for the hot-swap bays. Ensure sufficient power connections for all drives.

Figure 3: Angled front view showing several hot-swap drive bays partially open, illustrating the easy access for drive installation and removal.
5.2. Internal 2.5" Drives
Locate the internal 2.5" drive mounting points, typically near the bottom or side of the chassis. Secure your 2.5" drives using screws.
5.3. External 5.25" Devices
Remove the front bezel cover for the desired 5.25" bay. Slide your optical drive or other 5.25" device into the bay from the front and secure it with screws or the provided rails.
6. Fan Configuration and Cooling
The chassis comes pre-installed with three 120mm hot-swap fans at the front and two 80mm fans at the rear. These fans are designed to provide efficient airflow for cooling your components, especially the hard drives. The front 120mm fans are daisy-chained and powered by a single Molex connector. Ensure all fan power connectors are properly connected to your motherboard or power supply.
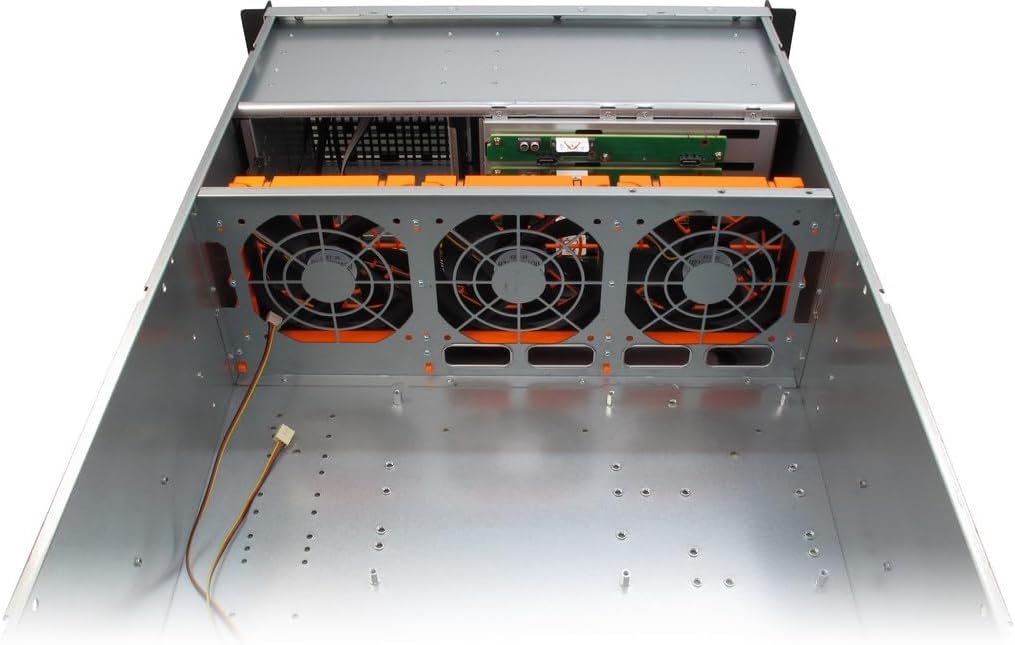
Figure 4: Internal top-down view, illustrating the placement of the three 120mm hot-swap fans at the front of the chassis, designed for optimal drive cooling.

Figure 5: Rear view of the chassis, showing the two 80mm fan mounts, I/O shield cutout, and expansion slots.

Figure 6: Internal side view of the chassis, showing the general layout, drive cages, and fan mounting areas.
7. Cable Management
Route all power and data cables neatly to ensure proper airflow and ease of future maintenance. Use cable ties if necessary.
8. Closing the Chassis
Once all components are installed and cables are managed, carefully slide the top cover back into place and secure it with the screws removed earlier.
Operating Instructions
1. Powering On
- Connect the power cable from your PSU to a wall outlet.
- Press the power button on the front panel of the chassis.
- Observe the power indicator lights and listen for system startup sounds.
2. Hot-Swap Drive Usage
The hot-swap drive bays allow for the removal and insertion of drives while the system is running, provided your operating system and HBA/RAID controller support hot-swapping. Always ensure the drive is safely ejected or unmounted from the operating system before physically removing it to prevent data loss.
Maintenance
1. Cleaning
- Regularly clean dust from the chassis interior and fan filters (if present) to maintain optimal airflow and cooling performance.
- Use compressed air to remove dust from fans and heatsinks.
- Wipe exterior surfaces with a soft, damp cloth. Avoid abrasive cleaners.
2. Fan Replacement
The front 120mm fans are hot-swappable. To replace a fan, ensure the system is powered off or the fan is safely disconnected from power if hot-swapping. Unclip the old fan and replace it with a new one, ensuring correct orientation for airflow.
3. Drive Replacement
For hot-swap drives, follow the hot-swap drive usage guidelines. For internal drives, power down the system, disconnect power, and then replace the drive.
Troubleshooting
Common Issues and Solutions:
- No Power:
- Check if the power cable is securely connected to both the PSU and the wall outlet.
- Ensure the PSU switch is in the 'ON' position.
- Verify all internal power connections (24-pin ATX, 8-pin CPU, etc.) are seated correctly.
- Excessive Fan Noise:
- Inspect fans for dust buildup and clean them.
- Ensure no cables are obstructing fan blades.
- Consider replacing noisy fans if cleaning does not resolve the issue.
- Drives Not Detected:
- Verify that all SATA data and power cables are securely connected to the drives and motherboard/backplane.
- Ensure the Molex power connectors for the hot-swap backplane are properly connected.
- Check BIOS/UEFI settings to ensure SATA ports are enabled and configured correctly (e.g., AHCI mode for hot-swap).
- Ensure your HBA card is properly installed and drivers are loaded in the operating system.
Specifications
| Feature | Detail |
|---|---|
| Brand | Inter-Tech |
| Model Name | Inter-Tech 88887203 Case IPC Storage 4U-4410, o.PSU |
| Model Number | 88887203 |
| Case Type | 4U Rack-mountable |
| Motherboard Compatibility | Mini ITX, µATX, ATX, eATX, SSI EEB |
| Hot-Swap Drive Bays | 10 x 2.5"/3.5" |
| Internal Drive Bays | 4 x 2.5" |
| External Drive Bays | 3 x 5.25" |
| Cooling Method | Air (3x 120mm front hot-swap fans, 2x 80mm rear fans) |
| Front Panel USB Ports | 1 x USB 2.0 |
| Item Weight | 14850 Grams |
| Manufacturer | A Plus Consulting GmbH |
Support and Warranty
For technical support, warranty information, or further assistance, please visit the official Inter-Tech website or contact your local dealer. Keep your purchase receipt for warranty claims.
Official Inter-Tech Website: www.inter-tech.de
Ask a question about this manual
Ask about setup, troubleshooting, compatibility, parts, safety, or missing instructions. Manuals+ will review the question and use this page’s manual context to help answer it.