
1. Introduction
This manual provides detailed instructions for the installation, configuration, and maintenance of your ASUS H110M-D motherboard. The ASUS H110M-D is designed to support 6th generation Intel Core i7/i5/i3/Pentium/Celeron processors with an LGA 1151 socket, featuring DDR4 memory support up to 32GB, integrated graphics, and Intel Turbo Boost Technology 2.0. It is a Micro ATX form factor motherboard, ideal for building compact yet capable systems.
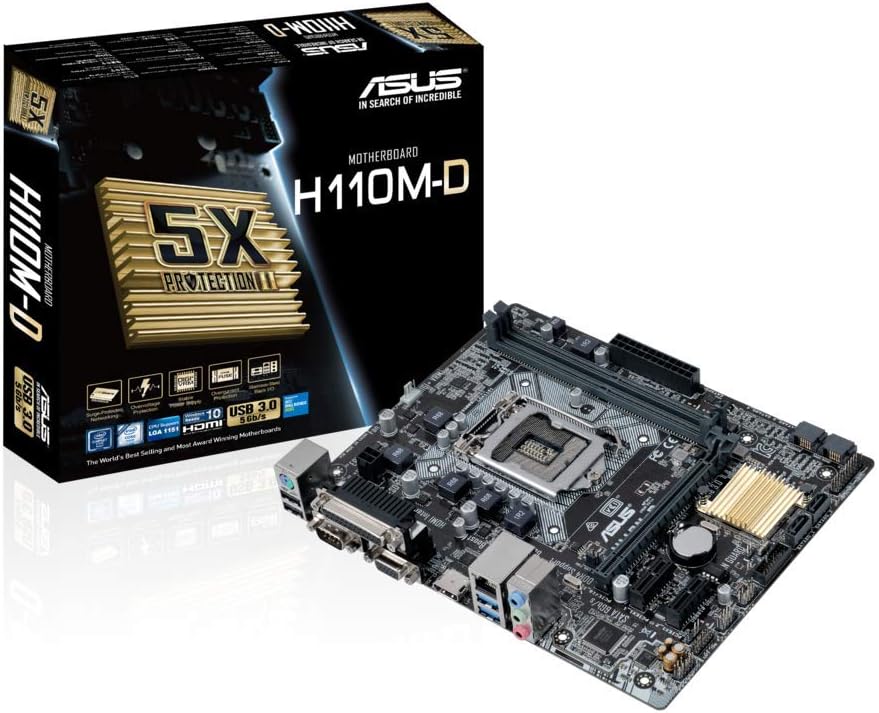
Figure 1.1: ASUS H110M-D Motherboard and Packaging.
This image displays the ASUS H110M-D motherboard alongside its retail packaging, highlighting its compact Micro ATX form factor and key features.
2. Safety Information
- Always disconnect the power cord from the wall outlet before touching any components.
- Wear an anti-static wrist strap or frequently touch a grounded object to prevent electrostatic discharge (ESD) damage.
- Ensure proper ventilation within your PC case to prevent overheating.
- Do not expose the motherboard to moisture or extreme temperatures.
3. Setup and Installation
3.1. Compatibility Check
IMPORTANT: Before proceeding with installation, verify the compatibility of your CPU and RAM with the ASUS H110M-D motherboard. Refer to the official ASUS website for the latest CPU and memory Qualified Vendor Lists (QVL). This motherboard supports Intel Socket 1151 for 6th generation Core i7/i5/i3/Pentium/Celeron processors and DDR4 memory up to 32GB.
3.2. Motherboard Layout

Figure 3.1: ASUS H110M-D Motherboard Top View.
This image provides a comprehensive top-down view of the motherboard, illustrating the placement of the CPU socket, RAM slots, PCIe slots, and various connectors.
3.3. Component Installation Steps
- Install the CPU: Carefully align the CPU with the socket (LGA 1151) and gently place it. Close the retention arm to secure the CPU.
- Install the CPU Cooler: Apply thermal paste (if not pre-applied) and install the CPU cooler according to its instructions. Connect the CPU fan cable to the CPU_FAN header.
- Install Memory Modules: Open the clips on the DDR4 DIMM slots. Align the memory modules with the key notch and press firmly until the clips snap into place. This motherboard has two DDR4 slots.
- Mount the Motherboard: Secure the motherboard into your PC case using the appropriate standoffs and screws.
- Connect Power Cables: Connect the 24-pin ATX power connector and the 8-pin (or 4-pin) CPU power connector from your power supply to the motherboard.
- Connect Storage Devices: Use SATA 6Gbps cables to connect your SSDs/HDDs to the SATA ports on the motherboard.
- Install Expansion Cards: Insert graphics cards or other PCIe expansion cards into the appropriate PCIe slots (e.g., PCIe 3.0 x16 for graphics).
- Connect Front Panel Cables: Connect the power button, reset button, USB ports, audio jacks, and LED indicators from your PC case to the corresponding headers on the motherboard. Refer to the motherboard manual's detailed diagrams for correct pin assignments.
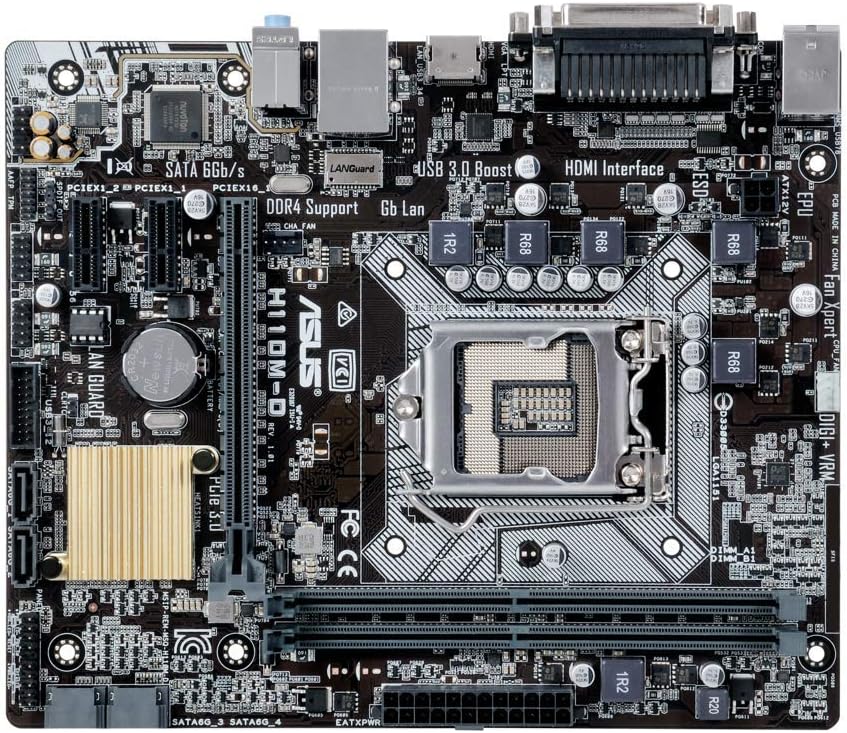
Figure 3.2: CPU Socket and Memory Slots.
This close-up view highlights the LGA 1151 CPU socket and the two DDR4 memory slots, crucial for proper component installation.
3.4. Rear I/O Panel Connections
Connect your peripherals to the rear I/O panel. This motherboard includes various ports such as USB 2.0, USB 3.0, HDMI, VGA, DVI, LAN, and audio jacks.
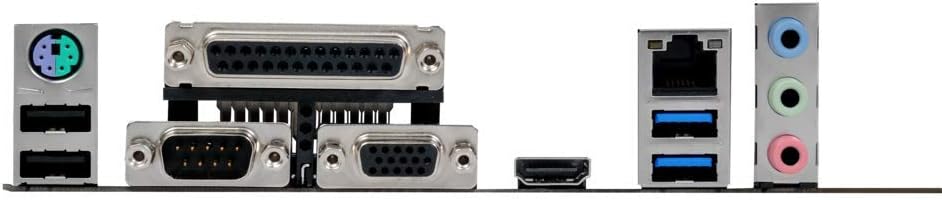
Figure 3.3: Rear I/O Panel.
This image shows the various input/output ports available on the rear of the motherboard, including USB, video outputs (VGA, HDMI), and audio jacks.
4. Operating Your System
4.1. BIOS Configuration
Upon first boot, or by pressing the DEL key during startup, you can enter the UEFI BIOS utility. The ASUS BIOS is designed to be intuitive, offering both a simple EZ Mode and an advanced mode for detailed configuration. Here you can set boot order, configure system settings, and monitor hardware.
4.2. Driver Installation
After installing your operating system (e.g., Windows 10), install the necessary drivers for the motherboard components. These drivers are typically provided on a support CD included with the motherboard or can be downloaded from the official ASUS support website. Key drivers include chipset, audio (Realtek), LAN, and graphics drivers (if using integrated graphics).
4.3. First Boot and OS Installation
Ensure all connections are secure. Power on your system. If all components are correctly installed, the system should boot to the BIOS or your operating system installation media. Follow the on-screen prompts to install your preferred operating system.
5. Maintenance
- Dust Removal: Regularly clean dust from inside your PC case and motherboard components using compressed air. Ensure the system is powered off and unplugged.
- BIOS Updates: Periodically check the ASUS support website for BIOS updates. Updating the BIOS can improve compatibility, stability, and performance. Follow ASUS's specific instructions for BIOS flashing carefully.
- Driver Updates: Keep your drivers updated to ensure optimal performance and compatibility with new software and hardware.
- Component Checks: Periodically inspect cables and connections to ensure they are secure and free from damage.
6. Troubleshooting
6.1. No Display/No Boot
- Verify all power cables (24-pin ATX, 8-pin CPU) are securely connected.
- Reseat RAM modules. Try booting with only one RAM stick.
- Ensure the graphics card (if dedicated) is properly seated and has power. If using integrated graphics, ensure the monitor is connected to the motherboard's video output.
- Clear CMOS (refer to motherboard manual for jumper location).
6.2. Audio Issues
- Ensure audio drivers are correctly installed.
- Check front panel audio cable connection to the motherboard header.
- Verify audio output settings in your operating system.
- Ensure audio is enabled in the BIOS.
6.3. Front Panel Connector Issues (e.g., Speaker)
- Double-check the front panel header connections. The manual provides detailed diagrams for correct pin assignments. Incorrect connection is a common cause for issues like non-functional speakers or power buttons.
7. Specifications
| Feature | Specification |
|---|---|
| Brand | ASUS |
| Model Name | H110M-D |
| CPU Socket | LGA 1151 |
| Compatible Processors | Intel Core i7/i5/i3/Pentium/Celeron (6th Gen) |
| Chipset | Intel H110 |
| Memory Technology | DDR4 SDRAM |
| Max Memory Supported | 32 GB |
| Memory Clock Speed | 2133 MHz (up to 667 MHz listed, but 2133 is standard for H110 DDR4) |
| Form Factor | Micro ATX |
| Dimensions | 23 x 3 x 28 cm |
| Weight | 812 g |
| USB Ports | USB 2.0, USB 3.0 |
| Video Interface | HDMI, VGA (D-Sub) |
| Storage Interface | SATA 6Gbps |
| Wireless Connectivity | 801.11ac (if applicable, though typically via add-in card) |
Note: Specifications are subject to change without notice. For the most up-to-date information, please visit the official ASUS website.
8. Warranty and Support
ASUS products are manufactured to the highest quality standards. This motherboard comes with a standard manufacturer's warranty. For detailed warranty terms and conditions, please refer to the warranty card included with your product or visit the official ASUS support website.
8.1. Technical Support
If you encounter any issues that cannot be resolved using this manual, please contact ASUS technical support. You can find contact information and additional resources on the official ASUS support website: www.asus.com/support/
8.2. Online Resources
- ASUS Download Center: For drivers, utilities, BIOS updates, and manuals.
- ASUS FAQ: Frequently asked questions and troubleshooting guides.


