1. Introduction and Overview
The Maverick ET-851 Dual Sensor Oven Meat Thermometer is designed to provide precise temperature monitoring for both your oven and the food you are cooking. Its intuitive touch screen interface and large blue backlit LCD display ensure clear visibility and ease of use in various lighting conditions. This thermometer helps you achieve perfectly cooked meals by simultaneously tracking two temperatures and alerting you when your target is reached.

Image 1.1: The Maverick ET-851 thermometer unit with its dual-sensor probe.
Key Features:
- Dual Temperature Monitoring: Simultaneously track oven and meat temperatures for optimal cooking.
- Touch Screen Interface: Easy and intuitive operation for setting temperatures and timers.
- Large Blue Backlit LCD Display: Provides clear visibility in any lighting condition.
- Temperature Range: Monitors temperatures from -25°F to +572°F (-10°C to +300°C).
- Timer Function: Features a 99-minute, 59-second timer.
- Alarm Alerts: Notifies you when target meat temperature or timer duration is reached.
- Durable Probe: High-quality, heat-resistant stainless steel probe with a 42-inch wire, rated to 572°F (300°C).
- Multiple Mounting Options: Includes a kickstand, magnet, hang hole, and wall mount for versatile placement.
- Batteries Included: Comes with 2 AAA batteries.
2. Setup and Installation
2.1 Battery Installation
- Locate the battery compartment on the back of the thermometer unit.
- Open the battery compartment cover.
- Insert 2 AAA batteries, ensuring correct polarity (+/-).
- Close the battery compartment cover securely.
2.2 Probe Connection
- Carefully uncoil the stainless steel probe wire.
- Insert the probe's jack firmly into the designated port on the side of the thermometer unit.
2.3 Placement Options
The ET-851 offers several ways to position the unit for optimal viewing:
- Kickstand: Pull out the integrated kickstand on the back of the unit to stand it upright on a flat surface.
- Magnet: Use the strong magnets on the back to attach the unit to a metal surface, such as an oven door or refrigerator.
- Hang Hole: Utilize the hang hole for suspending the unit from a hook.
- Wall Mount: The unit can also be mounted on a wall using appropriate hardware (not included) through the designated mounting points.
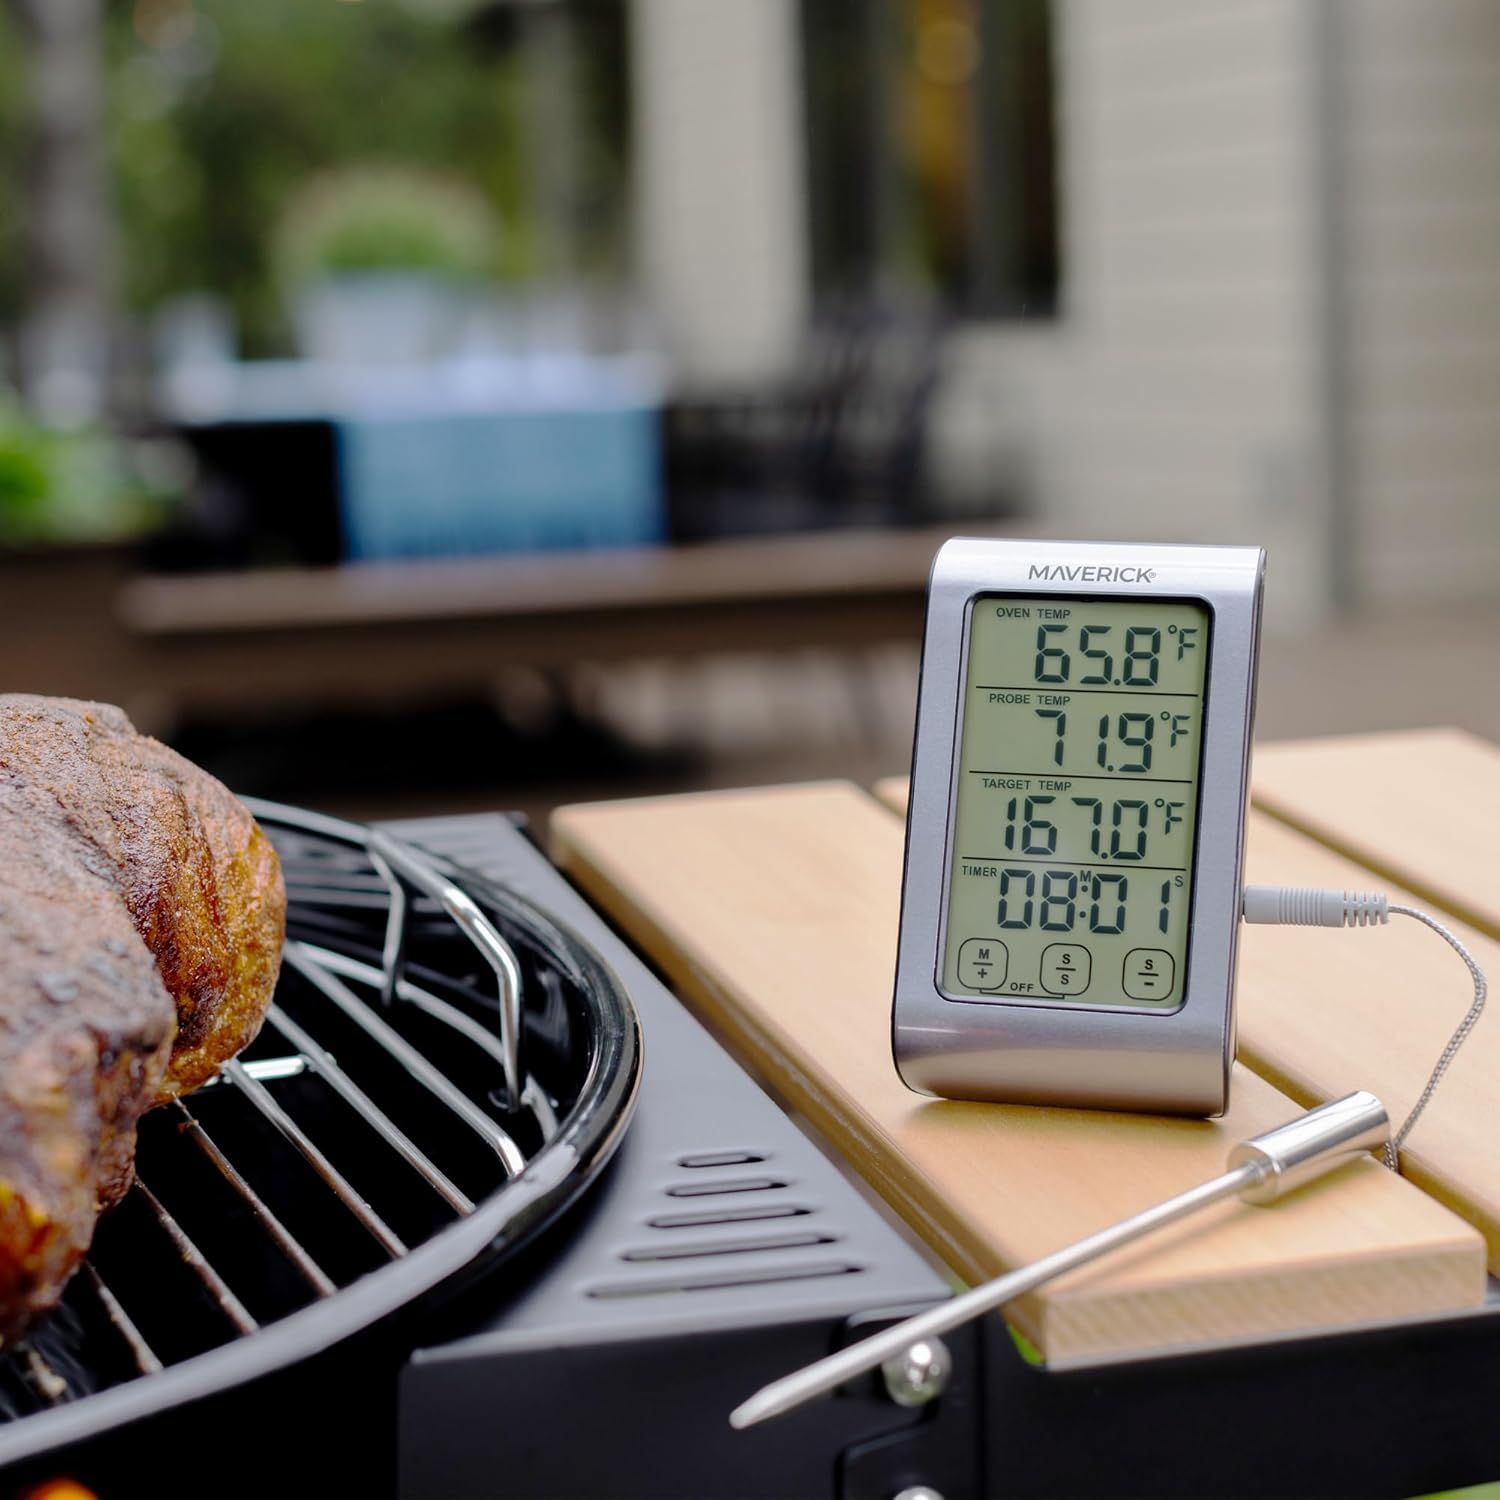
Image 2.1: The ET-851 thermometer positioned for outdoor grilling.
3. Operating Instructions
3.1 Power On/Off
Press the ON/OFF button located on the front of the unit to turn the thermometer on or off.
3.2 Selecting Temperature Units (°F/°C)
With the unit powered on, press the °F/°C button to toggle between Fahrenheit and Celsius temperature displays.
3.3 Setting Target Temperature
- On the touch screen, locate the 'TARGET TEMP' section.
- Use the M+ and S- buttons (or similar touch controls) to adjust the desired target temperature. The display will show the selected temperature.
- Once the target temperature is set, the thermometer will continuously monitor the probe temperature and sound an alarm when it reaches the set target.

Image 3.1: Detailed view of the ET-851's touch screen display.
3.4 Using the Timer
The ET-851 includes a 99-minute, 59-second countdown timer.
- Locate the 'TIMER' section on the display.
- Use the M+ (minutes) and S- (seconds) buttons to set the desired countdown time.
- Press the START/STOP button to begin or pause the timer.
- When the timer reaches zero, an alarm will sound. Press any button to silence the alarm.
3.5 Monitoring Temperatures
Insert the stainless steel probe into the thickest part of the meat, avoiding bone or gristle. Position the probe wire so it is not pinched by the oven door. The display will show:
- OVEN TEMP: The ambient temperature inside your oven or grill.
- PROBE TEMP: The current internal temperature of your food.
- TARGET TEMP: Your desired final food temperature.

Image 3.2: Proper insertion of the probe into food.
4. Maintenance
4.1 Cleaning Instructions
The thermometer unit and probe should be cleaned after each use. The manufacturer recommends Hand Wash Only for the probe. Do not immerse the main thermometer unit in water. Wipe the unit with a damp cloth.
- Probe: Wash the stainless steel probe with warm, soapy water. Rinse thoroughly and dry completely before storage. Avoid harsh abrasive cleaners.
- Unit: Wipe the thermometer unit with a soft, damp cloth. Do not use abrasive cleaners or submerge the unit in water.
4.2 Storage
Store the thermometer and probe in a clean, dry place when not in use. Ensure the probe wire is not kinked or damaged during storage.
5. Troubleshooting
- No Display: Check if batteries are installed correctly and are not depleted. Replace batteries if necessary.
- Inaccurate Readings: Ensure the probe is fully inserted into the food and not touching bone or gristle. Verify the probe connection to the main unit is secure.
- Probe Error Message: If an error message related to the probe appears, ensure the probe is correctly plugged in. If the issue persists, the probe may be damaged and require replacement.
- Alarm Not Sounding: Check if the volume is set appropriately or if the alarm function is enabled.
6. Specifications
| Model | ET-851 |
| Brand | MAVERICK |
| Temperature Range | -25°F to +572°F (-10°C to +300°C) |
| Display Type | LCD with Blue Backlight |
| Probe Material | Food Grade Stainless Steel |
| Probe Wire Length | 42 inches |
| Power Source | 2 AAA Batteries (included) |
| Response Time | 3 seconds |
| Product Care | Hand Wash Only (probe) |
| Item Weight | 6.4 ounces |
7. Warranty and Support
7.1 Warranty Information
The Maverick ET-851 Dual Sensor Oven Meat Thermometer comes with a LIMITED ONE YEAR WARRANTY. Maverick Industries will repair or replace the unit within 1 year from the date of purchase for defects in materials or workmanship.
7.2 Manufacturer Support
For technical assistance, troubleshooting, or warranty claims, please contact Maverick Industries, the manufacturer of this product. Refer to the packaging or the official Maverick website for the most current contact information.
8. Additional Information
8.1 Official Product Video
Video 8.1: A general overview video showcasing Maverick brand products, including grilling and cooking scenarios. This video provides a broader context of Maverick's offerings.