Introduction
This Mini-Manual is a compact, high-quality laminated guide designed to assist users of the Yaesu FT-817 and FT-818ND transceivers. It provides detailed, step-by-step instructions for setting up and operating these portable all-mode radios, serving as a quick reference that is smaller and more convenient than the factory instruction manual.
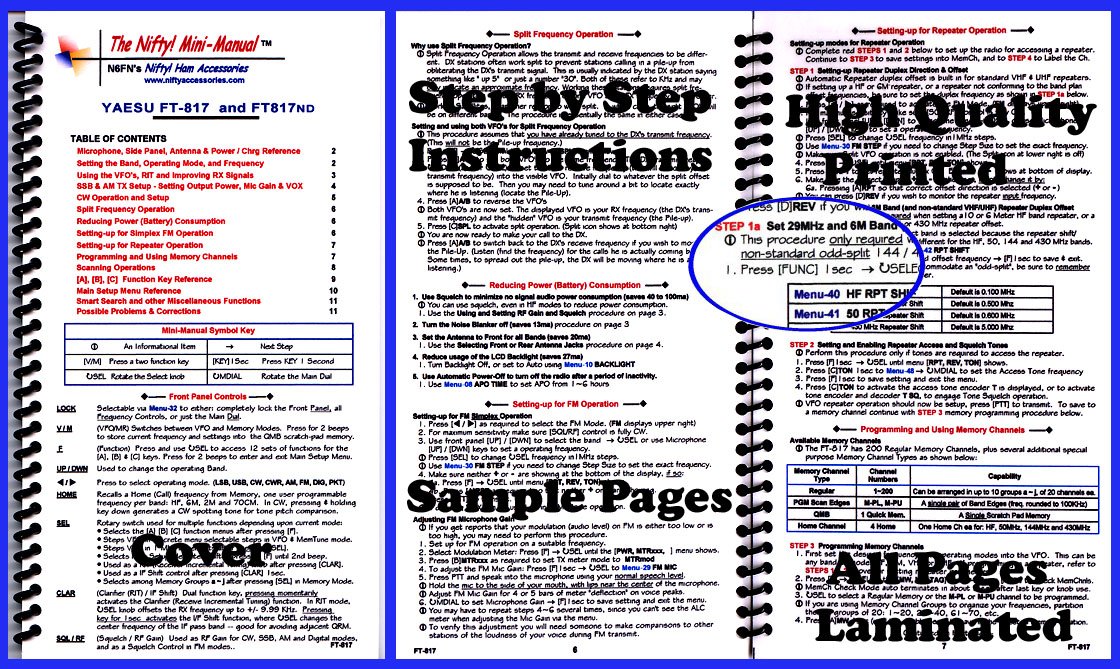
Image: The Nifty! Mini-Manual for Yaesu FT-817 and FT-818ND, a compact, laminated, spiral-bound guide designed for quick reference during radio operation.
The manual is organized for quick access to essential information, featuring clear descriptions for controls, setup menus, and various modes of operation. Its durable, water-resistant lamination makes it suitable for field use and GoKits.
General Information
Mini-Manual Symbol Key
| Symbol | Description | Action |
|---|---|---|
| Φ | An Informational Item | Next Step |
| [V/M] | Press a two function key | [KEY] 1 Sec: Press KEY 1 Second |
| USEL | Rotate the Select knob | OMDIAL: Rotate the Main Dial |
Front Panel Controls
- LOCK: Selectable via Menu-32 to either: completely lock the Front Panel, all Frequency Controls, or just the Main Dial.
- V/M (VFO/MR): Switches between VFO and Memory Modes. Press for 2 beeps to store current frequency and settings into the QMB scratch-pad memory.
- F (Function): Press and use USEL to access 12 sets of functions for the [A], [B] & [C] keys. Press for 2 beeps to enter and exit Main Setup Menu.
- UP/DWN: Used to change the operating Band.
- A: Press to select operating mode. (LSB, USB, CW, CWR, AM, FM, DIG, PKT)
- HOME: Recalls a Home (Call) frequency from Memory, one user programmable frequency per band: HF, 6M, 2M and 70CM. In CW, pressing & holding key down generates a CW spotting tone for tone pitch comparison.
- SEL: Rotary switch used for multiple functions depending upon current mode:
- Selects the [A] [B] [C] function menus.
- Steps through selectable steps in VFO & MemTune mode.
- Steps through selectable steps after pressing [CLAR].
- Used as a Shift control after pressing [CLAR] 1sec.
- Selects among Memory Groups a-J after pressing [SEL] in Memory Mode.
- CLAR (Clarifier (RIT) / IF Shift): Dual function key, pressing momentarily activates the Clarifier (Receive Incremental Tuning) function. In RIT mode, USEL knob offsets the RX frequency up to +/- 9.99 KHz. Pressing key for 1sec activates the IF Shift function, where OSEL changes the center frequency of the IF pass band – good for avoiding adjacent QRM.
- SQL/RF (Squelch / RF Gain): Used as RF Gain for CW, SSB, AM and Digital modes, and as a Squelch Control in FM modes.
Setup
Setting-up for Repeater Operation
To set up the radio for accessing a repeater, complete the following steps:
- STEP 1: Setting-up Repeater Duplex Direction & Offset
- Automatic Repeater duplex offset is built in for standard VHF & UHF repeaters.
- If setting up a HF or 6M repeater, or a repeater not conforming to the band plan, the duplex frequency is shown in STEP 1a below.
- Press [SEL] to change USEL frequency in 1MHz steps.
- Use Menu-30 FM STEP if you need to change Step Size to set the exact frequency.
- Make sure VFO operation is not enabled. (The Split icon at lower right is off)
- Press [D]REV if you wish to monitor the repeater input frequency.
- STEP 1a: Set 29MHz and 6M Band (and non-standard VHF/UHF) Repeater Duplex Offset
- This procedure is only required when setting a 10 or 6 Meter HF band repeater, or a 144 or 430 MHz repeater offset.
- The correct band is selected because the repeater shift/offset is different for the HF, 50, 144 and 430 MHz bands.
- Press [FUNC] 1 sec → USEL to accommodate an "odd-split"; be sure to remember the offset frequency.
Menu Description Default Menu-40 HF RPT Shift 0.100 MHz 0.500 MHz Menu-41 50 RPT Shift 0.600 MHz 30 MHz Repeater Shift 5.000 MHz - STEP 2: Setting and Enabling Repeater Access and Squelch Tones
- Perform this procedure only if tones are required to access the repeater.
- Press [F] 1sec → USEL until menu [RPT, REV, TON] shows.
- Press [C]TON 1sec to Menu-48 UMDIAL to set the Access Tone frequency.
- Press [F] 1sec to save setting and exit the menu.
- Press [C]TON to activate the access tone encoder T is displayed, or to activate tone encoder and decoder T8Q, to engage Tone Squelch operation.
- VFO repeater operation should now be setup, press [PTT] to transmit. To save to a memory channel continue with STEP 3 memory programming procedure below.
Setting-up for FM Simplex Operation
- Press [4] as required to select the FM Mode. (FM displays upper right)
- For maximum sensitivity make sure [SOUR] control is fully ON.
- Use front panel [UP] / [DWN] to select the band → USEL or use Microphone [UP] / [DWN] keys to set an operating frequency.
- Press [SEL] to change USEL frequency in 1MHz steps.
- Use Menu-30 FM STEP if you need to change Step Size to set the exact frequency.
- Make sure there are 0 or + showing at the bottom of the display.
- Press [F] → USEL until menu [RPT, REV, TON] shows.
Operating Instructions
Split Frequency Operation
Split Frequency Operation allows the transmit and receive frequencies to be different. DX stations often work split to prevent stations calling in a pile-up from obliterating the DX's transmit signal. This is usually indicated by the DX station saying something like "up 5" or just a number "30". Both of these refer to KHz and may indicate an approximate frequency. Working the split frequency is shown below.
Setting and using both VFO's for Split Frequency Operation
This procedure assumes that you have already tuned to the DX's transmit frequency (This will not be the Pile-up frequency.)
- Tune the transmit frequency into the visible VFO. Initially dial to whatever the split offset is supposed to be. Then you may need to tune around a bit to locate exactly where he is listening (locate the Pile-Up).
- Press [A]A/B to reverse the VFO's.
- Both VFO's are now set. The displayed VFO is your RX frequency (the DX's transmit frequency) and the "hidden" VFO is your transmit frequency (the Pile-up).
- Press [C]SPL to activate split operation. (Split icon shows at bottom right)
- You are now ready to make your call to the DX.
- Press [A]A/B to switch back to the DX's receive frequency if you wish to monitor the Pile-Up. (Listen (find the frequency) for the calls he is actually coming back. Sometimes, to spread out the pile-up, the DX will be moving where he is listening.)
Reducing Power (Battery) Consumption
- Use Squelch to minimize no signal audio power consumption (saves 40 to 100ma) You can use squelch, even in HF modes to reduce power consumption.
- Use the Using and Setting RF Gain and Squelch procedure on page 3.
- Turn the Noise Blanker off (saves 13ma) procedure on page 3.
- Set the Antenna to Front for all Bands (saves 20ma) Use the Selecting Front or Rear Antenna Jacks procedure on page 4.
- Reduce usage of the LCD Backlight (saves 27ma) Turn Backlight Off, set to Auto using Menu-10 BACKLIGHT.
- Use Automatic Power-Off to turn off the radio after a period of inactivity. Use Menu 08 APO TIME to set APO from 1~6 hours.
Adjusting FM Microphone Gain
If you get reports that your modulation (audio level) on FM is either too low or too high, you may need to perform this procedure.
- Set up for FM operation on a suitable frequency.
- Select Modulation Meter: Press [F] → USEL until the [PWR, MTRXX,] menu shows.
- Select Modulation Meter: Press [F] to set TX meter mode to MTRmod.
- To adjust the PM Mic Gain: Press [F] 1sec → USEL to Menu-29 FM MIC.
- Press PTT and speak into the microphone using your normal speech level.
- Hold the mic to the side of your mouth, with lips near the center of the microphone.
- Adjust PM Mic Gain for 4 or 5 bars of meter "deflection" on voice peaks.
- UMDIAL to set Microphone Gain [F] 1sec to save setting and exit the menu.
- You may have to repeat steps 4-6 several times, since you can't use the ALC meter when adjusting the Mic Gain via the menu.
- To verify this adjustment you will need someone to make comparisons to other stations of the loudness of your voice during FM transmit.
Programming and Using Memory Channels
The FT-817 has 200 Regular Memory Channels, plus several additional special purpose Memory Channel Types as shown below:
| Memory Channel Type | Channel Numbers | Capability |
|---|---|---|
| Regular | 1-200 | Can be arranged in up to 10 groups a-J, of 20 channels each. |
| PGM Scan Edges | M-PL, M-PU | A single pair of Band Edges (freq. rounded to 100KHz) |
| QMB | 1 Quick Mem. | A Single Scratch Pad Memory |
| Home Channel | 4 Home | One Home Ch each for: HF, 50MHz, 144MHz and 430MHz |
STEP 3: Programming Memory Channels
- First set desired operating modes into the VFO. This can be done by checking MemChnis.
- MemCh Mode auto terminates after last key or knob use.
- USEL to select a Regular Memory or the M-PL or M-PU channel to be programmed.
- If you are using Memory Channel Groups to organize your frequencies, partition the groups of 20: 1-20, 21-40, 61-70, etc.
Maintenance
Proper maintenance ensures the longevity and optimal performance of your Yaesu FT-817ND or FT-818ND transceiver. This mini-manual provides guidance on aspects such as reducing power consumption, which indirectly contributes to battery health and overall device care.
- Battery Conservation: Utilize features like squelch to minimize audio power consumption and turn off the LCD backlight when not needed to extend battery life.
- Automatic Power-Off (APO): Configure the APO function (Menu 08 APO TIME) to automatically power off the radio after a period of inactivity, preventing unnecessary battery drain.
- General Care: As this manual is laminated for durability and water resistance, it is designed to withstand typical field conditions. Keep the radio and manual clean and dry to prevent damage.
Troubleshooting
This mini-manual includes a section dedicated to "Possible Problems & Corrections" to help users diagnose and resolve common issues encountered during the operation of their Yaesu FT-817ND or FT-818ND transceivers. Refer to the relevant pages within the physical manual for specific solutions.
For issues not covered, or for more complex technical problems, it is recommended to consult the full factory instruction manual provided with your Yaesu transceiver or contact Yaesu support directly.
Specifications
This Nifty! Mini-Manual is specifically designed to provide operational instructions for the Yaesu FT-817ND and FT-818ND portable all-mode transceivers. While the manual itself does not list the technical specifications of the radios, it details how to access and utilize the various features and modes that define the capabilities of these transceivers, including:
- Frequency range and band settings.
- Operating modes (LSB, USB, CW, CWR, AM, FM, DIG, PKT).
- Output power adjustments.
- Memory channel capacity and programming.
- Repeater operation parameters.
For a complete list of technical specifications, such as power output, frequency stability, receiver sensitivity, and physical dimensions, please refer to the official Yaesu FT-817ND or FT-818ND factory instruction manual.
Warranty and Support
This Mini-Manual is a third-party accessory produced by Nifty! Accessories, designed to supplement the official Yaesu transceiver documentation. It is not a product of Yaesu Musen Co., Ltd.
For support or inquiries regarding the Mini-Manual itself, including its content, durability, or any manufacturing defects, please contact Nifty! Accessories directly:
- Website: www.niftyaccessories.com
For warranty claims, technical support, or service related to your Yaesu FT-817ND or FT-818ND transceiver, please refer to the official Yaesu documentation or contact Yaesu customer service channels.