Introduction
This manual provides comprehensive instructions for the Faber-Castell GRIP 2001 Quick-Setting Compass. Designed for precision and ease of use, this compass is suitable for school, technical drawing, and general drafting tasks. Please read this manual carefully to ensure proper operation and longevity of your compass.
Safety Instructions
- Keep out of reach of small children due to sharp points.
- Handle the compass with care to avoid injury from the needle point.
- Do not apply excessive force when adjusting or using the compass.
- Store the compass in its protective case when not in use.
Package Contents
Your Faber-Castell GRIP 2001 Quick-Setting Compass package includes:
- 1 x Faber-Castell GRIP 2001 Quick-Setting Compass
- 2 x Packs of Replacement Leads (6 leads per pack)
- Protective Caps for needle and lead

Figure 1: The Faber-Castell GRIP 2001 Quick-Setting Compass, shown with its included lead refills and protective caps.
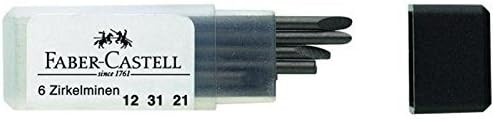
Figure 2: Close-up view of the Faber-Castell replacement lead packs. Each pack contains 6 leads.
Setup
- Unpacking: Carefully remove the compass and accessories from the packaging.
- Lead Installation:
- Locate the lead holder arm of the compass.
- Loosen the small screw or clamp at the end of the lead holder.
- Insert a lead from one of the provided packs into the holder, ensuring it extends sufficiently for drawing.
- Tighten the screw or clamp to secure the lead firmly.
- Needle Protection: Remove the protective cap from the needle point before use. Replace it after use for safety.

Figure 3: The Faber-Castell GRIP 2001 Quick-Setting Compass as it appears in its retail packaging.
Operation
- Setting the Radius:
- Place the compass needle at the desired center point on your drawing surface.
- Use the quick-setting mechanism (often a geared wheel or sliding adjustment) to open or close the compass arms to the desired radius. The robust gear guidance ensures precise and smooth adjustment.
- Ensure both arms are securely clamped once the desired radius is set.
- Drawing a Circle:
- Hold the compass firmly by the head.
- Apply gentle, consistent pressure to the needle point to secure it.
- Rotate the compass smoothly, allowing the lead to draw the circle. Maintain consistent pressure and angle for an even line.
- Maximum Diameter: This compass can draw circles up to 390 mm in diameter.
Maintenance
- Cleaning: Wipe the compass with a soft, dry cloth after each use to remove lead dust or smudges.
- Lead Replacement: When the lead wears down, replace it with a new one from the provided packs. Follow the lead installation steps in the "Setup" section.
- Storage: Always store the compass in its original case or a protective pouch to prevent damage to the needle and lead, and to keep it clean.
- Avoid Moisture: Keep the compass away from moisture and extreme temperatures.
Troubleshooting
Problem: Uneven or broken lines
Solution:
- Ensure the lead is securely clamped and not loose.
- Check if the lead is sharp enough; sharpen or replace if dull.
- Apply consistent pressure and rotate the compass smoothly.
- Verify the needle point is firmly anchored.
Problem: Compass arms slip
Solution:
- Ensure the quick-setting mechanism is fully engaged and tightened.
- Avoid applying excessive sideways pressure during rotation.
Specifications
| Feature | Specification |
|---|---|
| Brand | Faber-Castell |
| Model Number | GRIP 2001 |
| Color | Silver |
| Product Dimensions (L x W x H) | 21 x 8 x 1.8 cm |
| Item Weight | 45.4 g |
| Max. Circle Diameter | 390 mm |
| Lead Type | Standard compass leads |
Warranty and Support
For warranty information or technical support, please refer to the official Faber-Castell website or contact their customer service department. Keep your purchase receipt as proof of purchase.
Recycling and Disposal
Please dispose of the product and its packaging responsibly, in accordance with local environmental regulations.