1. Introduction
This manual provides comprehensive instructions for the installation, operation, and maintenance of your Xprite Blue LED Truck Bed Light Kit (Model DL-001-L3-B). This kit is designed to provide bright, durable, and versatile lighting for various vehicle applications, including truck beds, footwells, running boards, and under-car lighting.
2. Safety Information
- Always disconnect the vehicle's battery before beginning any electrical installation to prevent electrical shock or damage.
- Ensure all wiring connections are secure and properly insulated to prevent short circuits.
- Verify the power source is 12V DC. Connecting to an incorrect voltage may damage the lights.
- Avoid direct eye exposure to the LED lights when illuminated.
- If you are unsure about any part of the installation process, consult a qualified automotive technician.
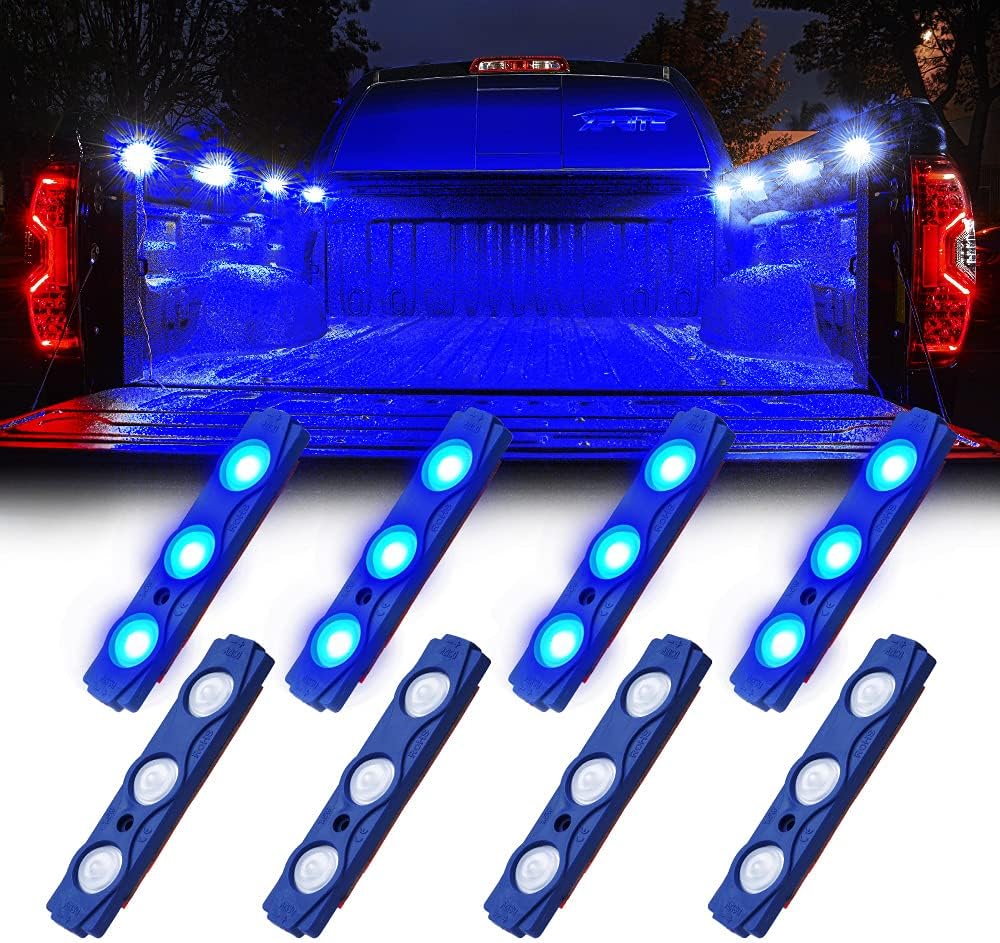
3. Package Contents
The Xprite Blue LED Truck Bed Light Kit includes the following components:
- 8 x LED Light Pods (3 LEDs per pod)
- 2 x Strands of Light Pods (4 pods per strand)
- 1 x On/Off Switch
- Mounting Hardware (3M adhesive tape, screws)
- Wiring (21 feet of power wire per strand, 2 feet of wire between each pod)

4. Specifications
| Brand | Xprite |
| Model Number | DL-001-L3-B |
| Color | Blue |
| Voltage | 12V DC |
| LED Type | 2835 SMD |
| LEDs per Pod | 3 |
| Total Pods | 8 |
| Power per LED | 0.5W |
| Rated Power | 1.5W (per pod) |
| Waterproof Rating | IP67 |
| Material | Polycarbonate (PC) |
| Wire Length (between pods) | 2 feet |
| Power Wire Length | 21 feet |
| Dimensions (per pod) | Approx. 3.4 x 0.75 x 0.25 inches (L x W x H) |
5. Setup & Installation
Follow these steps for proper installation of your LED light kit:
5.1. Preparation
- Choose Mounting Locations: Identify the desired locations for each of the 8 light pods. Common areas include truck bed rails, footwells, under the vehicle, or running boards. Ensure the chosen surfaces are flat and clean.
- Clean Surfaces: Thoroughly clean the mounting surfaces with rubbing alcohol to remove any dirt, grease, or debris. Allow the surface to dry completely. This is crucial for the adhesive to bond effectively.
- Plan Wiring Route: Determine the path for the wiring harnesses to reach your 12V power source and the on/off switch. Ensure wiring avoids moving parts, sharp edges, and excessive heat.
5.2. Mounting the Light Pods
- Apply Adhesive: Each light pod comes with pre-applied 3M adhesive tape. Peel off the protective backing from the adhesive.
- Position and Press: Carefully position each light pod onto the cleaned surface. Press firmly for at least 30 seconds to ensure a strong bond.
- Secure with Screws (Optional but Recommended): For enhanced security, especially in high-vibration or exposed areas, use the provided screws to further fasten the pods. Drill small pilot holes if necessary before inserting the screws.

5.3. Wiring the System
- Connect Pod Strands: The kit includes two strands of 4 pods each. Connect these strands to the main power wire using the provided connectors. Ensure connections are tight.
- Install On/Off Switch: Mount the on/off switch in a convenient and accessible location within your vehicle.
- Connect to Power: Connect the main power wire (typically red for positive, black for negative) to a 12V DC power source. The red wire should connect to the positive terminal of your battery or a fused accessory circuit, and the black wire to a ground point on the vehicle chassis or the negative battery terminal. It is recommended to use an inline fuse (not included) for protection.
- Test Functionality: Once all connections are made, turn on the switch to test the lights. If they do not illuminate, recheck all connections and the power source.
6. Operating Instructions
To operate your Xprite Blue LED Truck Bed Light Kit, simply use the installed on/off switch. Flip the switch to the "ON" position to illuminate the LED pods and to the "OFF" position to turn them off.
7. Maintenance
- Cleaning: Periodically clean the LED pods with a soft, damp cloth to remove dirt and grime. Avoid using abrasive cleaners or solvents.
- Inspection: Regularly inspect the wiring and connections for any signs of wear, damage, or corrosion. Ensure all mounting points remain secure.
- Waterproof Rating: The lights are IP67 rated, meaning they are protected against dust and temporary immersion in water. However, avoid high-pressure washing directly on the pods or connections.
8. Troubleshooting
| Problem | Possible Cause | Solution |
|---|---|---|
| Lights do not turn on. | No power, loose connection, faulty switch, blown fuse. | Check power source (12V), ensure all wires are securely connected, test the on/off switch, check for a blown fuse in the circuit. |
| Lights flicker or are dim. | Insufficient power, loose connection, damaged wiring. | Verify stable 12V power supply, tighten all connections, inspect wiring for damage and replace if necessary. |
| Some pods are not working. | Damaged pod, loose connection to specific pod. | Check connections to the non-working pods. If a single pod is damaged, it may need replacement. |
9. Warranty & Support
For warranty information or technical support, please refer to the official Xprite website or contact their customer service directly. Keep your purchase receipt as proof of purchase.
Visit the Xprite Store for more products and information.


